
[ YouTuber : kimimaro ]Tried Editing Video Using “DaVinci Resolve × Orbital2”!
- This Creator
- Editing with DaVinci Resolve × Orbital2
- In Closing
Table of Contents

Lifestyle YouTuber.
Gained 60,000 subscribers within one year of launching his channel (approx. 80,000 as of July 30, 2020).
He mainly uploads Vlogs, life hacks, and gadget reviews.
Twitter:kimimaro
YouTube:kimimaro
Instagram:kimimaro0802
note:kimimaro0802
Here’s how I edited video in DaVinci Resolve using Orbital2.
First, let me explain the usual flow of cut editing.
When previewing a video, there are often unnecessary silent sections. I want to delete these.
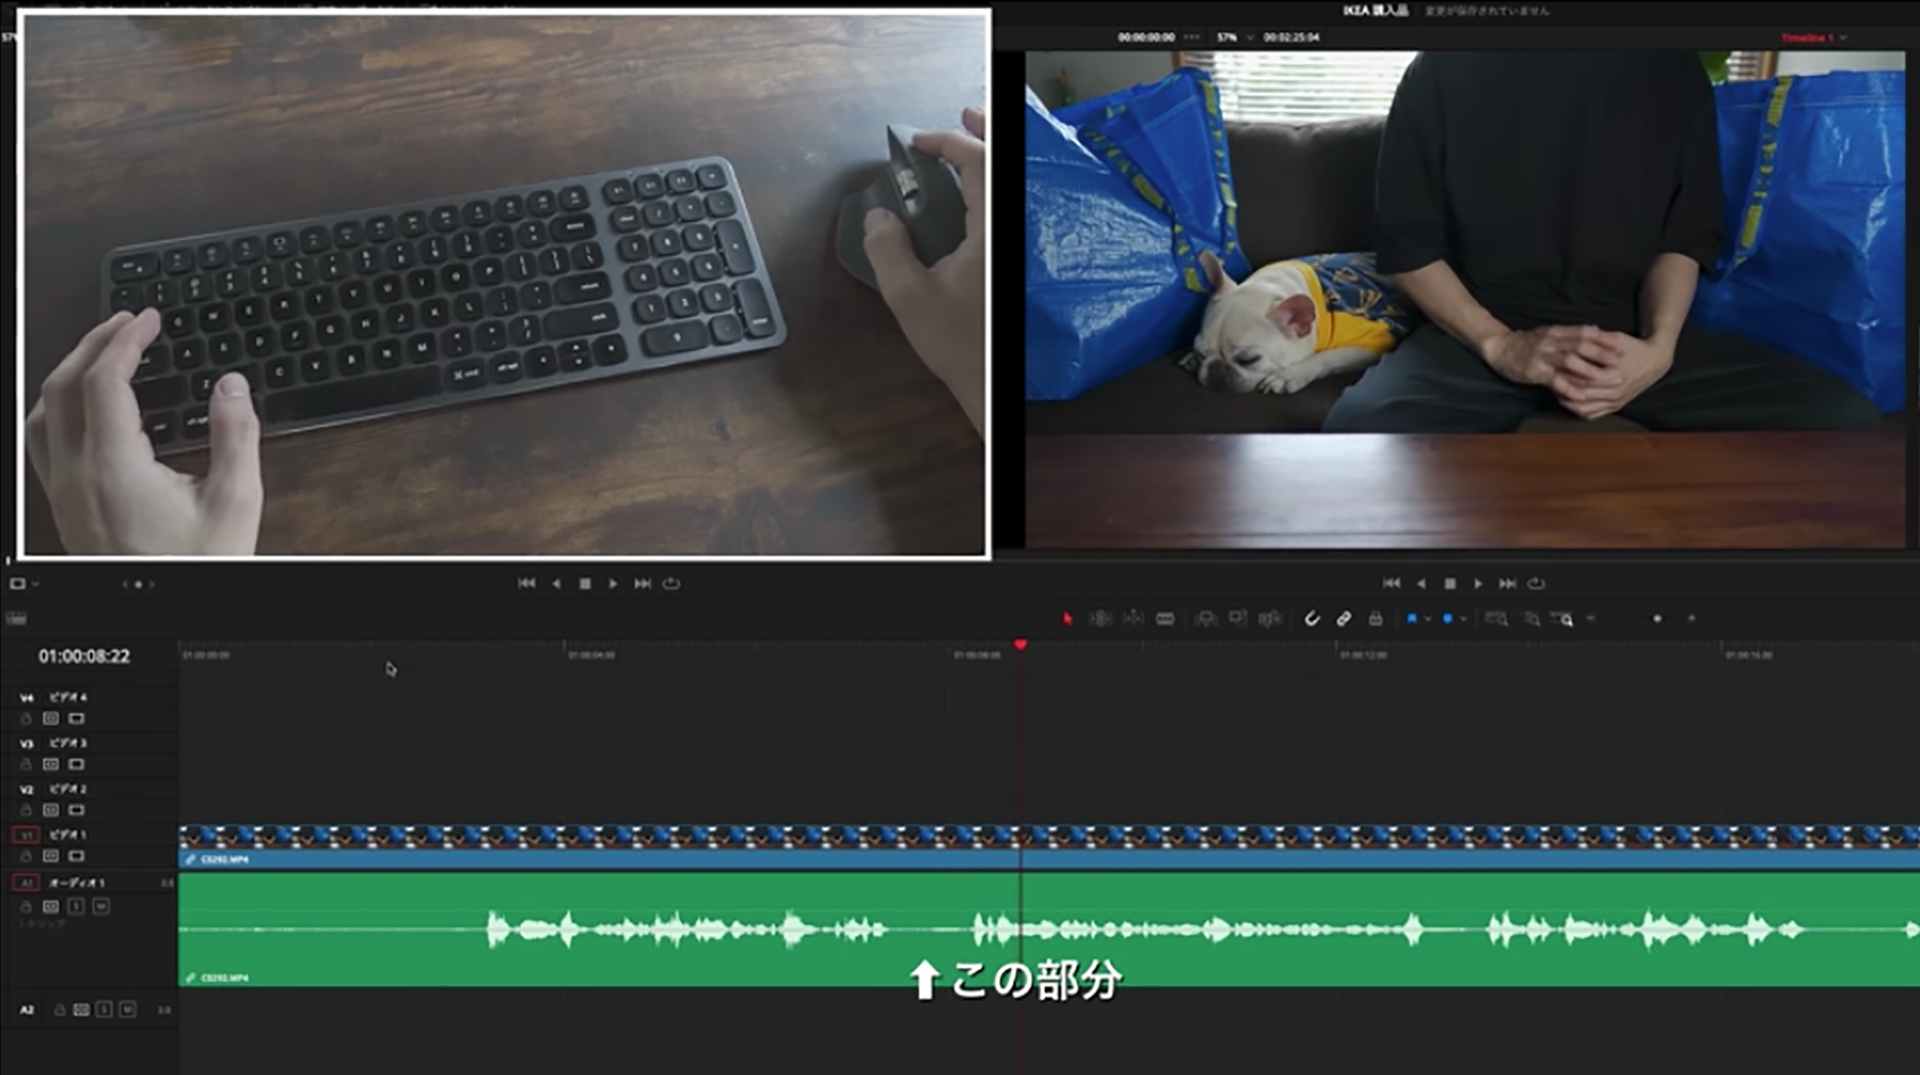
Normally, for cut editing, I place the playhead at the beginning of the silent part and cut with the blade. Next, I move the playhead to where the silence ends and cut again. Then I select the unwanted section and press Delete.
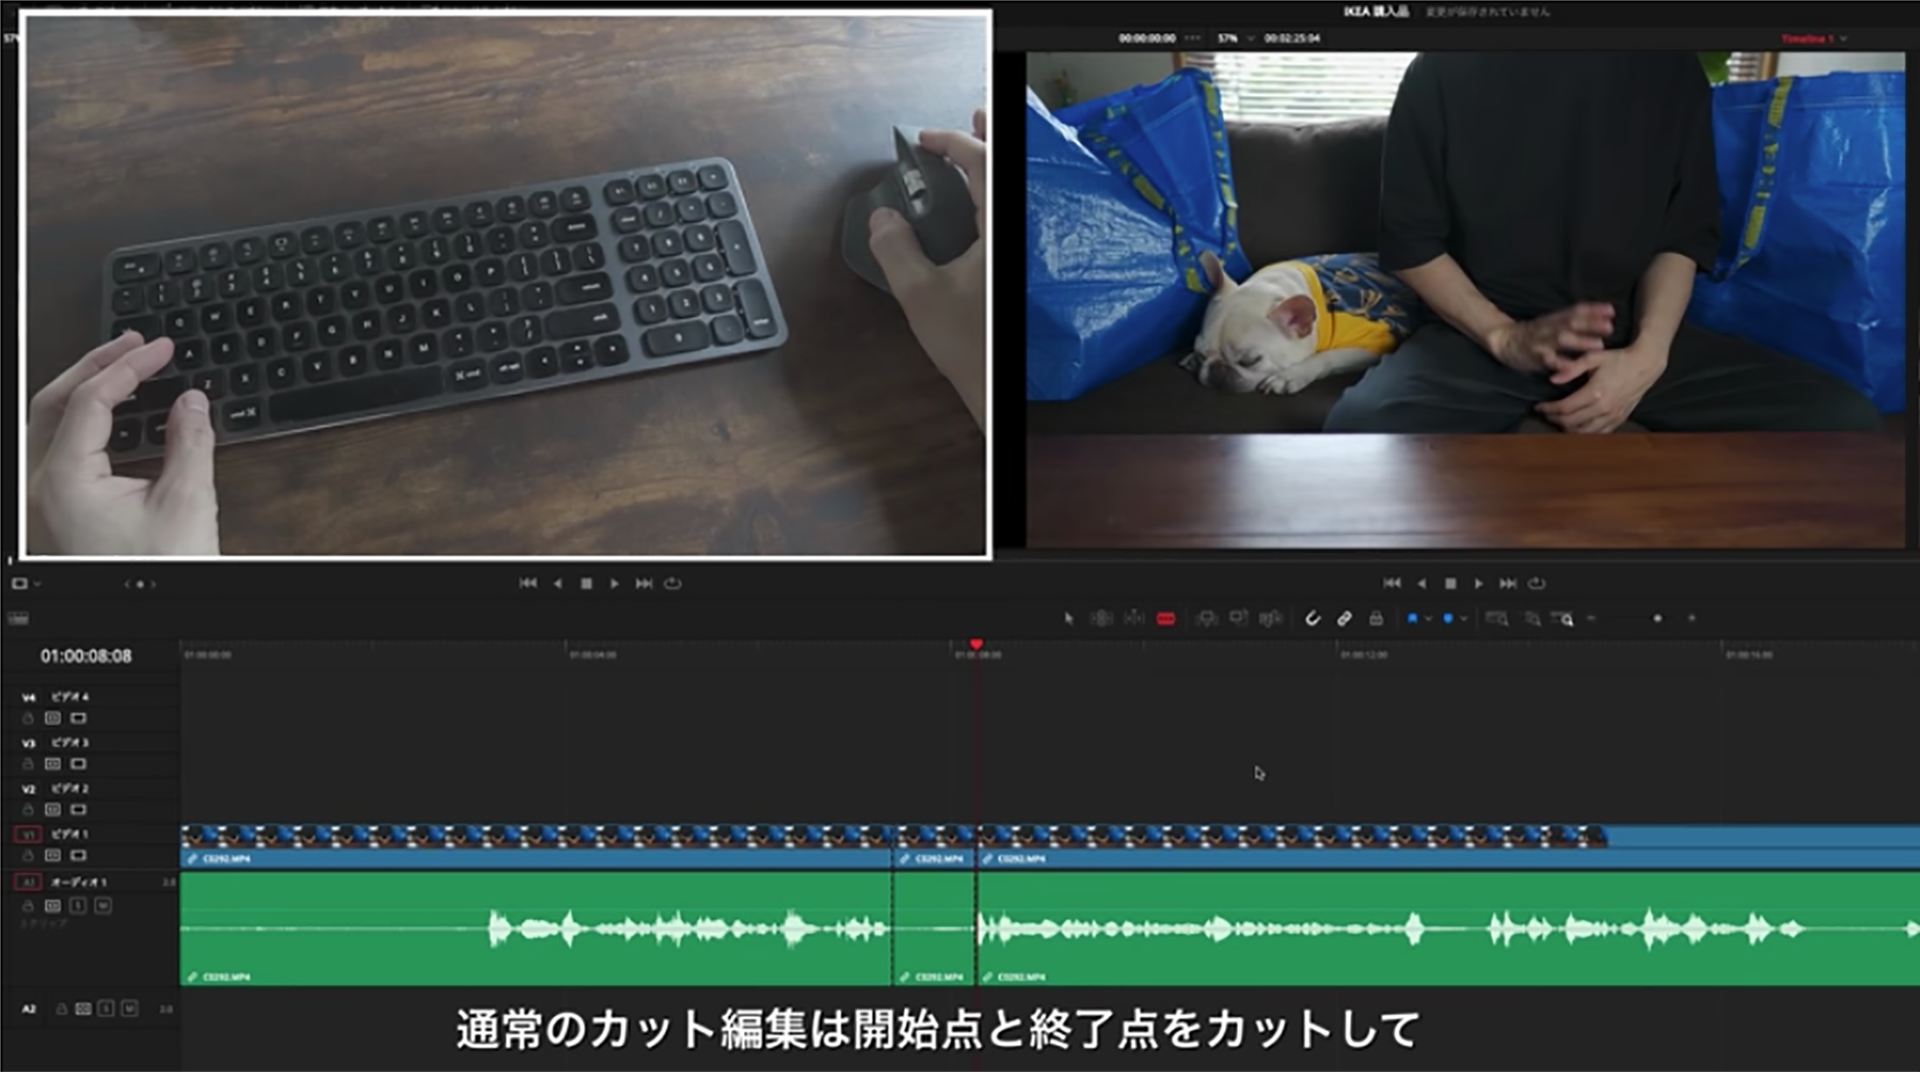
This removes the unnecessary part and shifts the later clips forward. Then I move the playhead back, replay the video, and check.
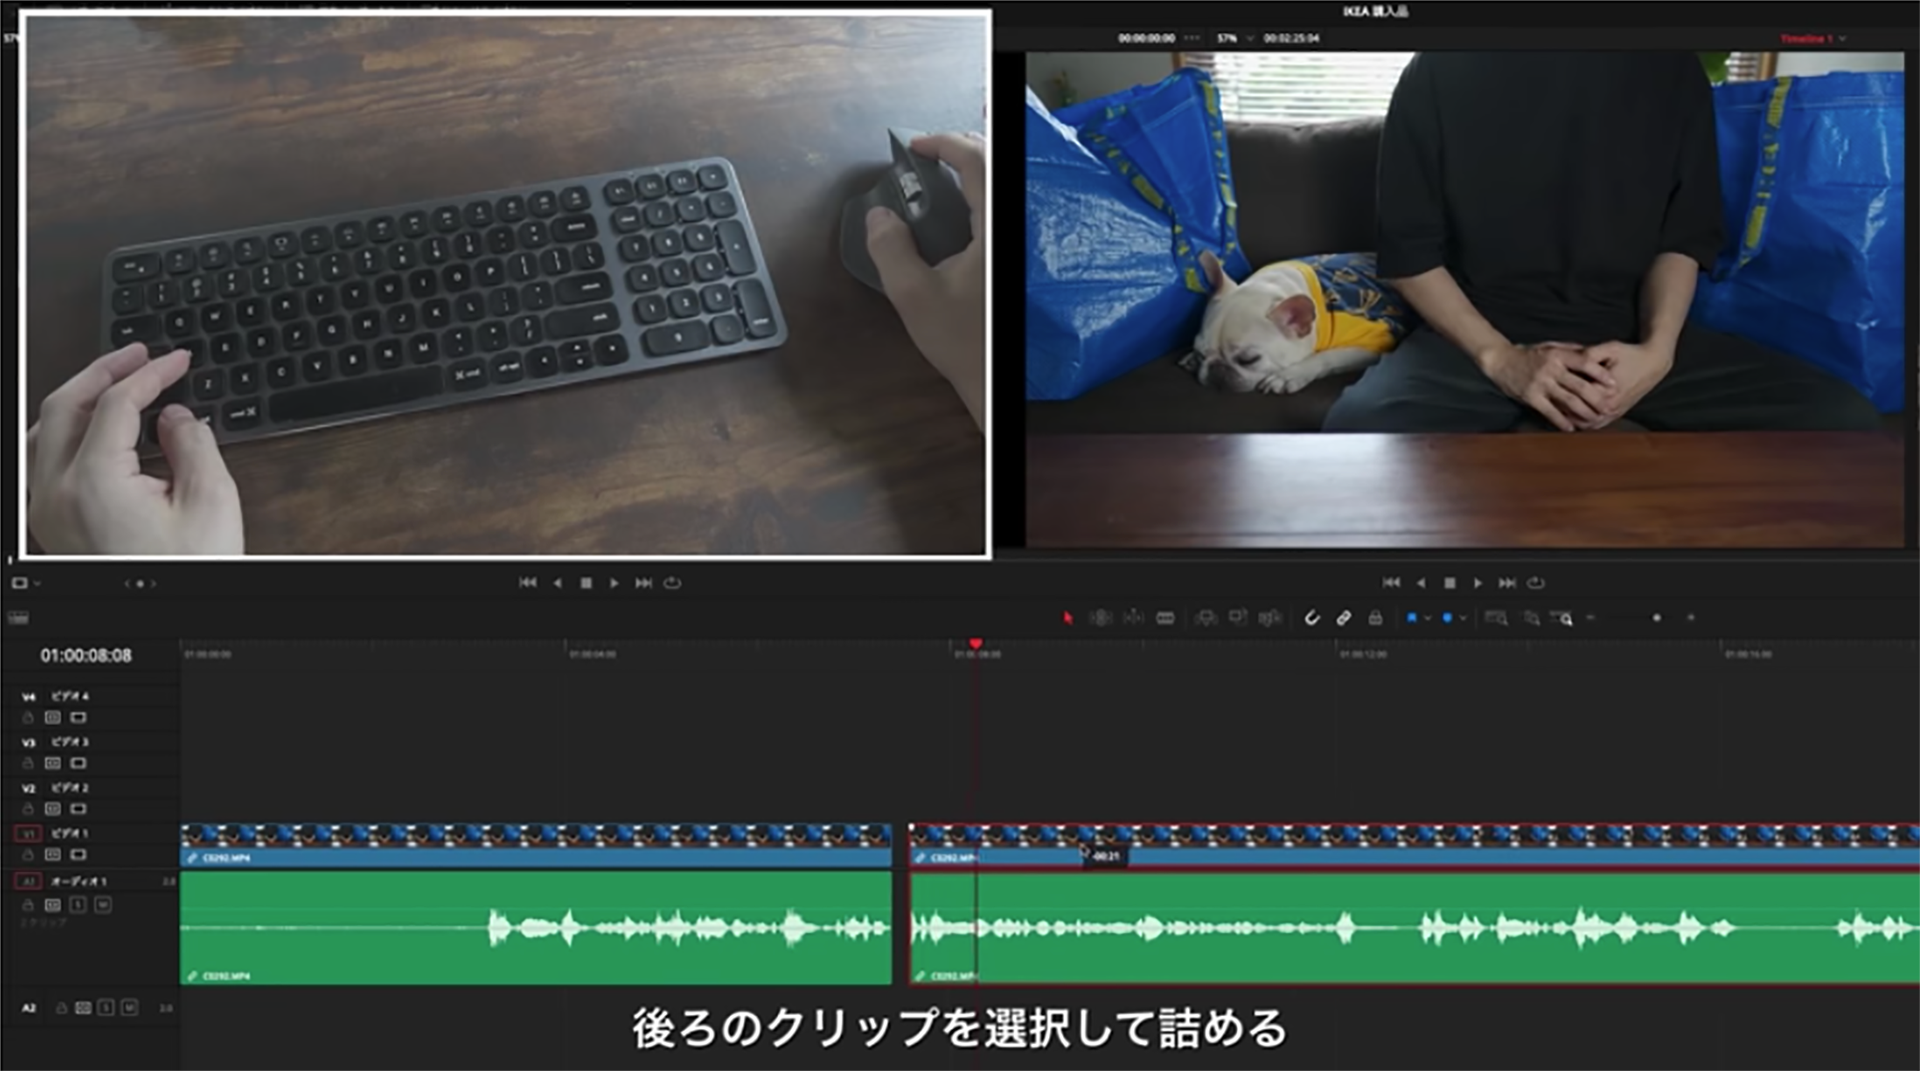
That’s how cut editing and review are done, but since this process requires multiple steps every time, it’s quite troublesome.
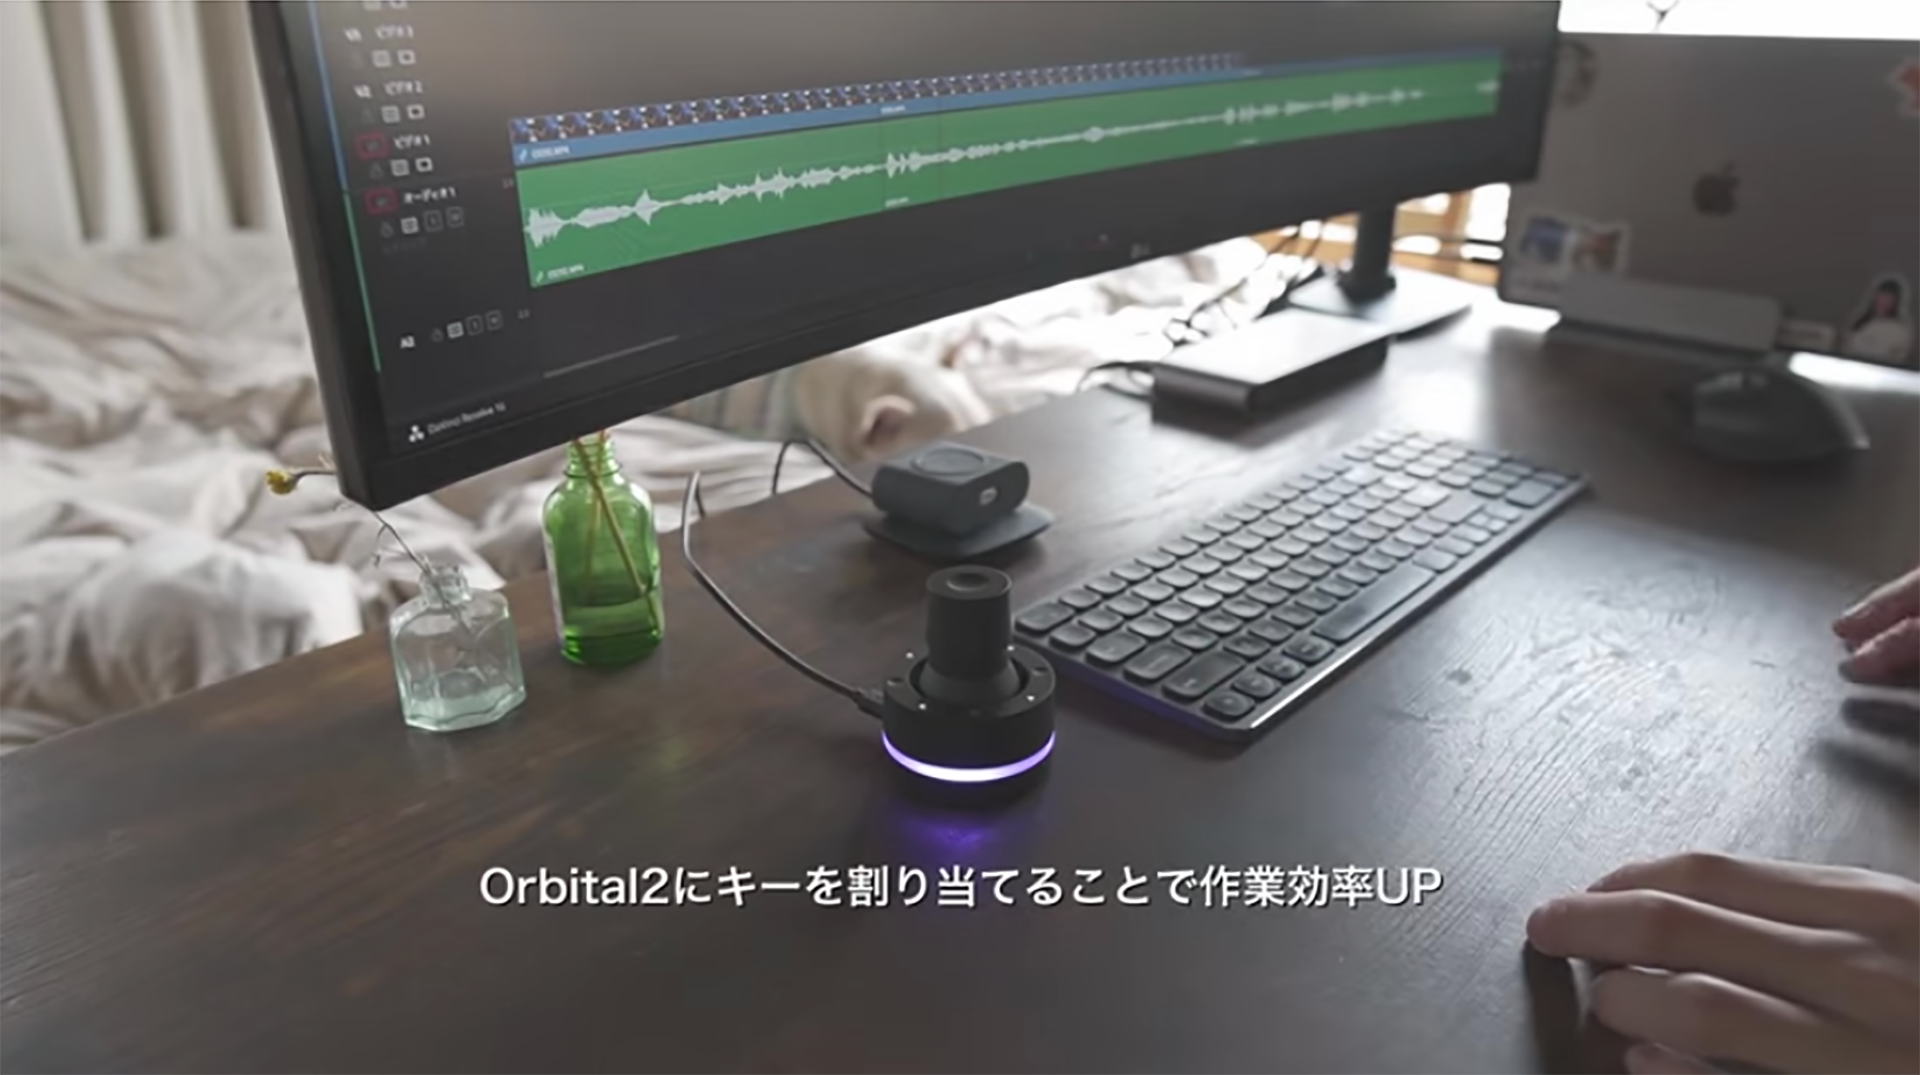
So, I assigned commonly used keyboard shortcuts to Orbital2’s joystick device for cut editing. Thanks to Orbital2, editing became smooth and very comfortable.
In the next section, I’ll explain what shortcuts I assigned to Orbital2.
Launch Orbital2 Core.
There are two modes: Orbital Engine Mode and Joystick Mode. I assigned keys to Joystick Mode.
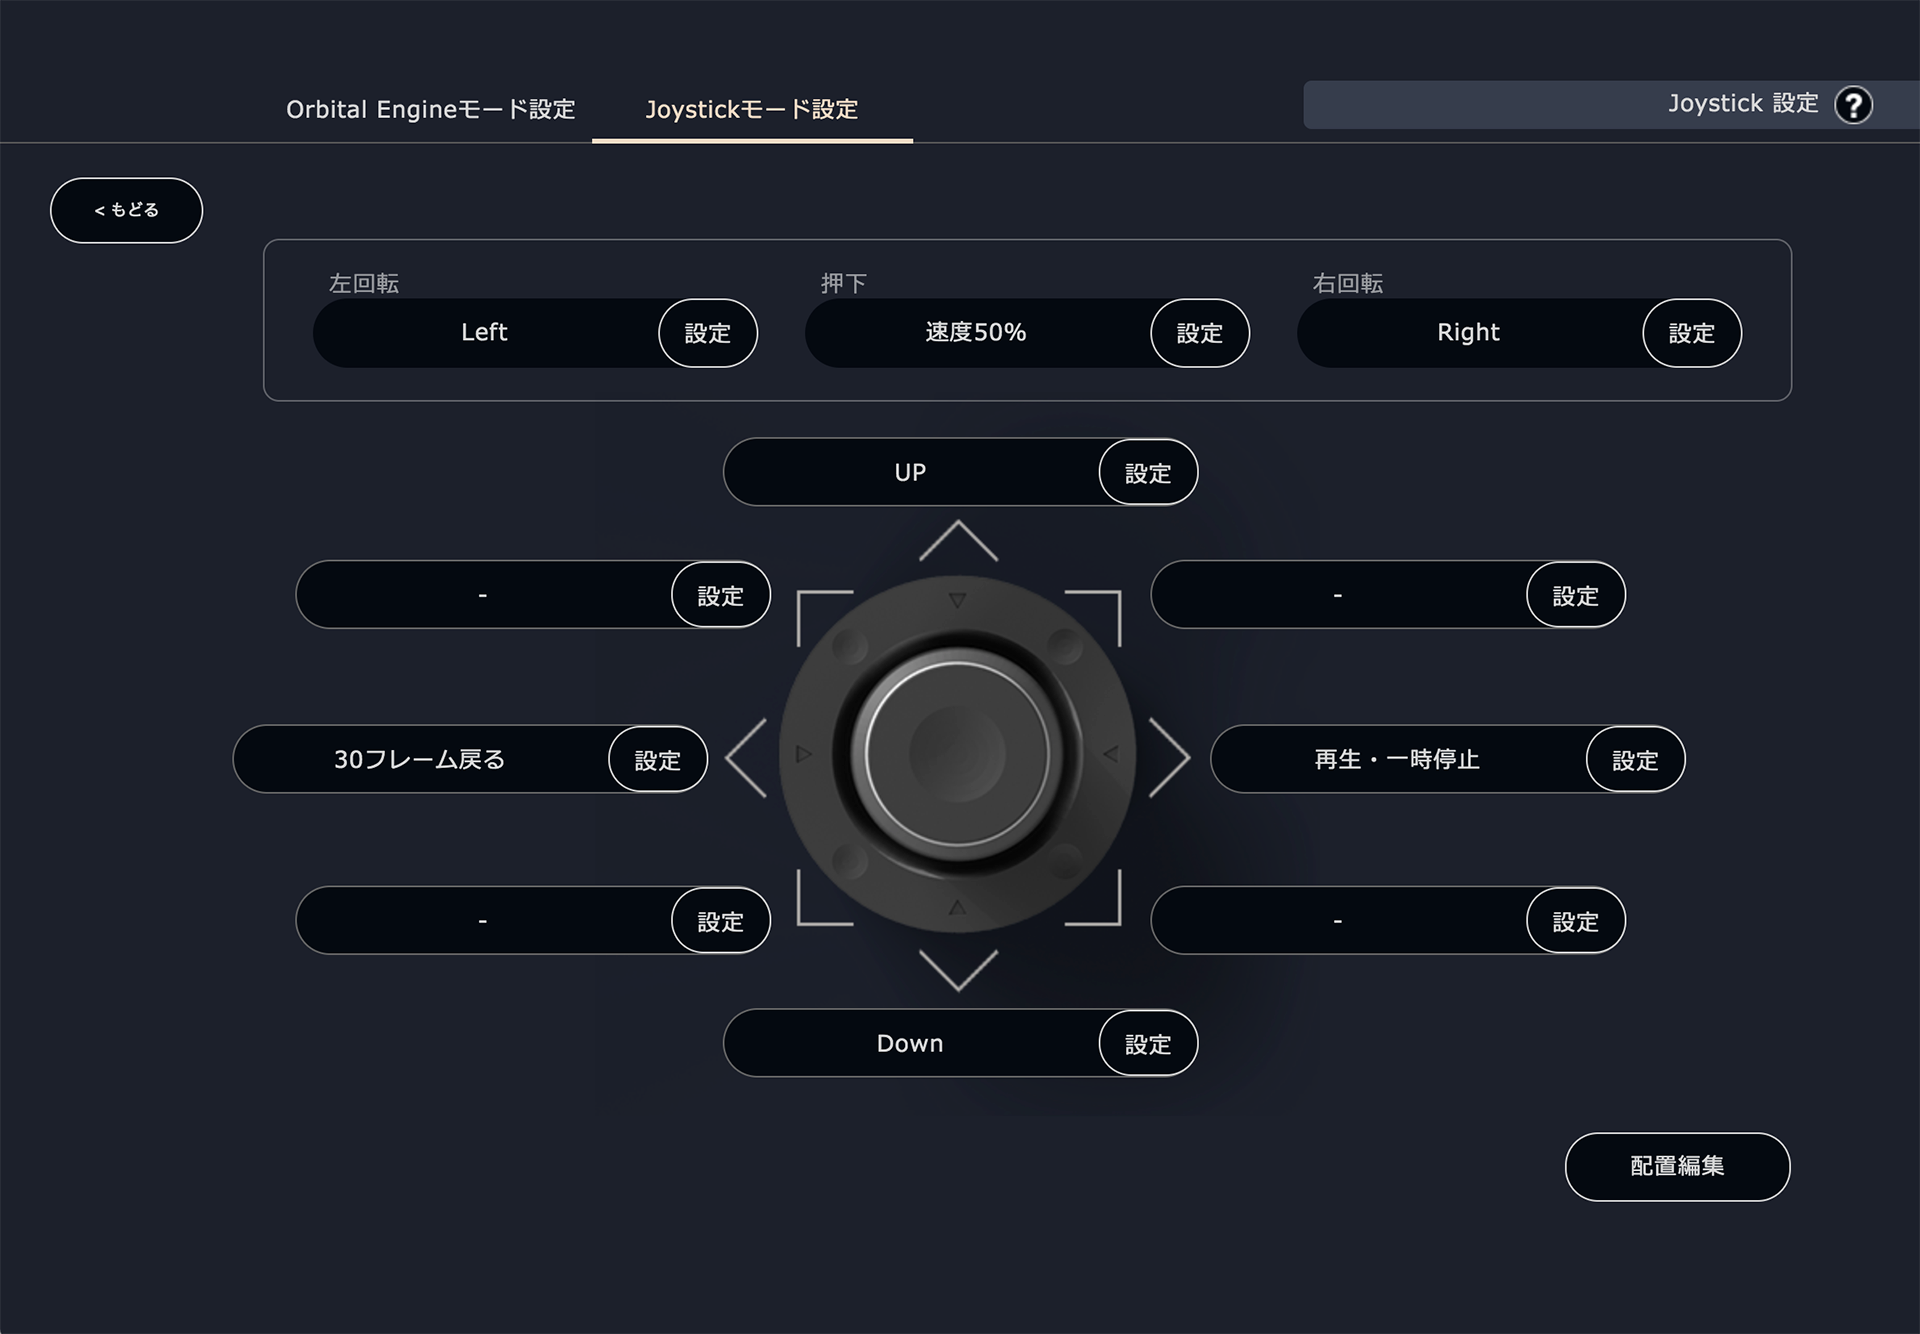
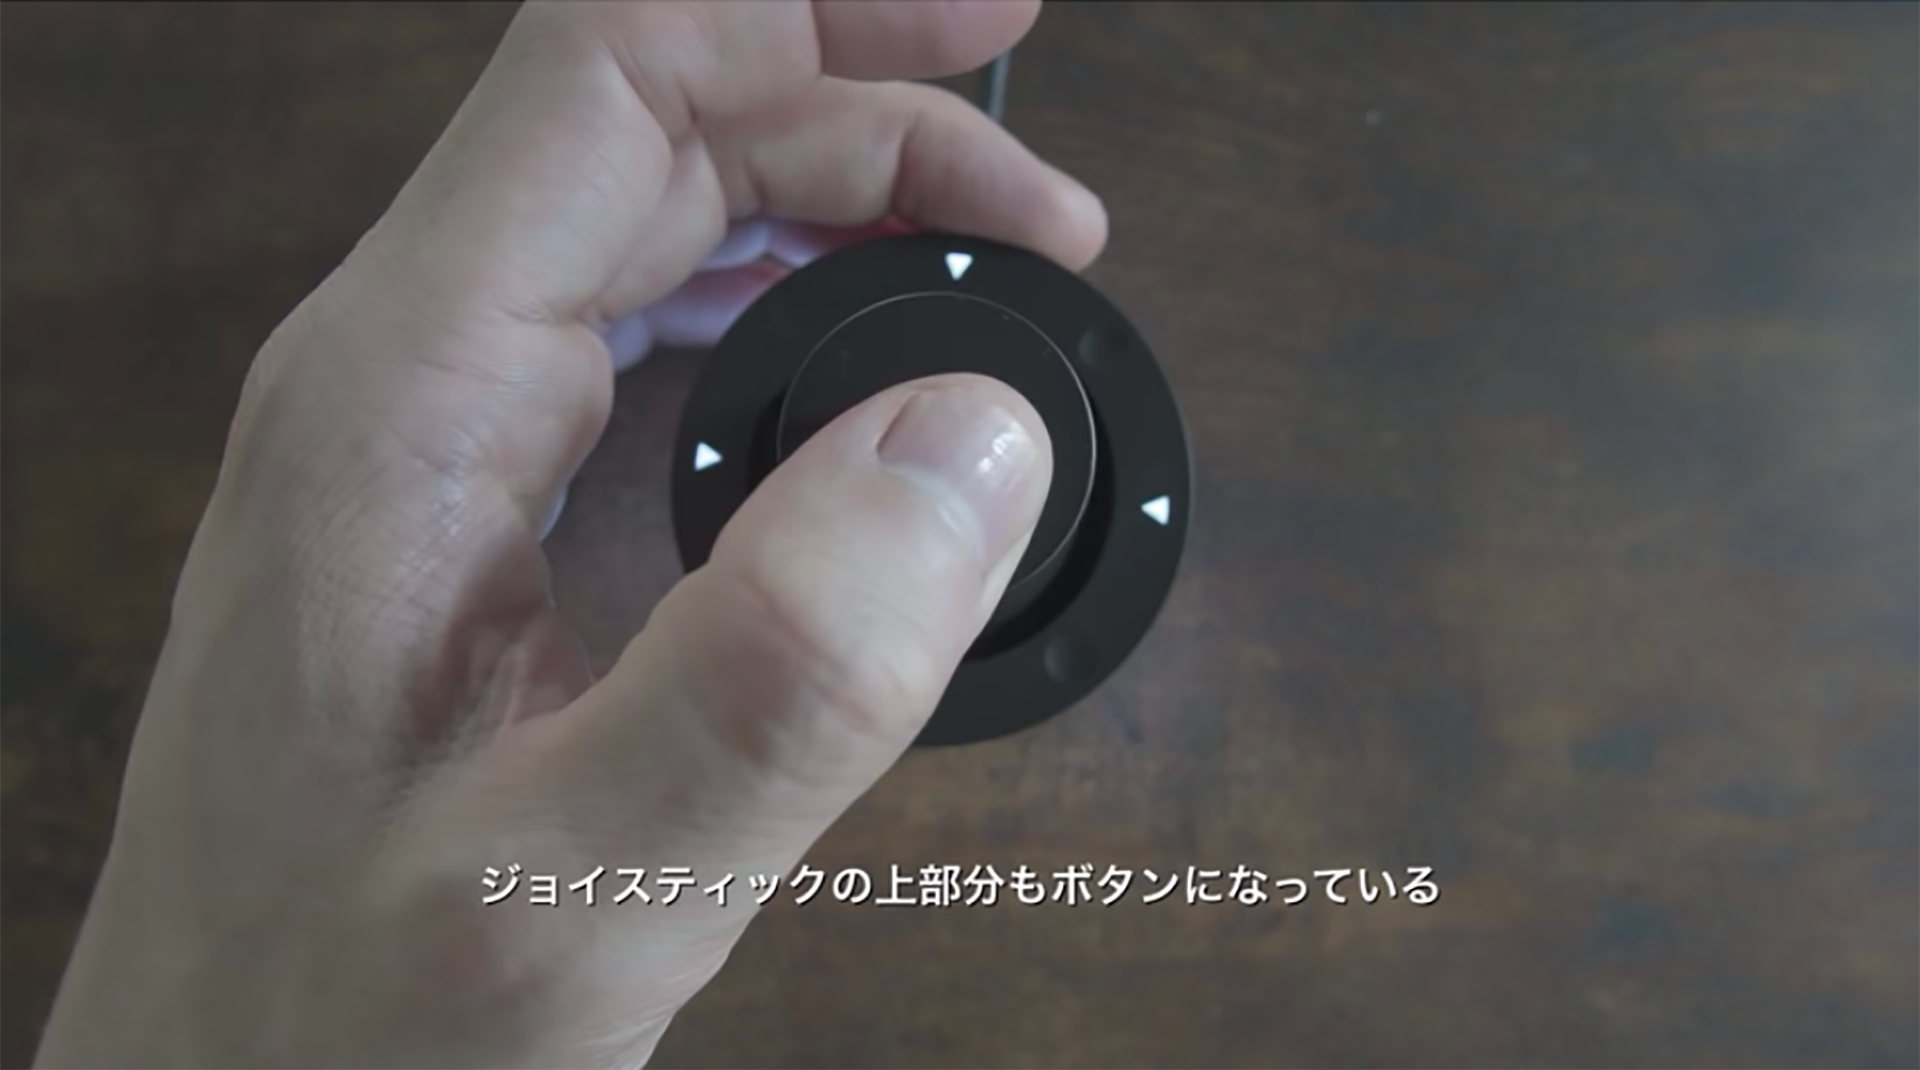
[ Joystick ]
You can assign shortcuts to each direction the joystick tilts.
Up direction: Up arrow key
Down direction: Down arrow key
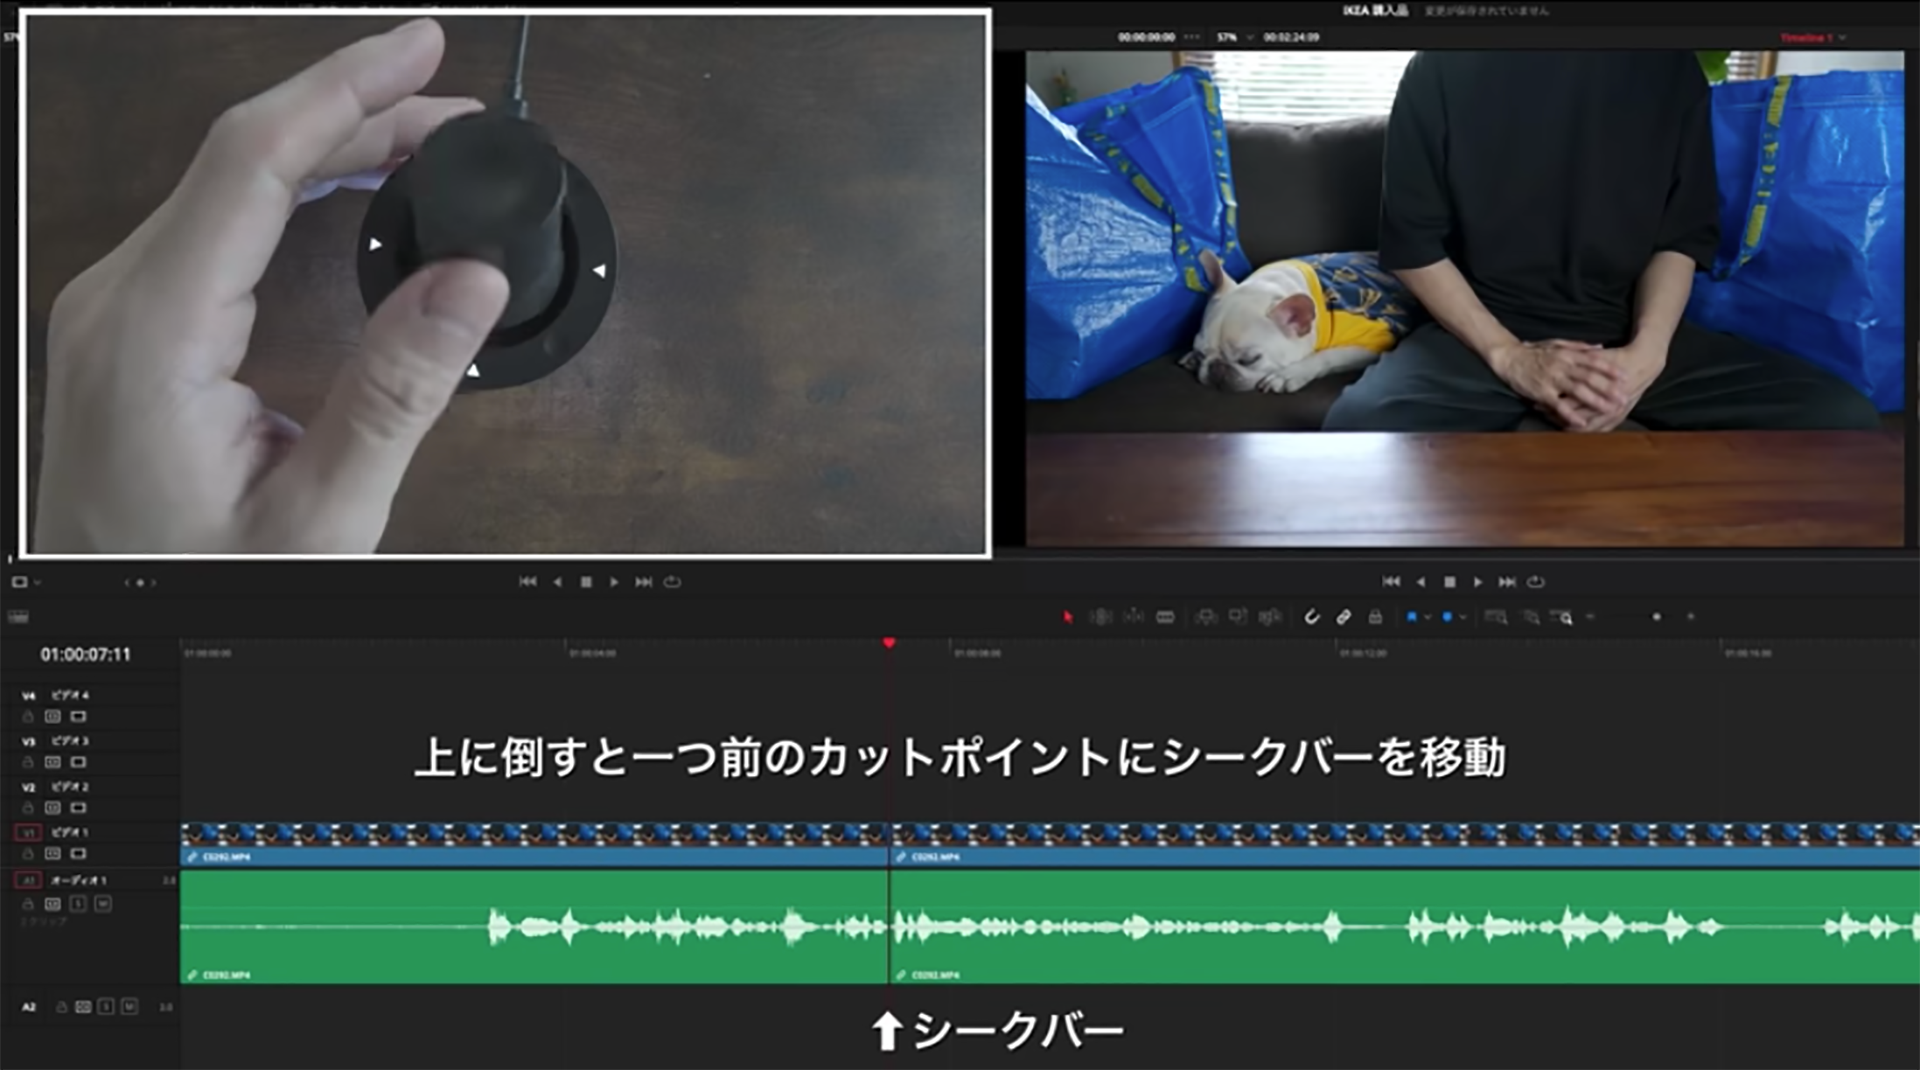
Tilting up moves the playhead to the previous cut point. Tilting down moves it to the next cut point.
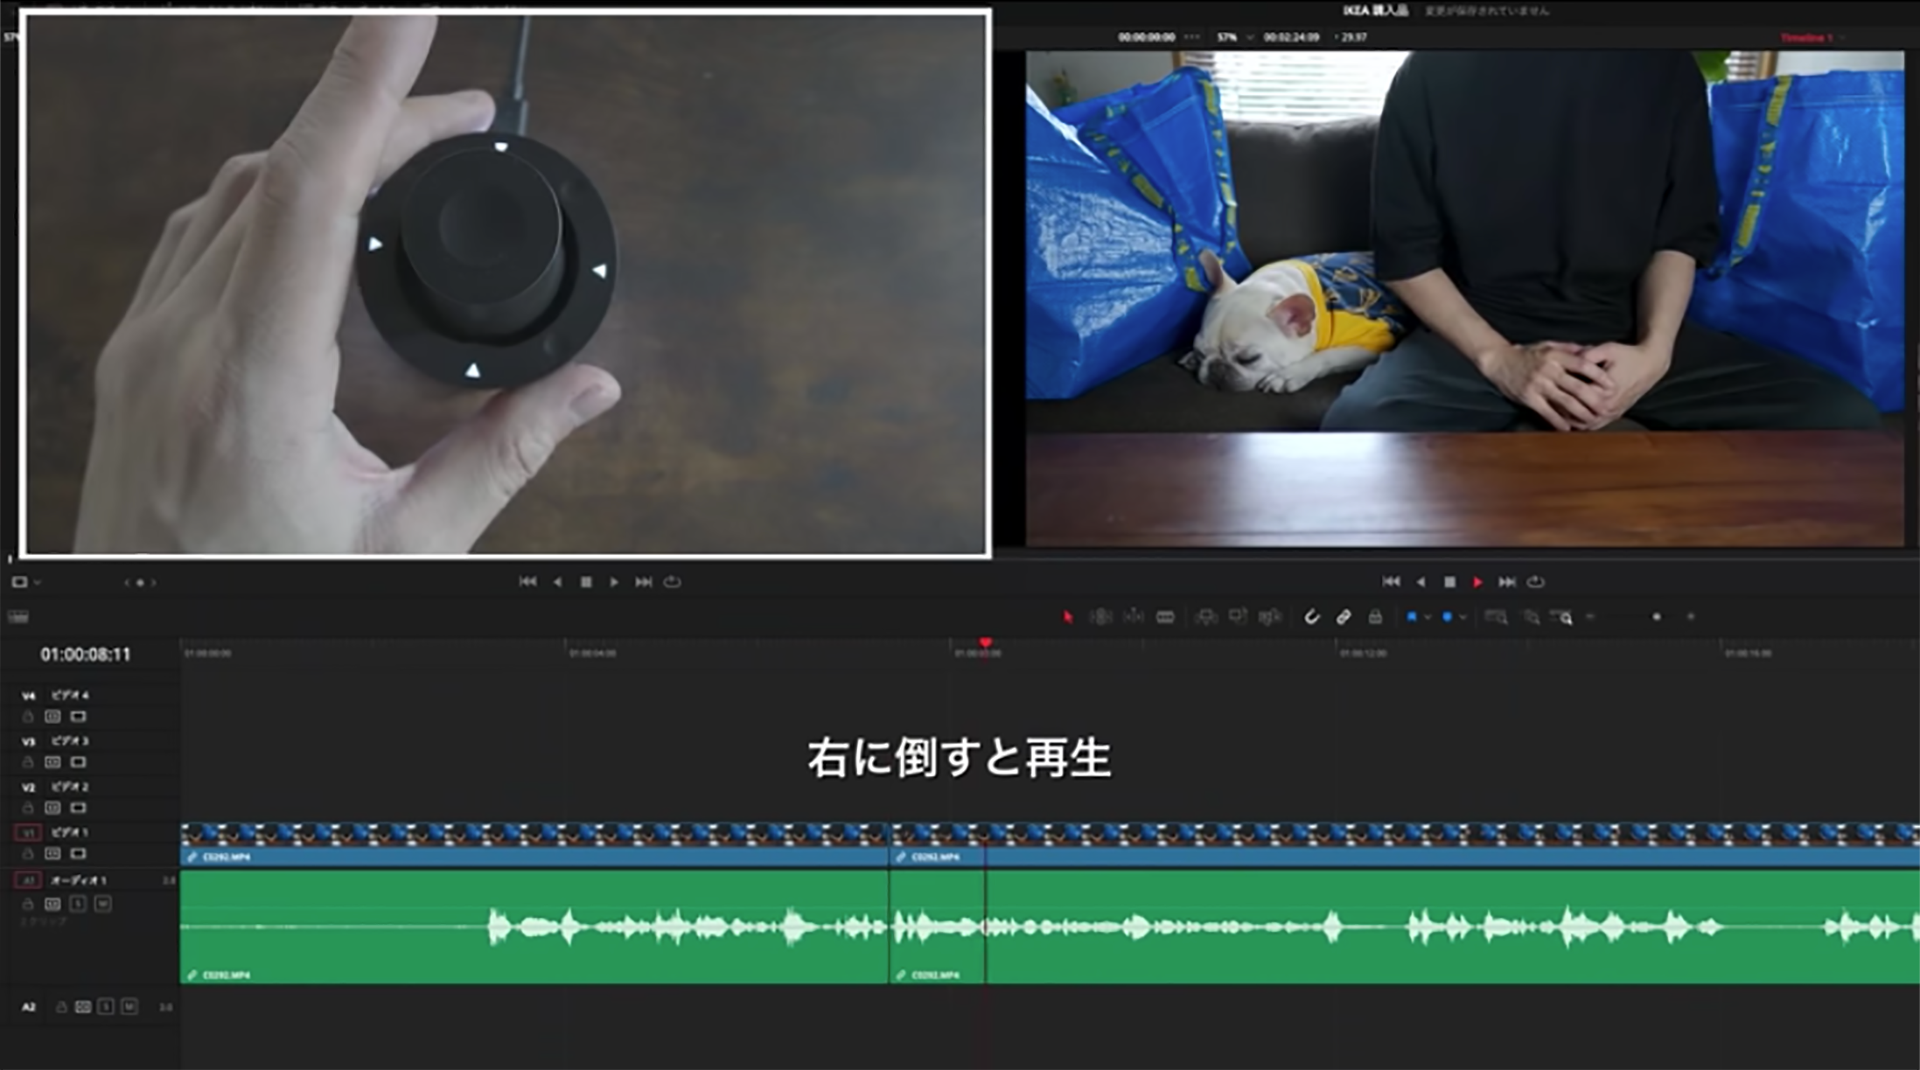
Right direction: Play/Pause (Space)
Left direction: Jump back 30 frames

For the dial rotation:
Rotate left: Left arrow key
Rotate right: Right arrow key
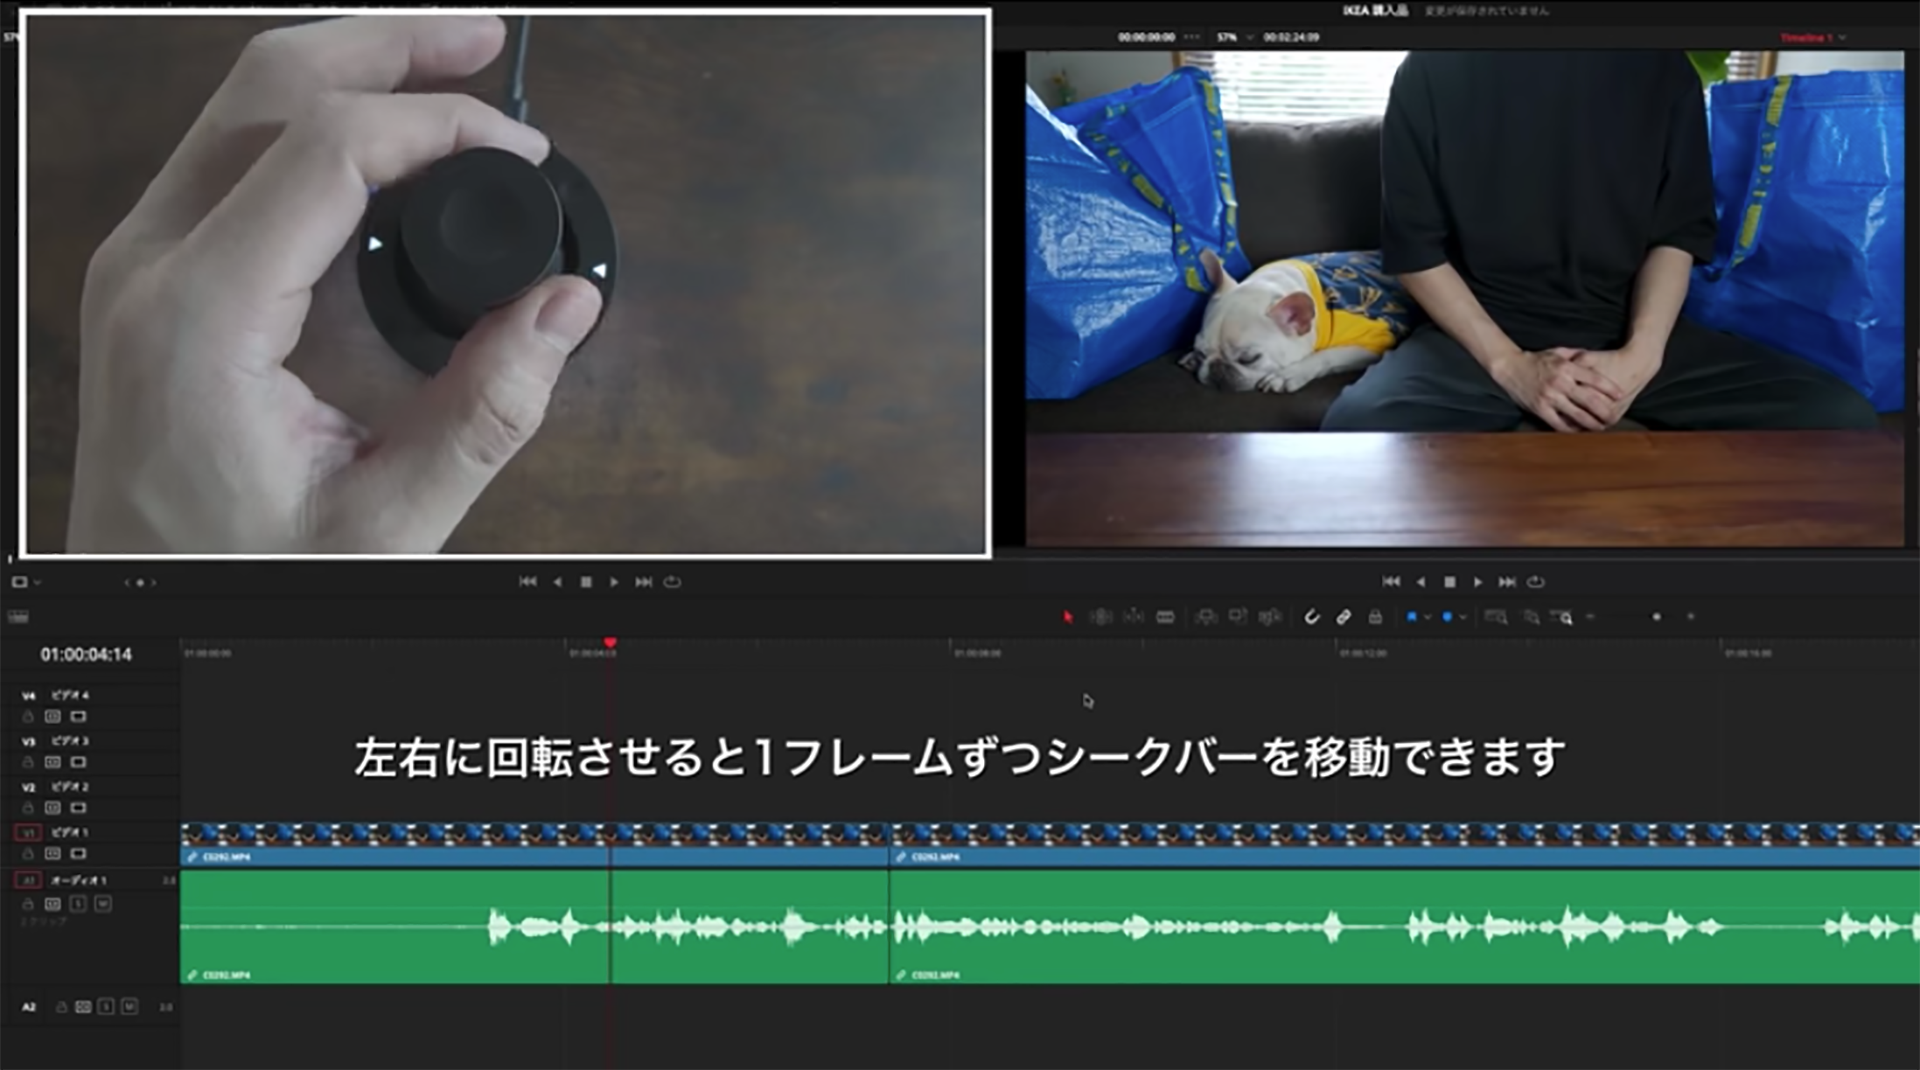
Rotating the dial moves the playhead one frame at a time, making fine adjustments at cut points very easy.
The joystick can also be pressed down. I assigned this press action to “Slow Motion (50% playback speed).”
To create slow motion normally, you select the clip, press Command + R to open the speed change menu, type 50%, then press “Change.”
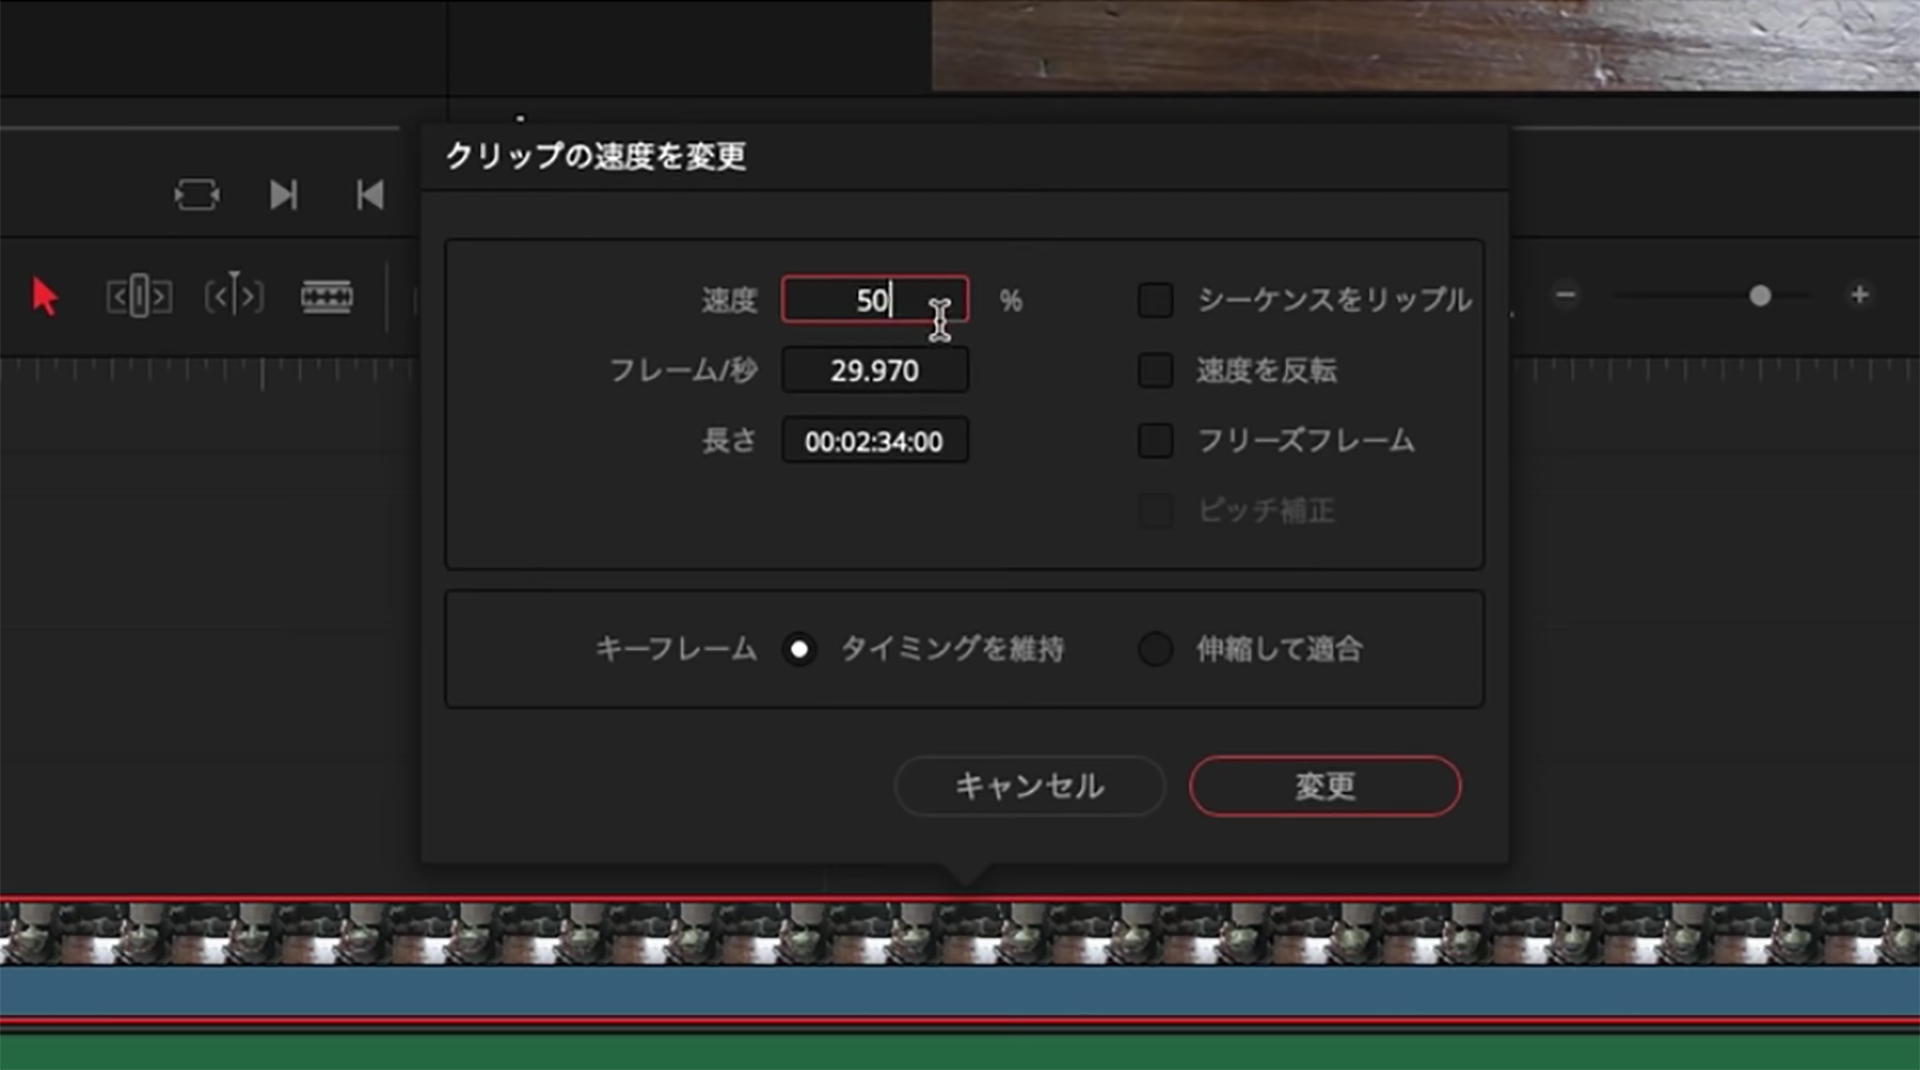
The program macro function lets you record such multi-step operations into one action.
For example:
Click “Start Recording,” then input Command + R → 5 → 0 → Enter, then click “Stop Recording.” Save it, and it’s ready.

Now, by selecting a clip and pressing the top of the joystick once, the playback speed instantly becomes 50%.
This shows how program macros allow even complex processes to be executed with just one button or one action.
[ Flat Ring ]
Top button: assigned to Cut. Pressing it once inserts a cut point just like the blade tool.
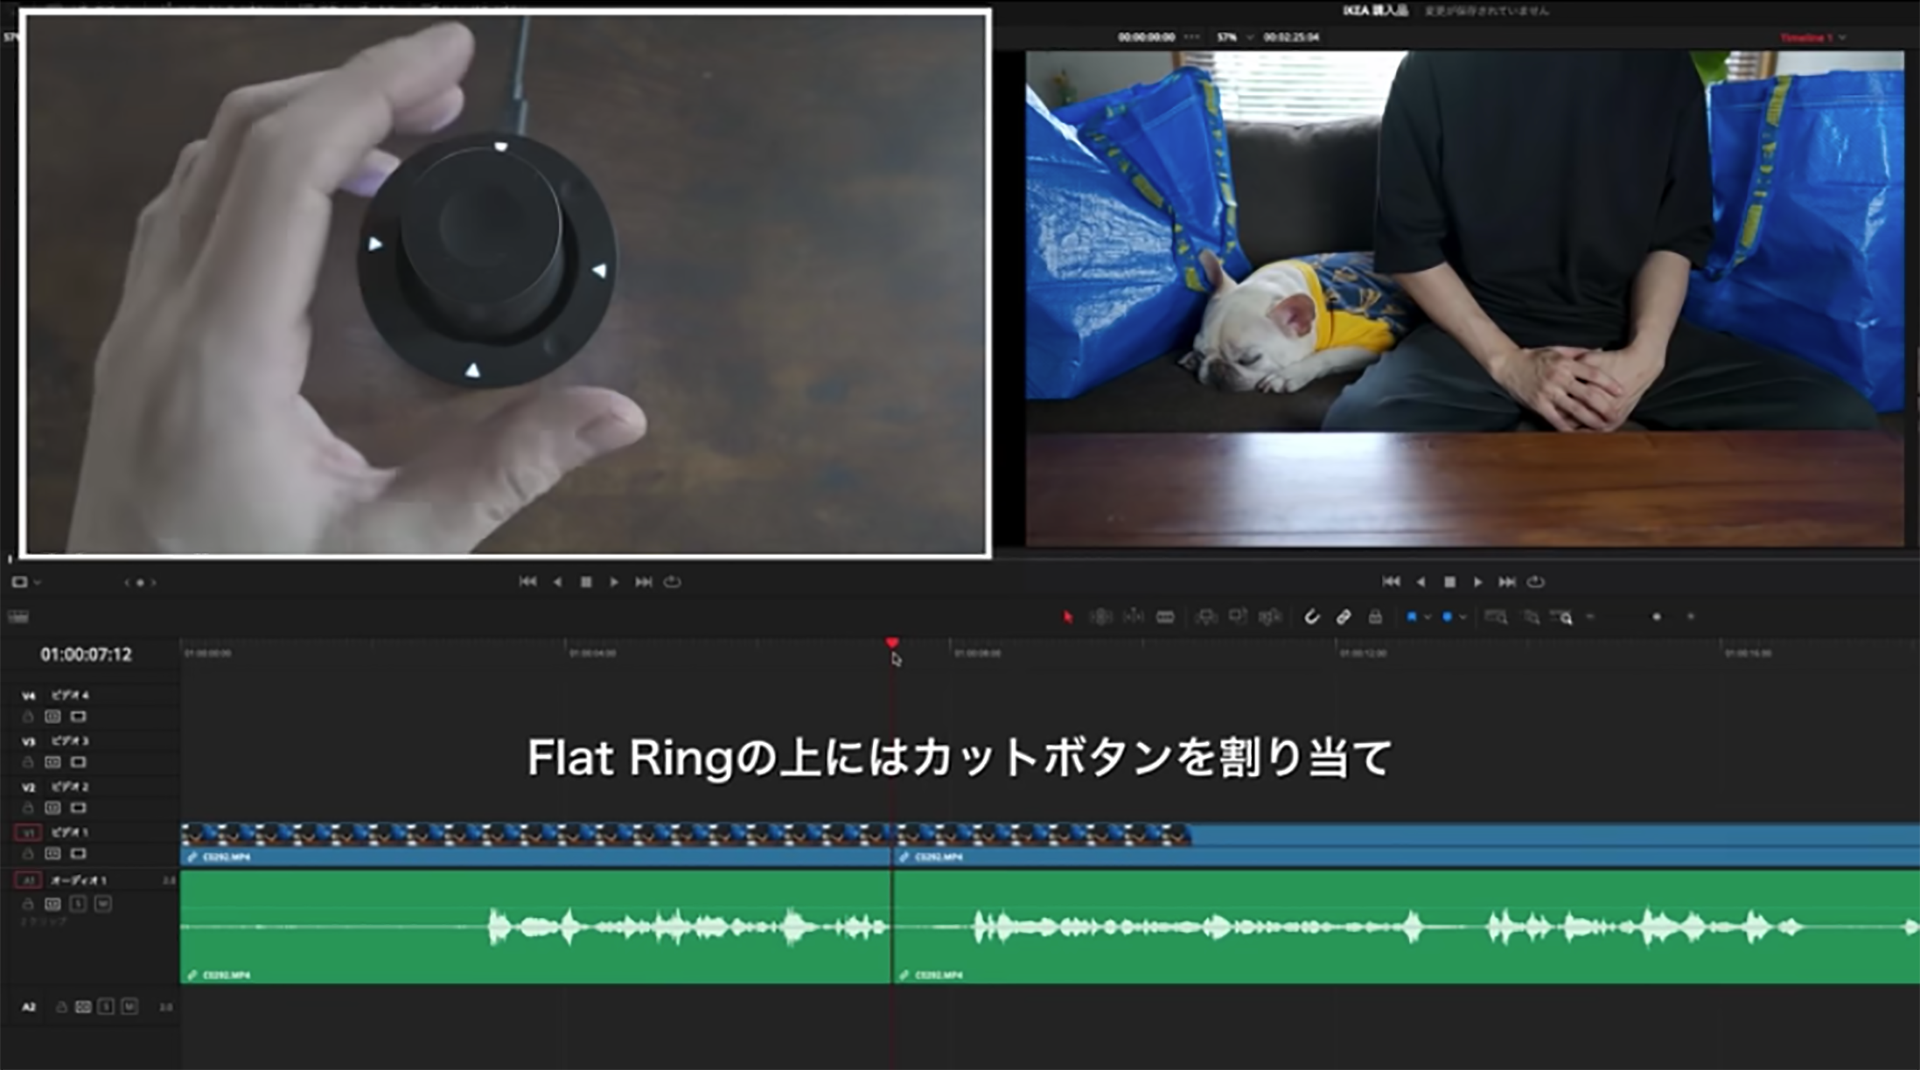
Left button: assigned to a sequence of commands that delete and close the gap up to the previous cut point. With one press, it removes the unwanted part and shifts clips forward.
Right button: similarly, assigned to delete and close the gap up to the next cut point.

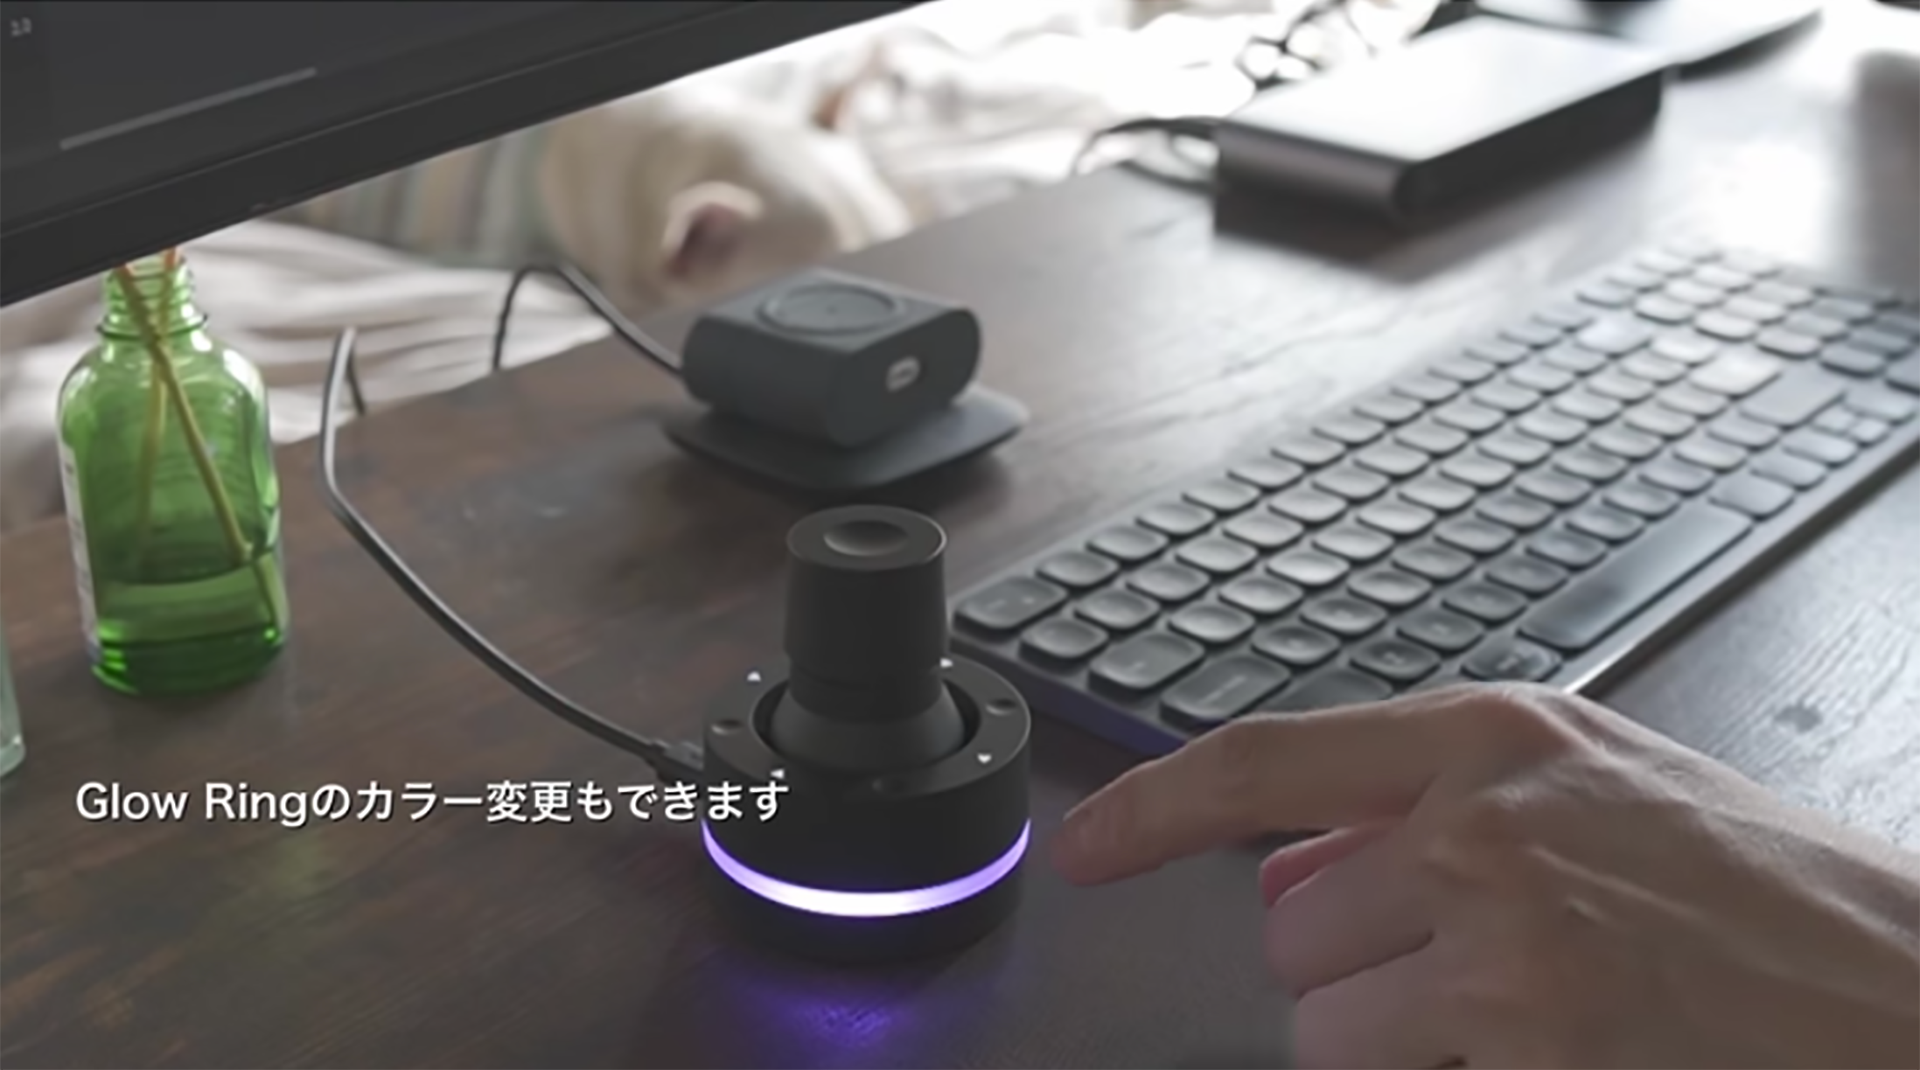
[ Glow Ring ]
The glowing part of Orbital2 is called the Glow Ring, and you can change its color.
For example, while the default is white, you could set it to purple like Adobe Premiere Pro, or teal like Adobe Lightroom—whatever color you like.
You can also manage shortcut assignments and Glow Ring colors per application by creating profiles. Matching the color to the application’s theme makes it easier to identify which profile you’re using.
Orbital2 may be a compact joystick device, but it greatly boosts editing efficiency. If you’re interested, definitely check it out.
▼ kimimaro’s Original Profile
He has kindly provided a profile for DaVinci Resolve!
Mac:
here
Please note: Profiles are only distributed when provided directly by creators. Some may not be available depending on your OS or keyboard layout. Thank you for your understanding.
This translation has been performed using ChatGPT.