Flat Ring Settings【Flick Menu】
The Flat Ring (Flick Menu) allows you to register eight functions as a group, and select and execute them by flicking the pen in each direction.
This function is recommended for creative work using a pen tablet. By flicking the ring-shaped menu that expands around the mouse cursor, you can execute a variety of functions.
select "Pop-up" from the following screen and click "Settings".
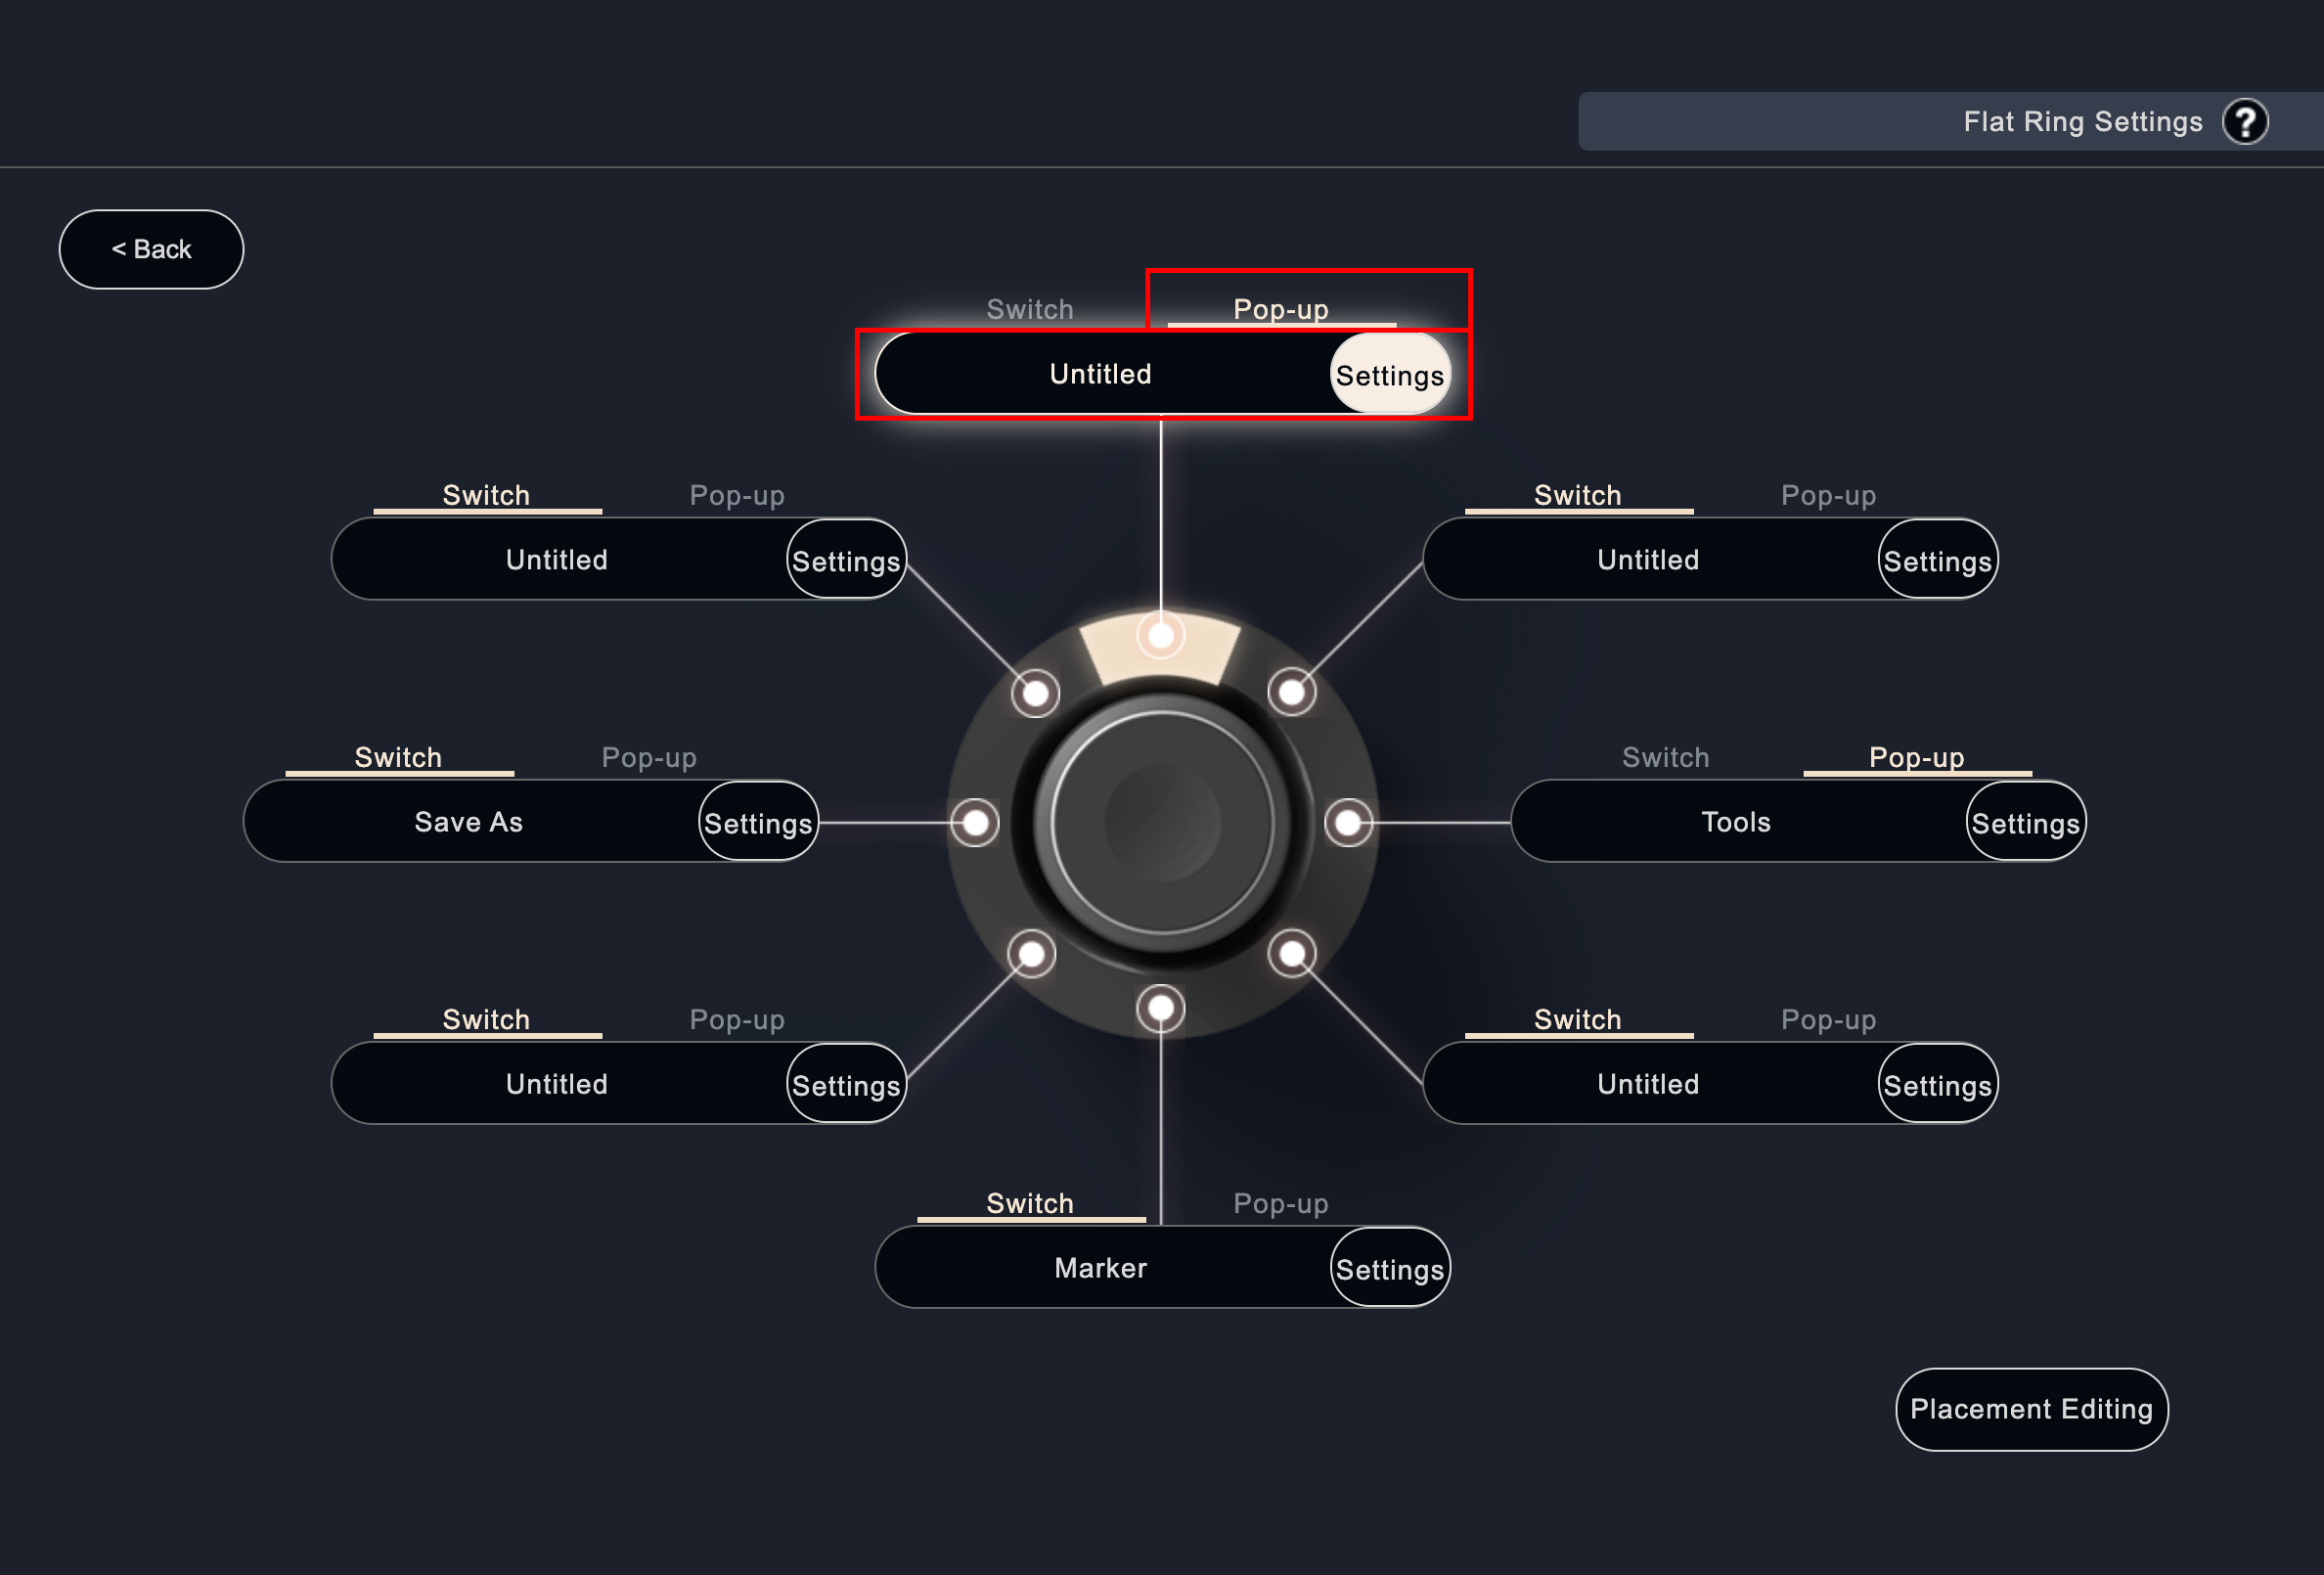
you will be redirected to the following screen. The list menu or flick menu will be displayed.
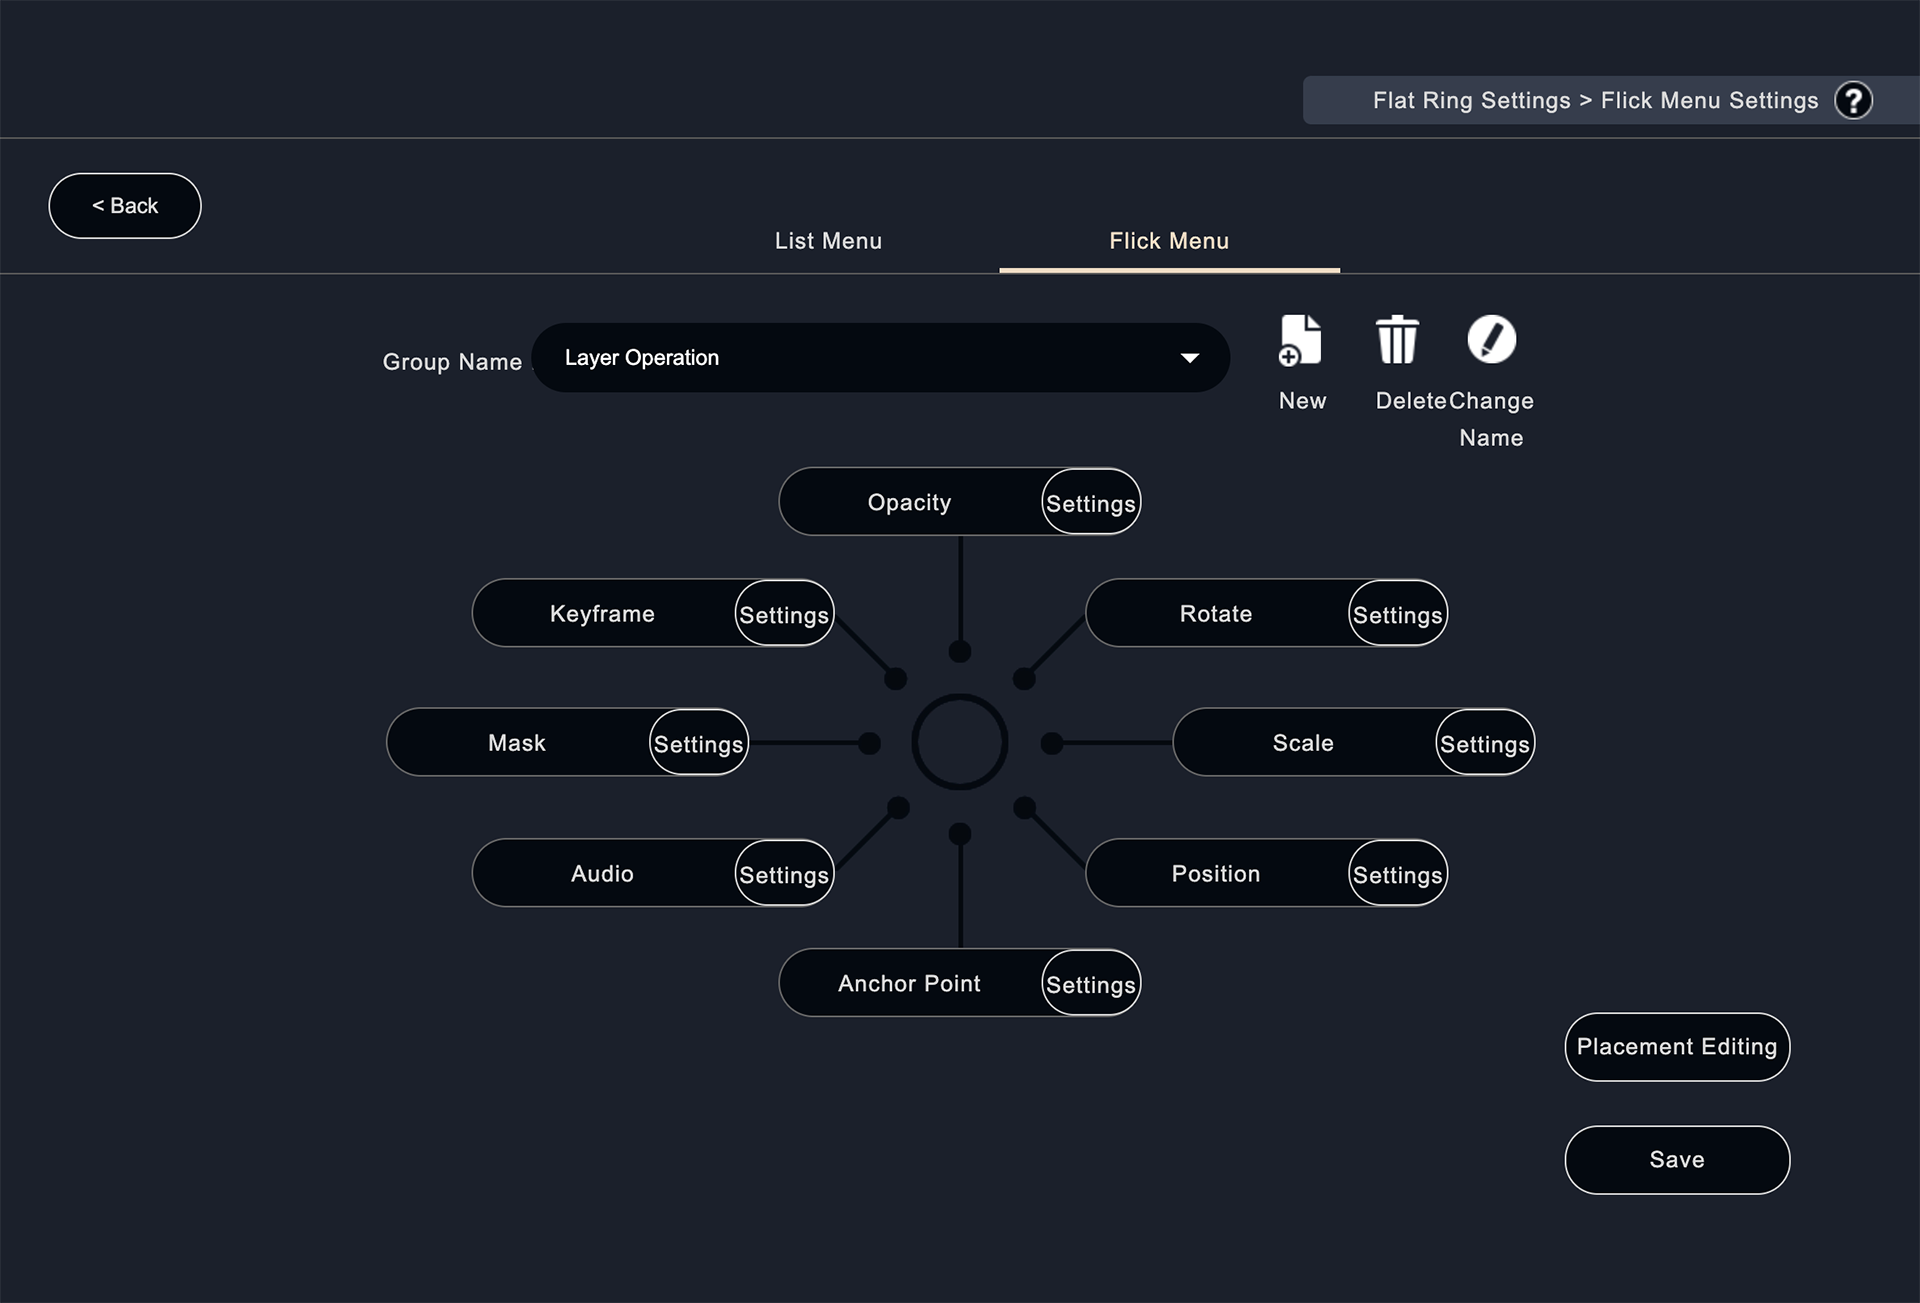
Click on the flick menu above the screen.
※ フNote: The flick menu is a circular menu that appears at the mouse cursor or a specific position on the screen.
It allows you to call up the necessary action with a single action.
In Illustrator, for example, it is useful to set up " Dropper", "Pen", "Selection", etc. as tools to be used.

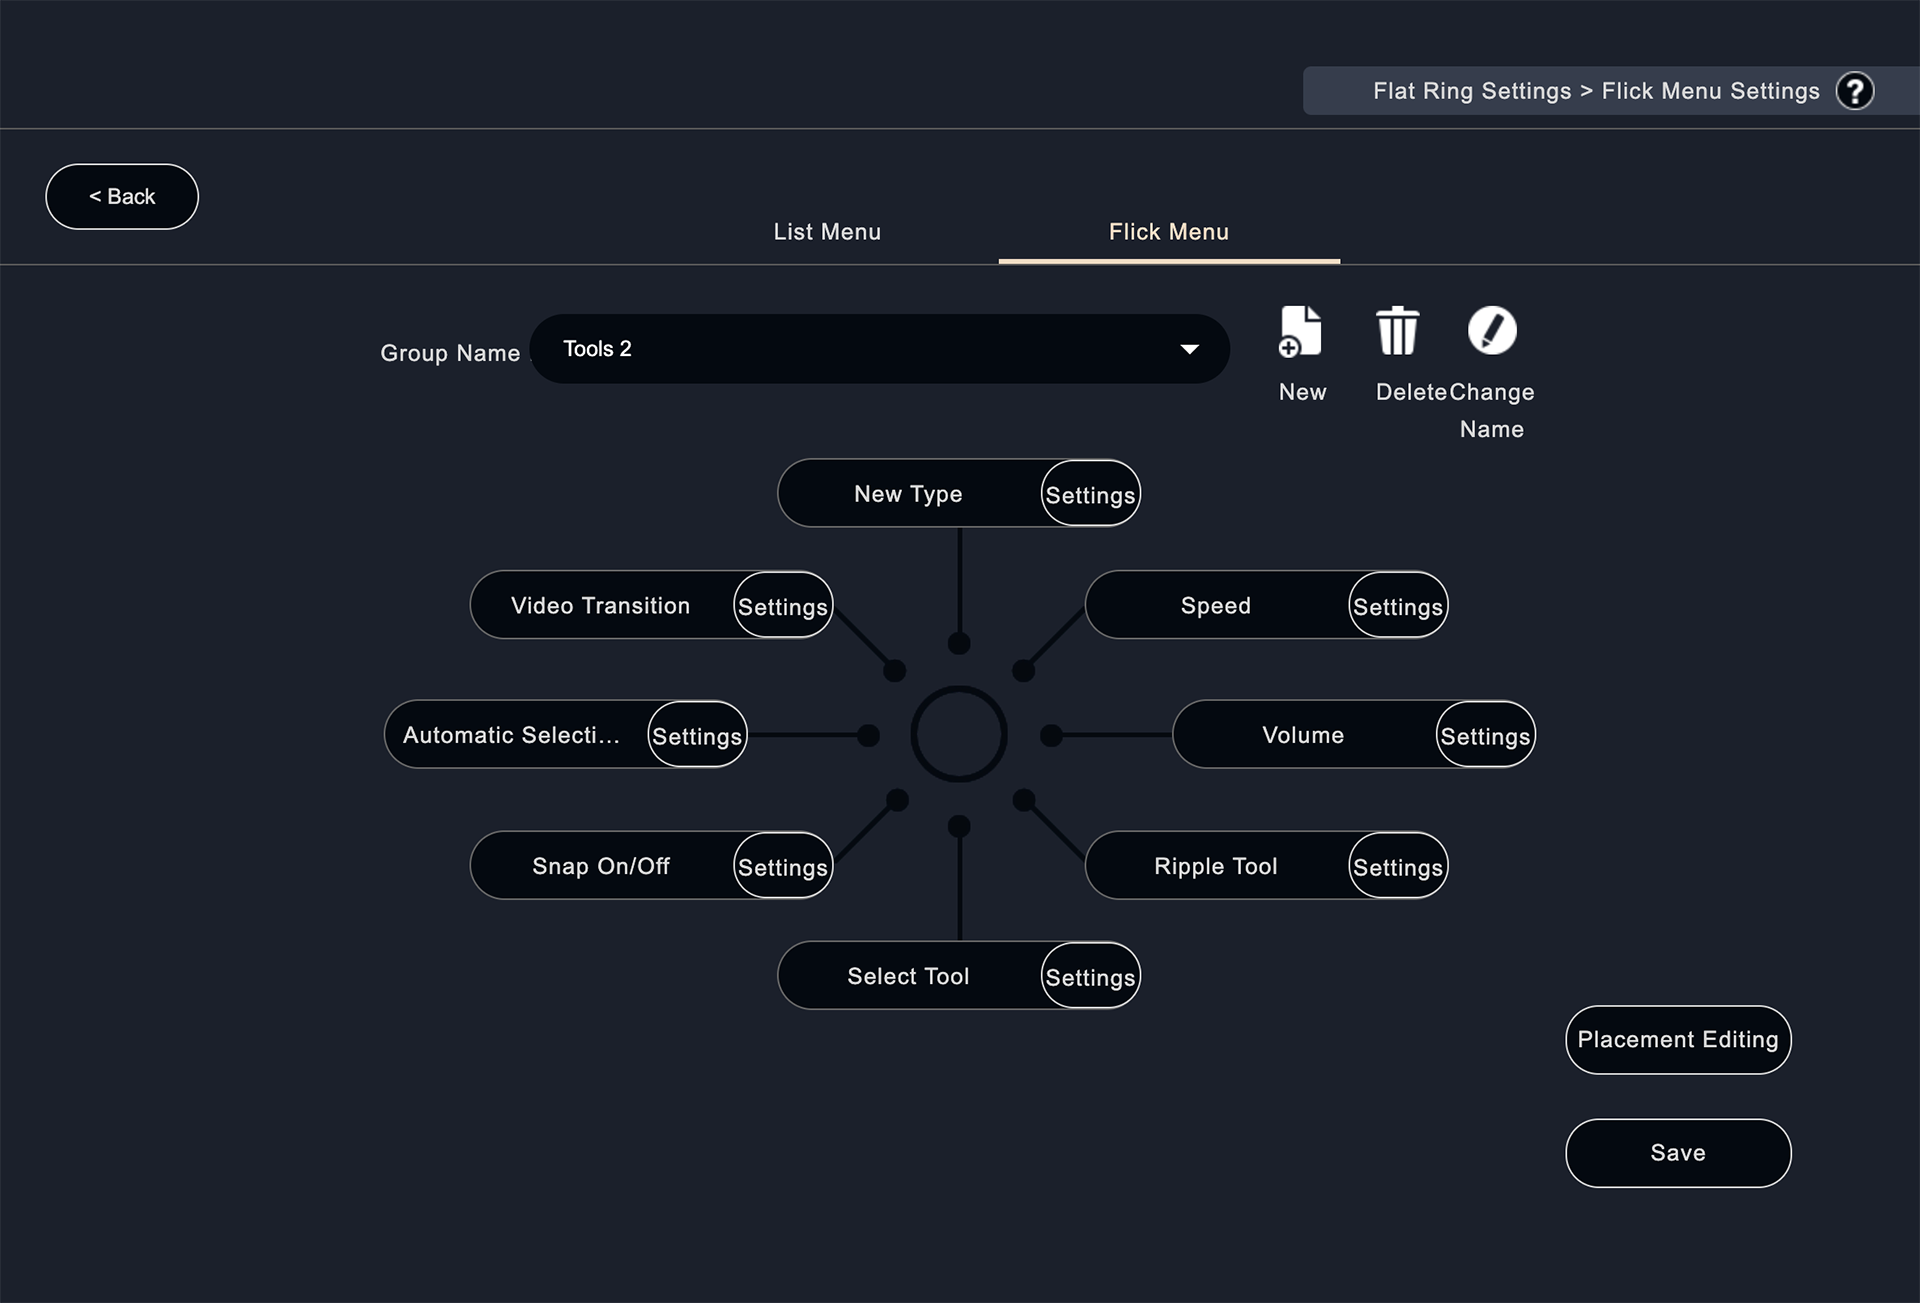
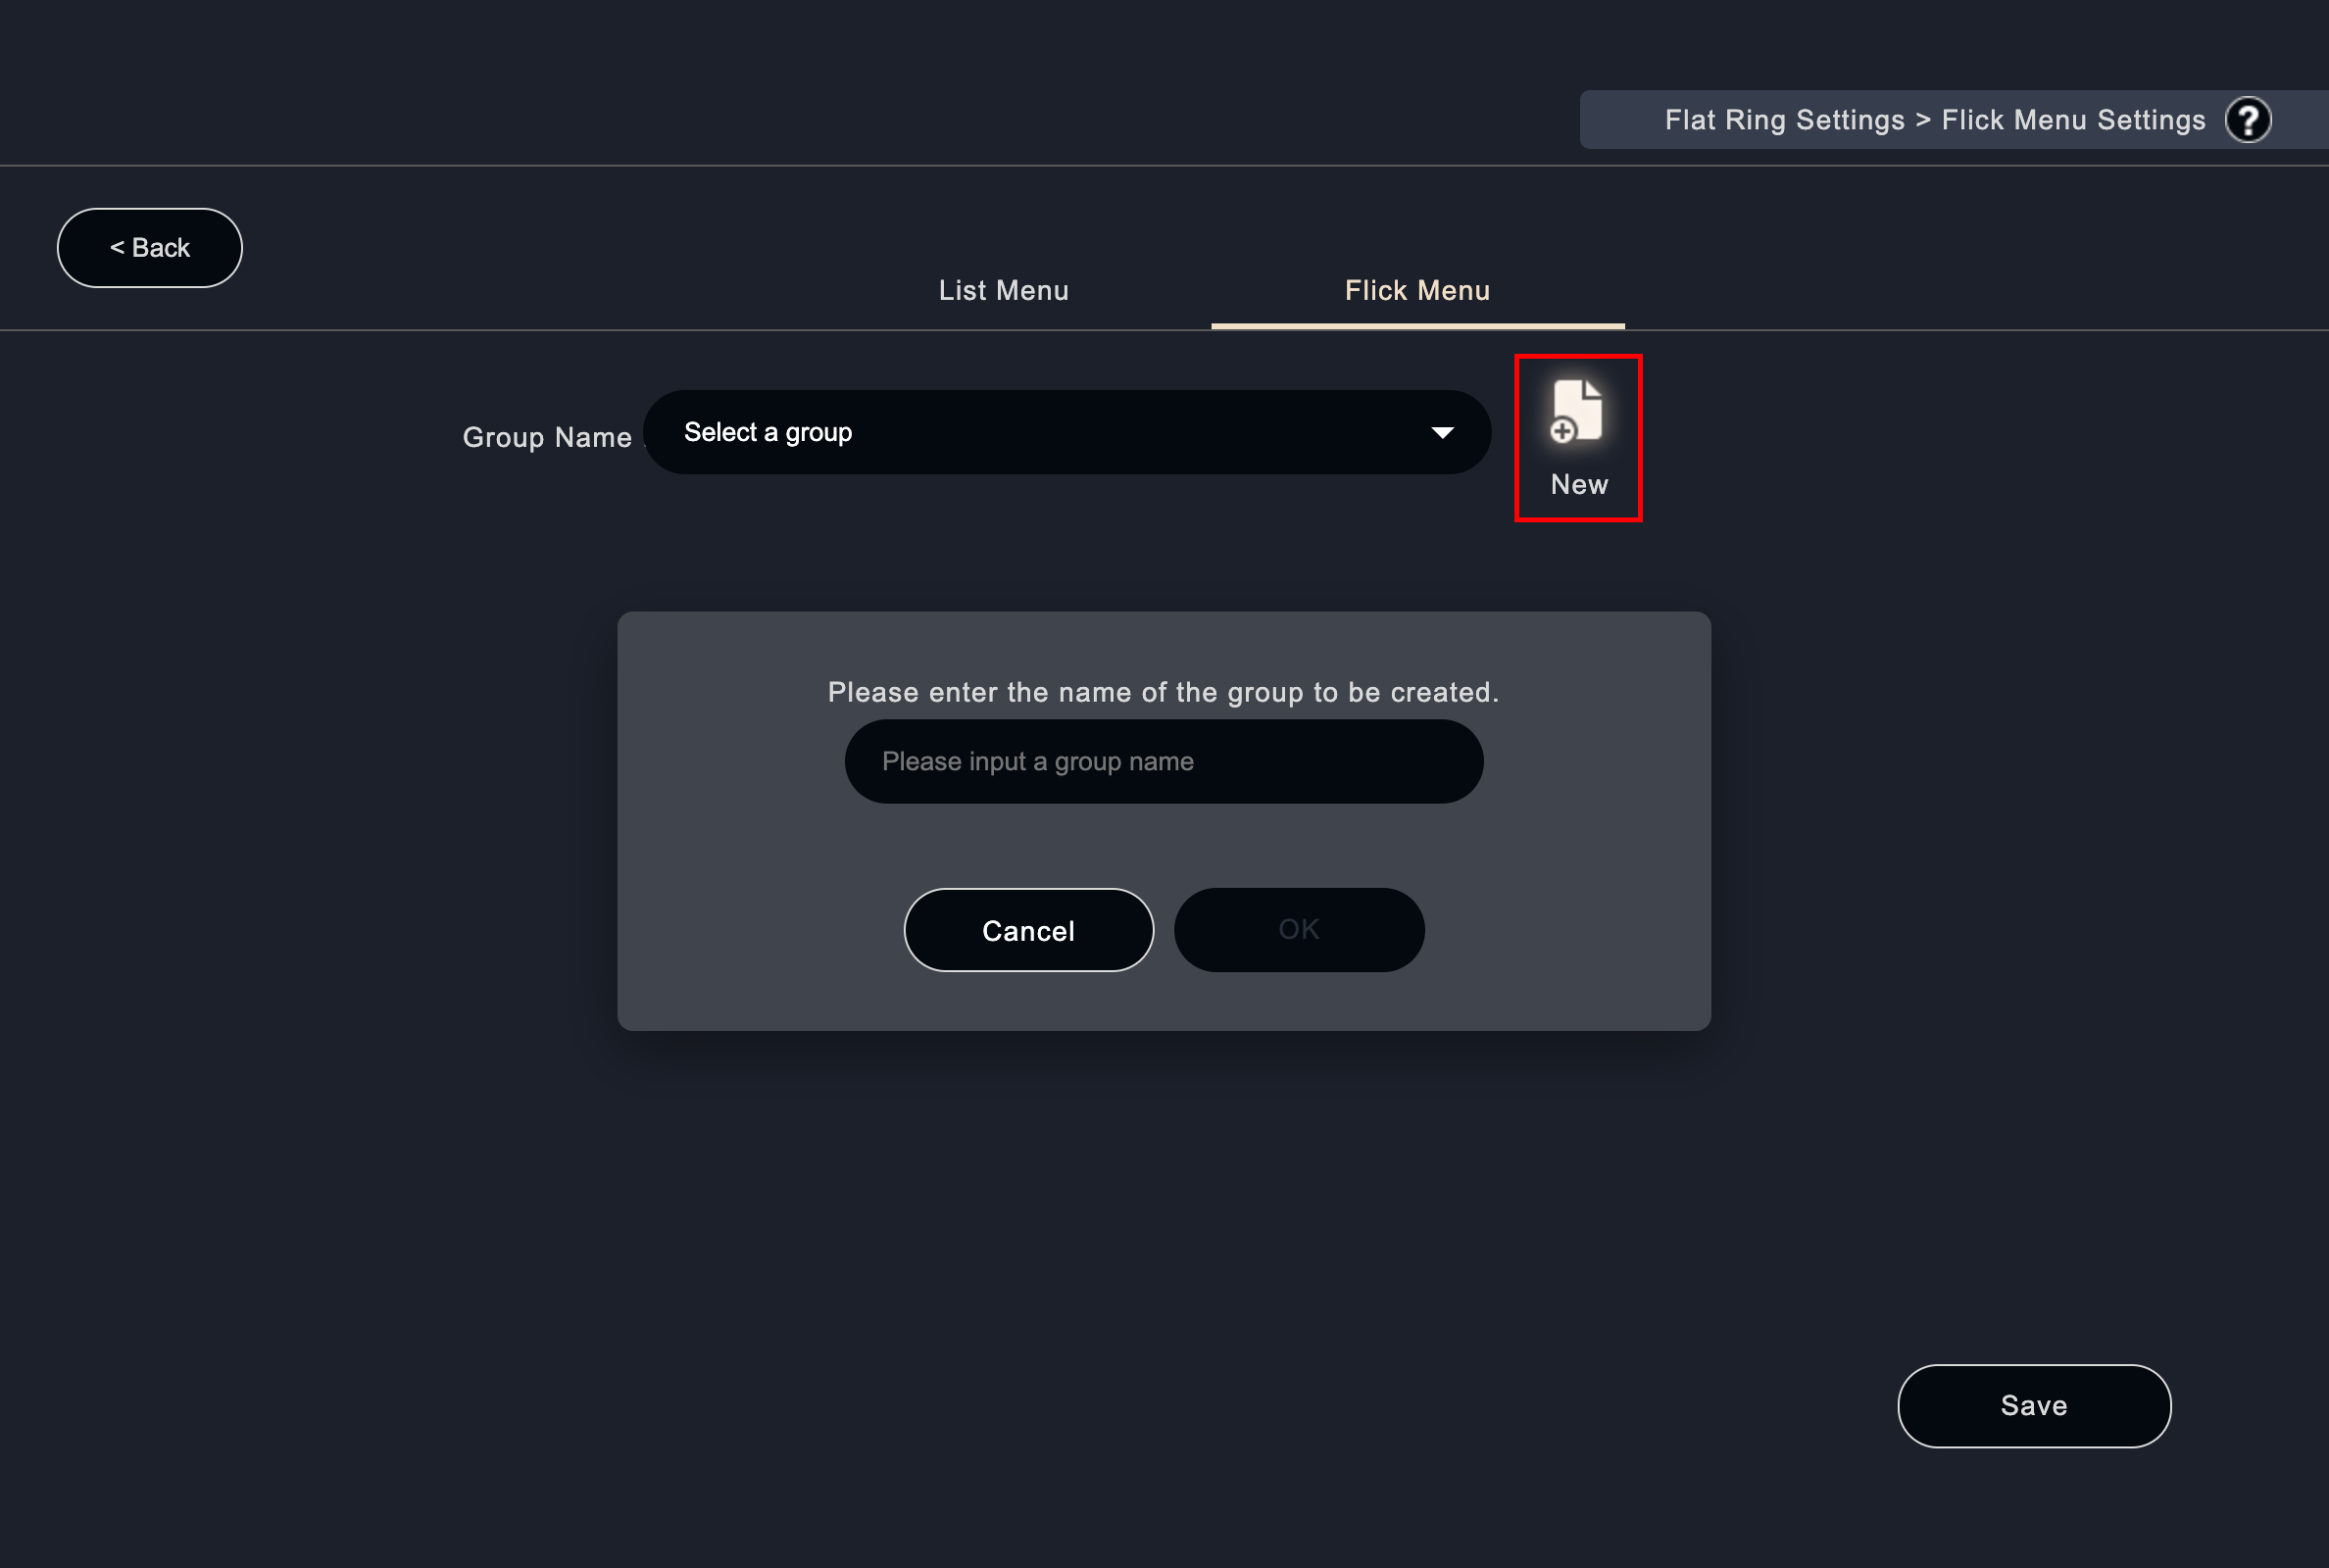
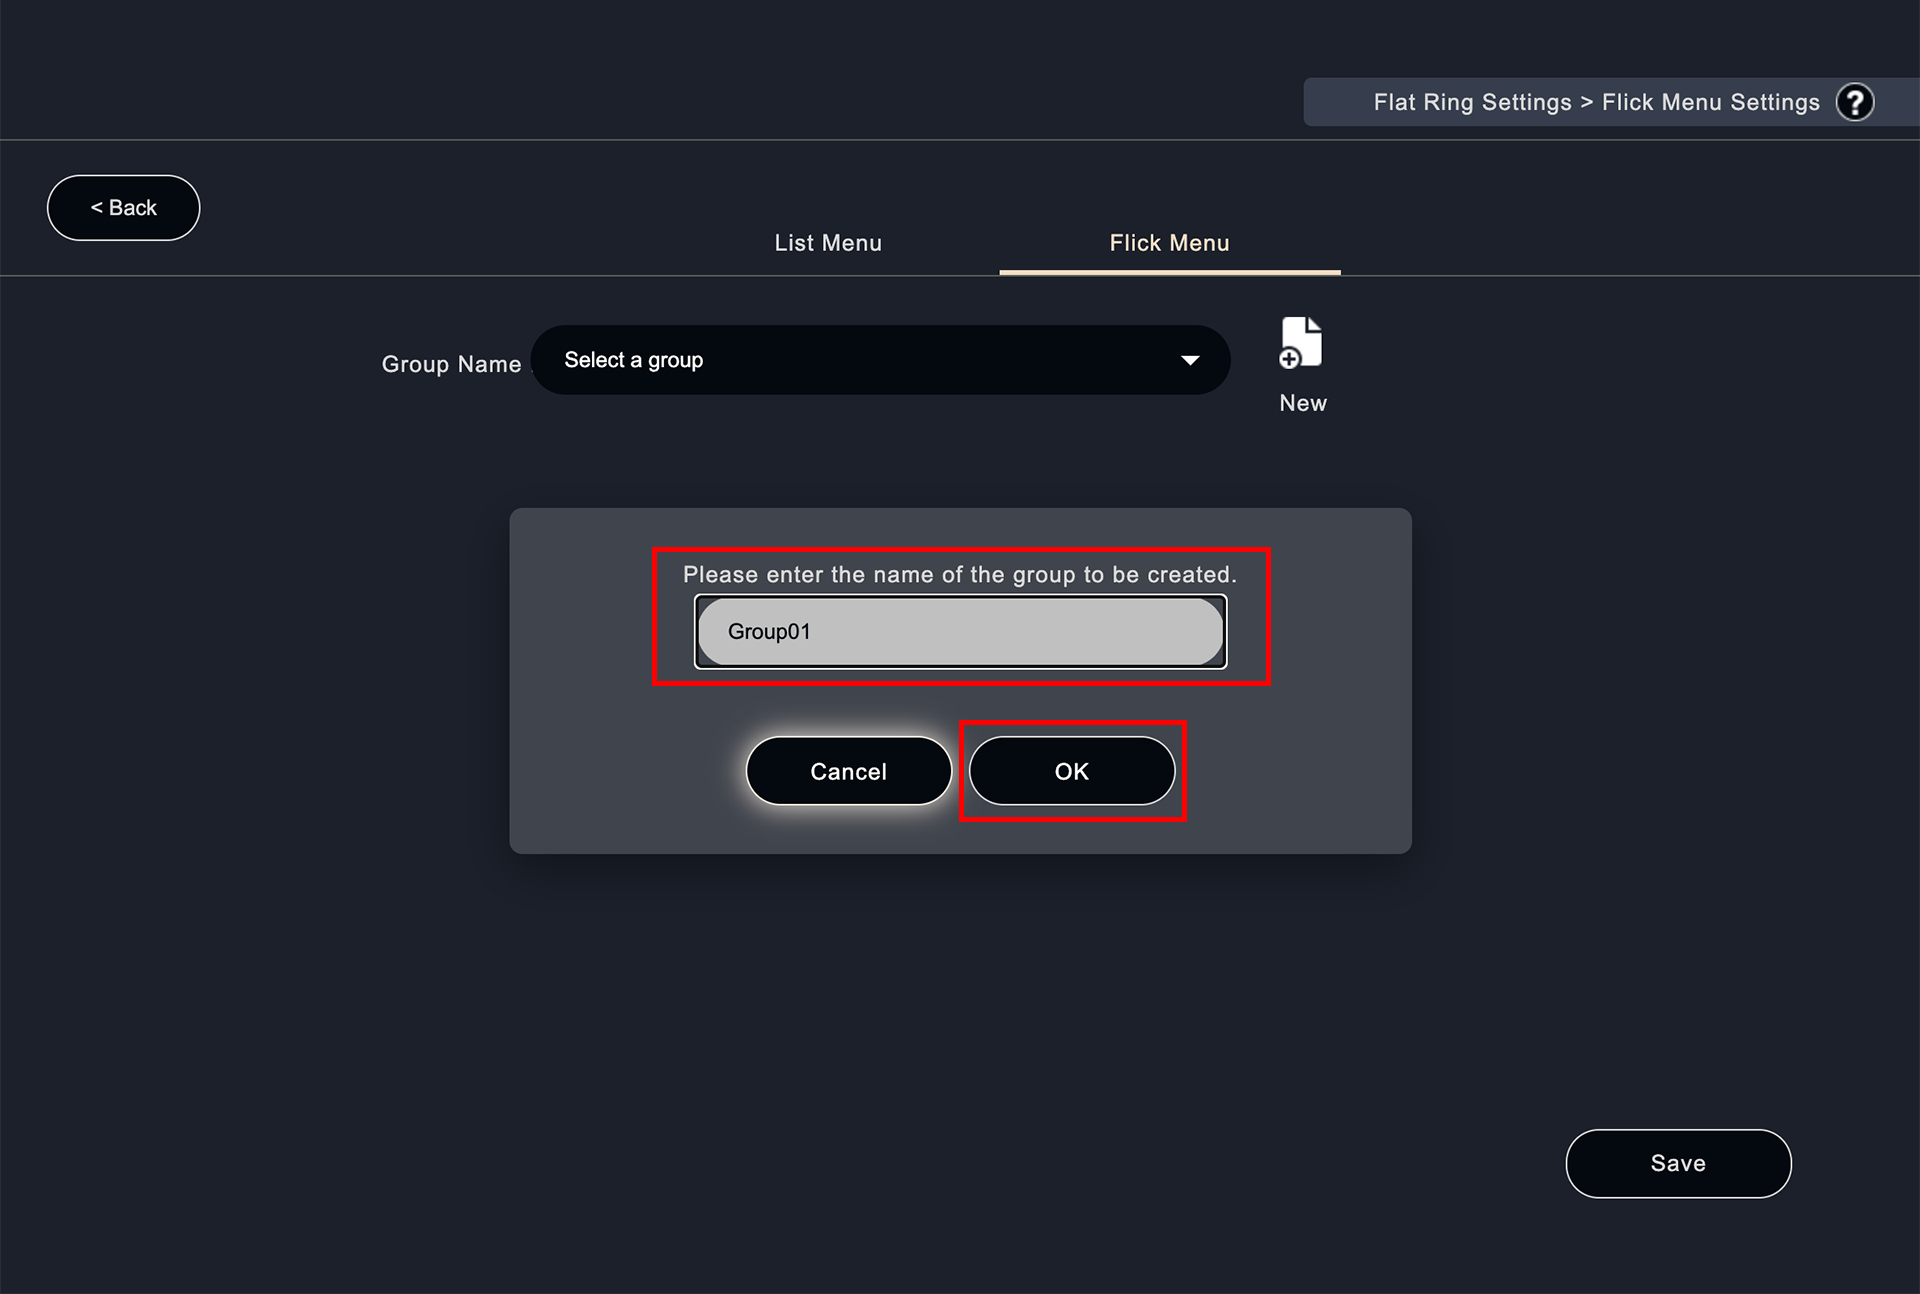
Click on " New " to create a group.
Set the name of the group you want to create. Click "OK" after setting.
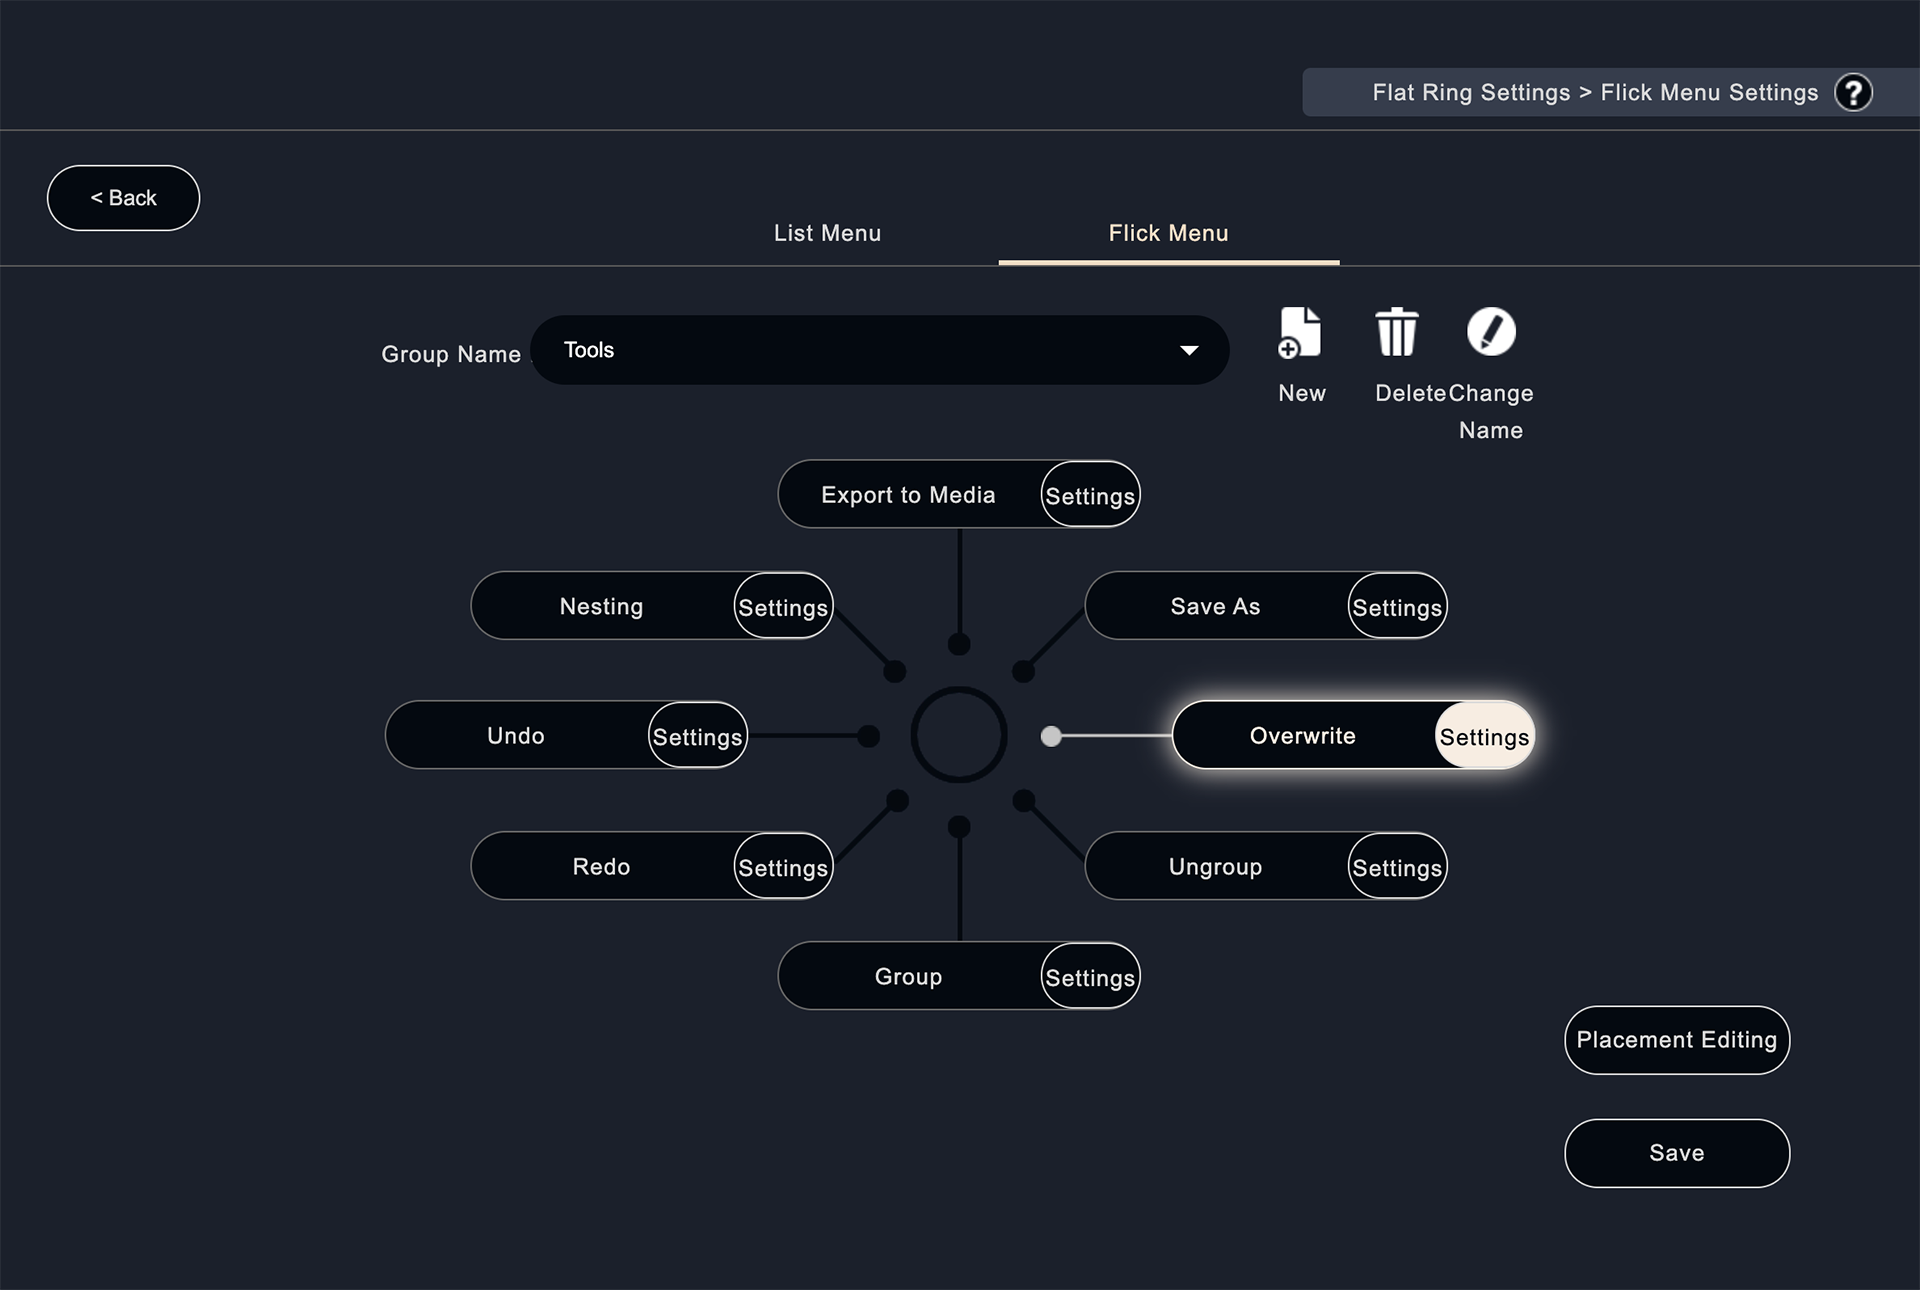
Click to set a function for each direction in the flick menu and call it up with a mouse movement.
Click on the direction you want to assign.
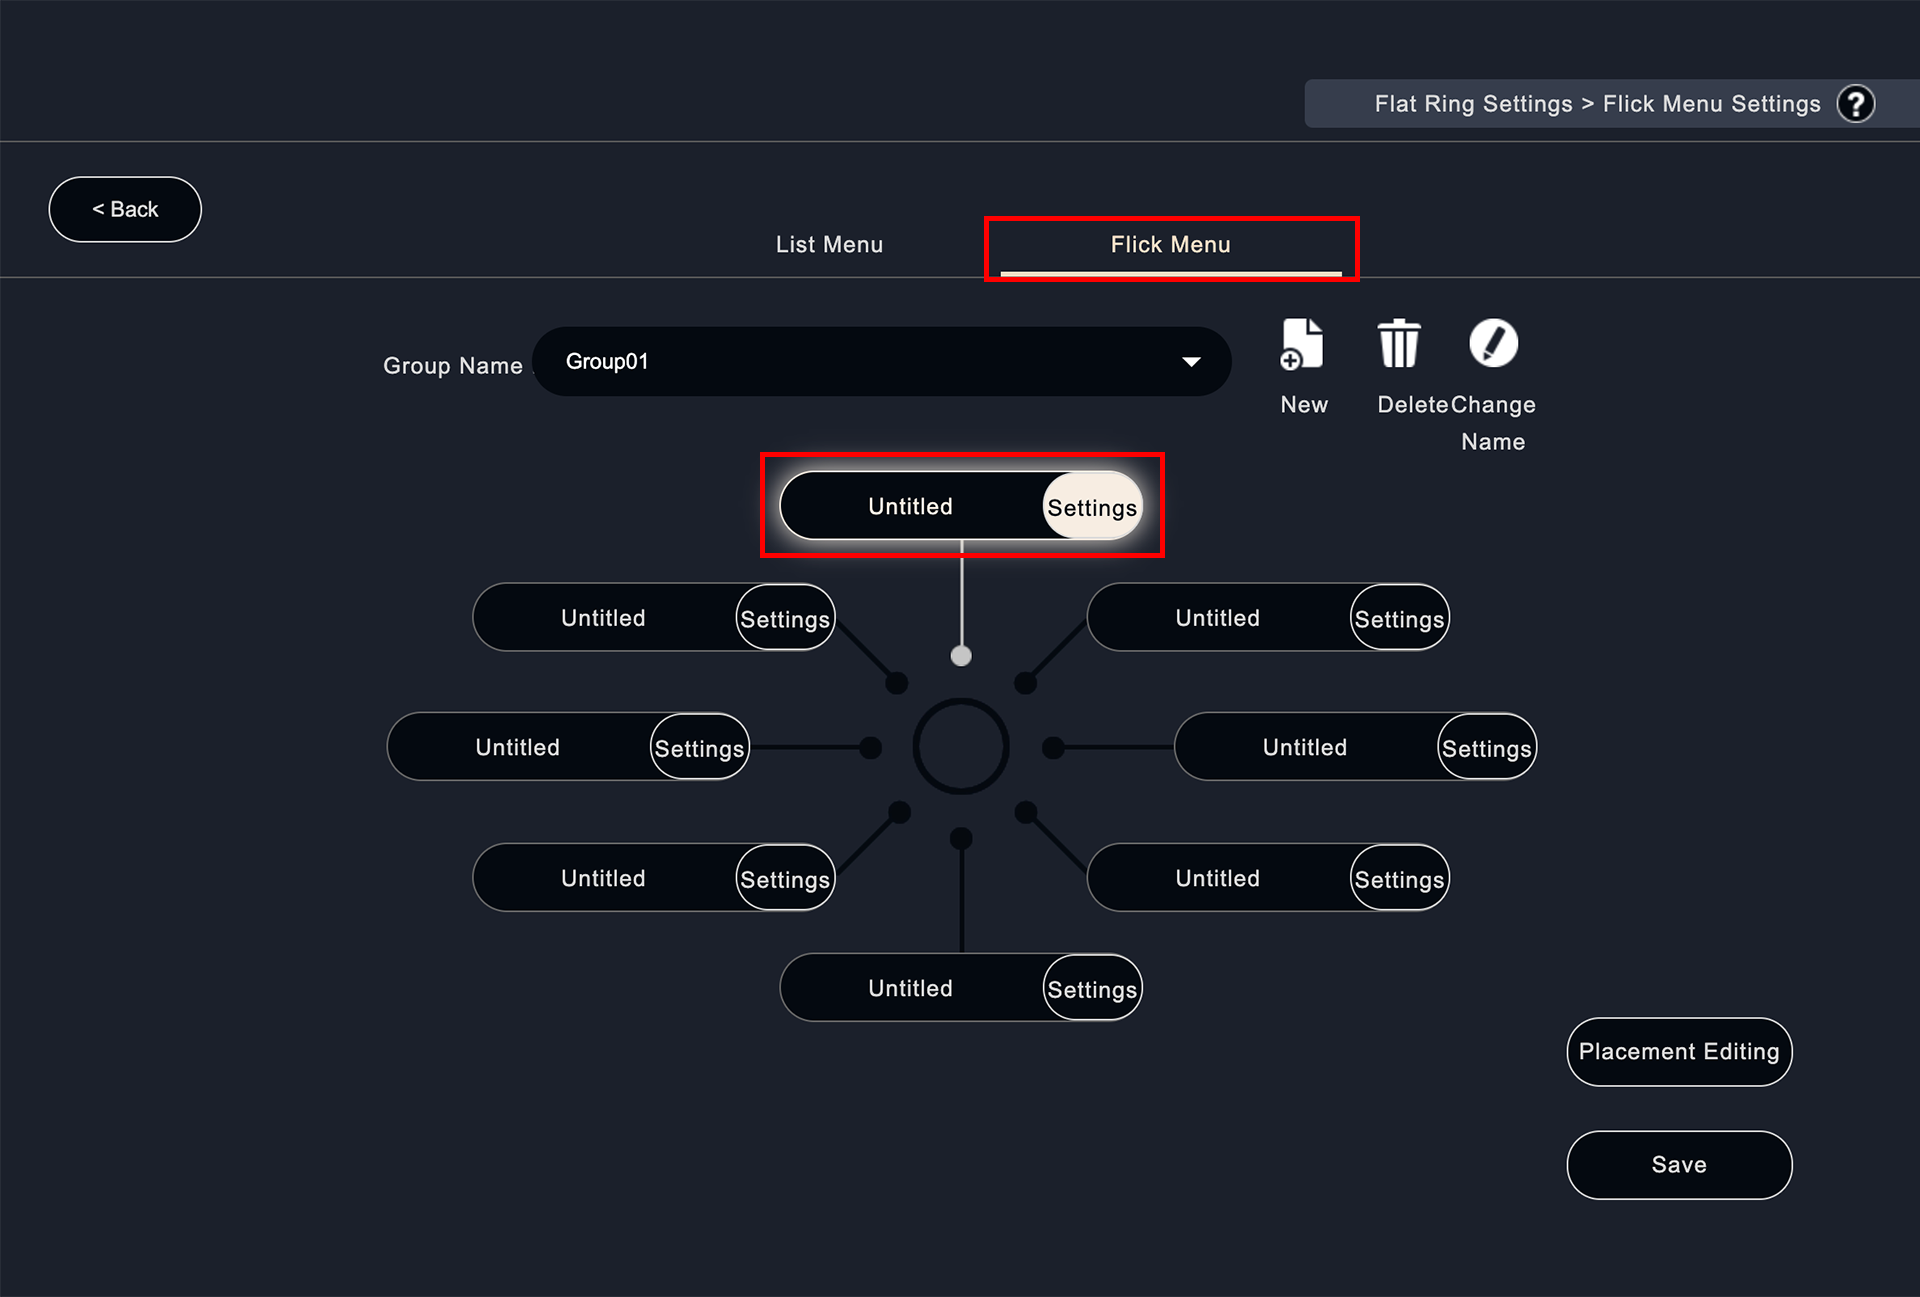
The input form will be activated.
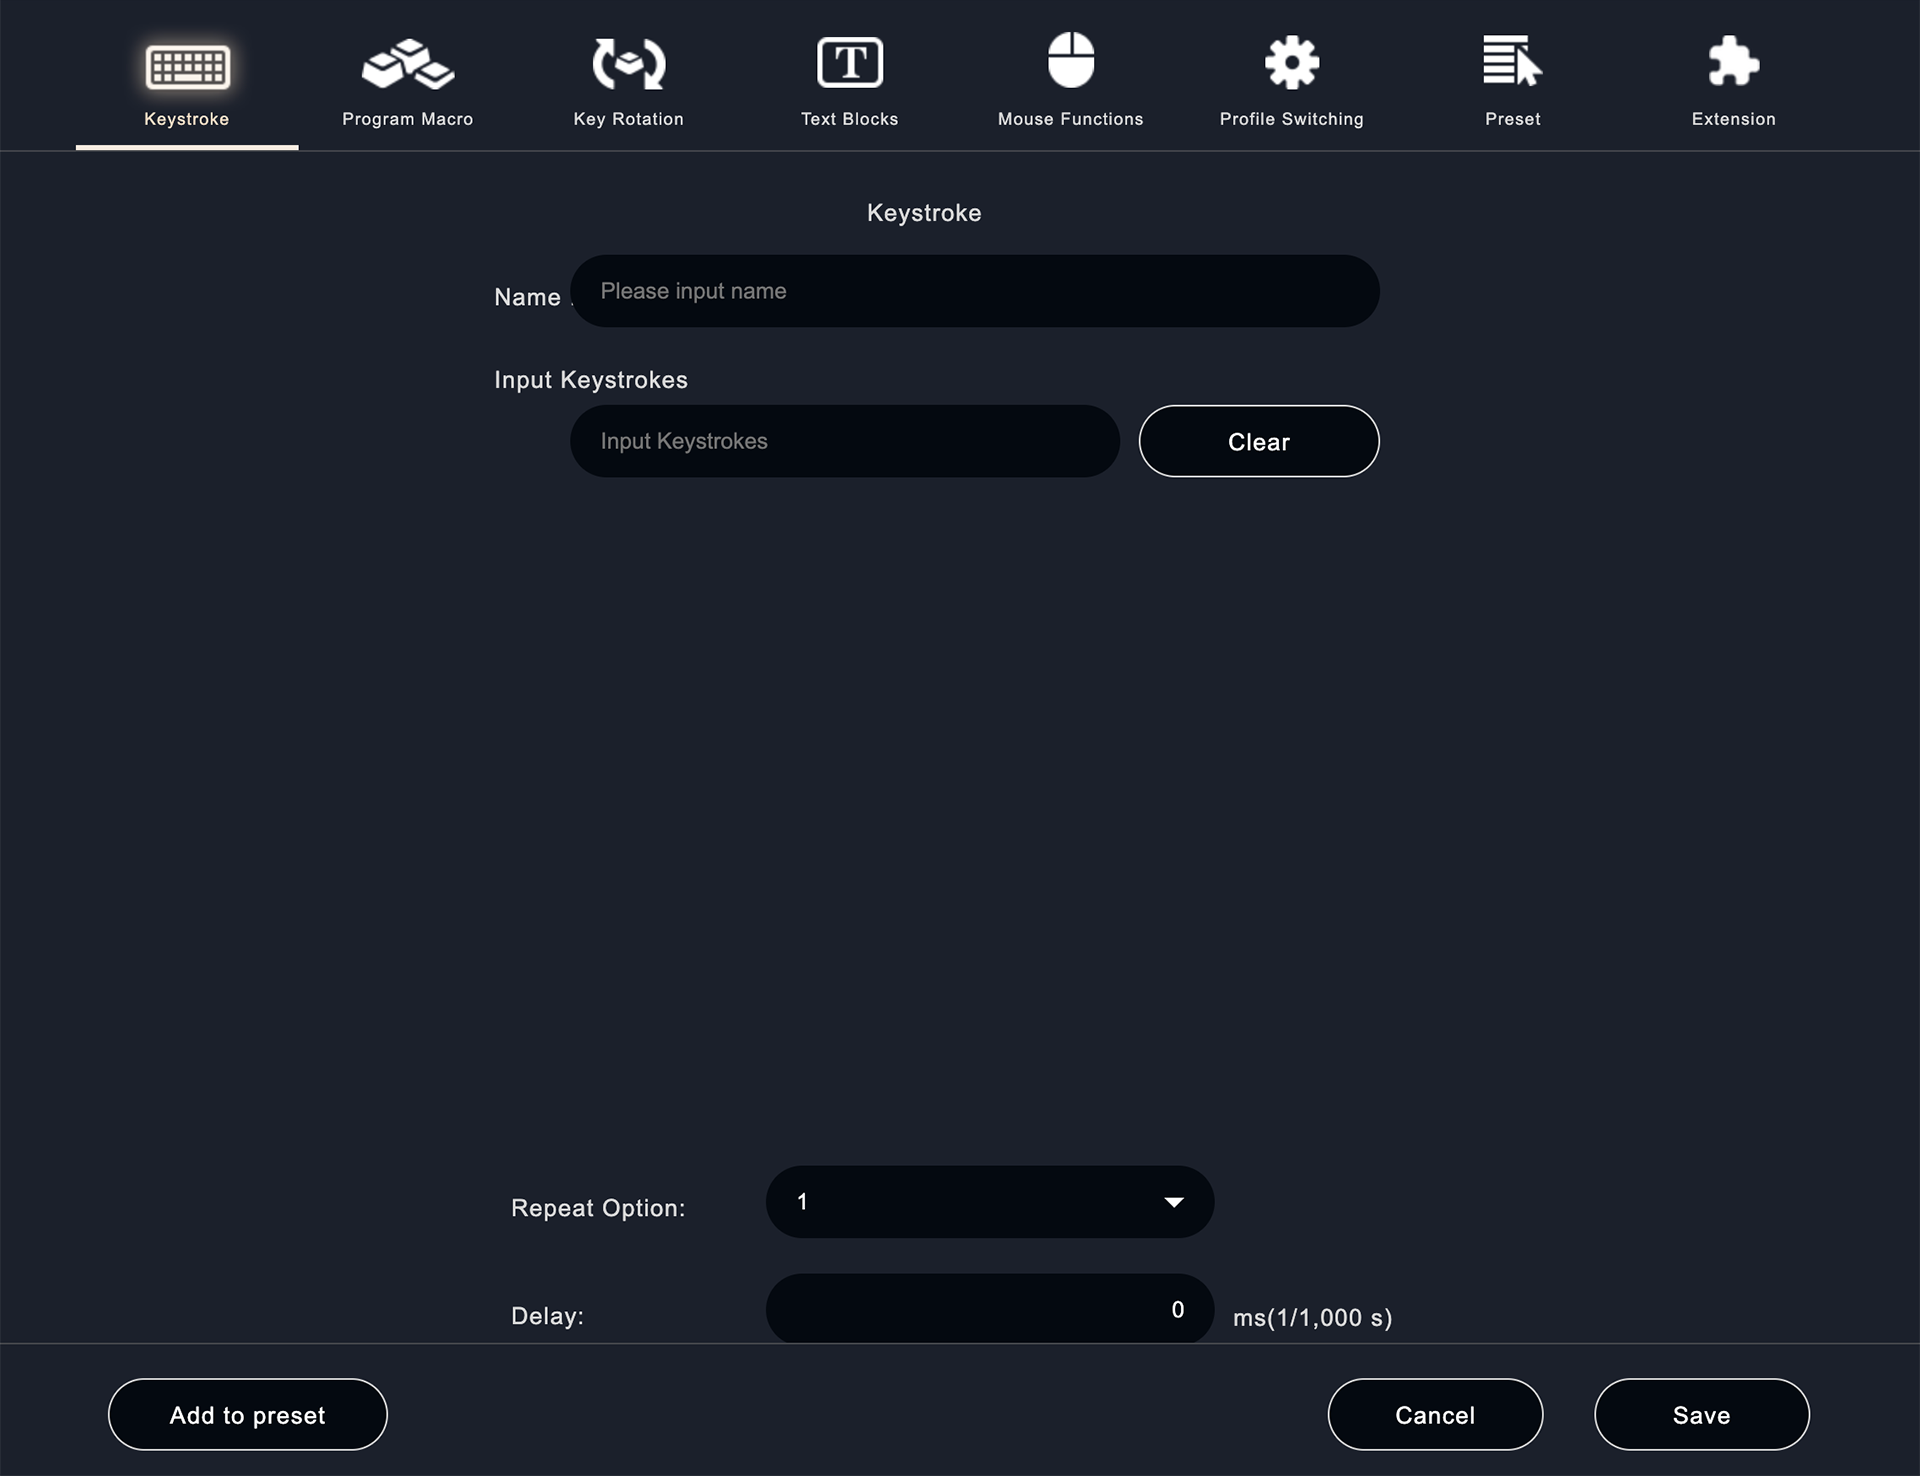
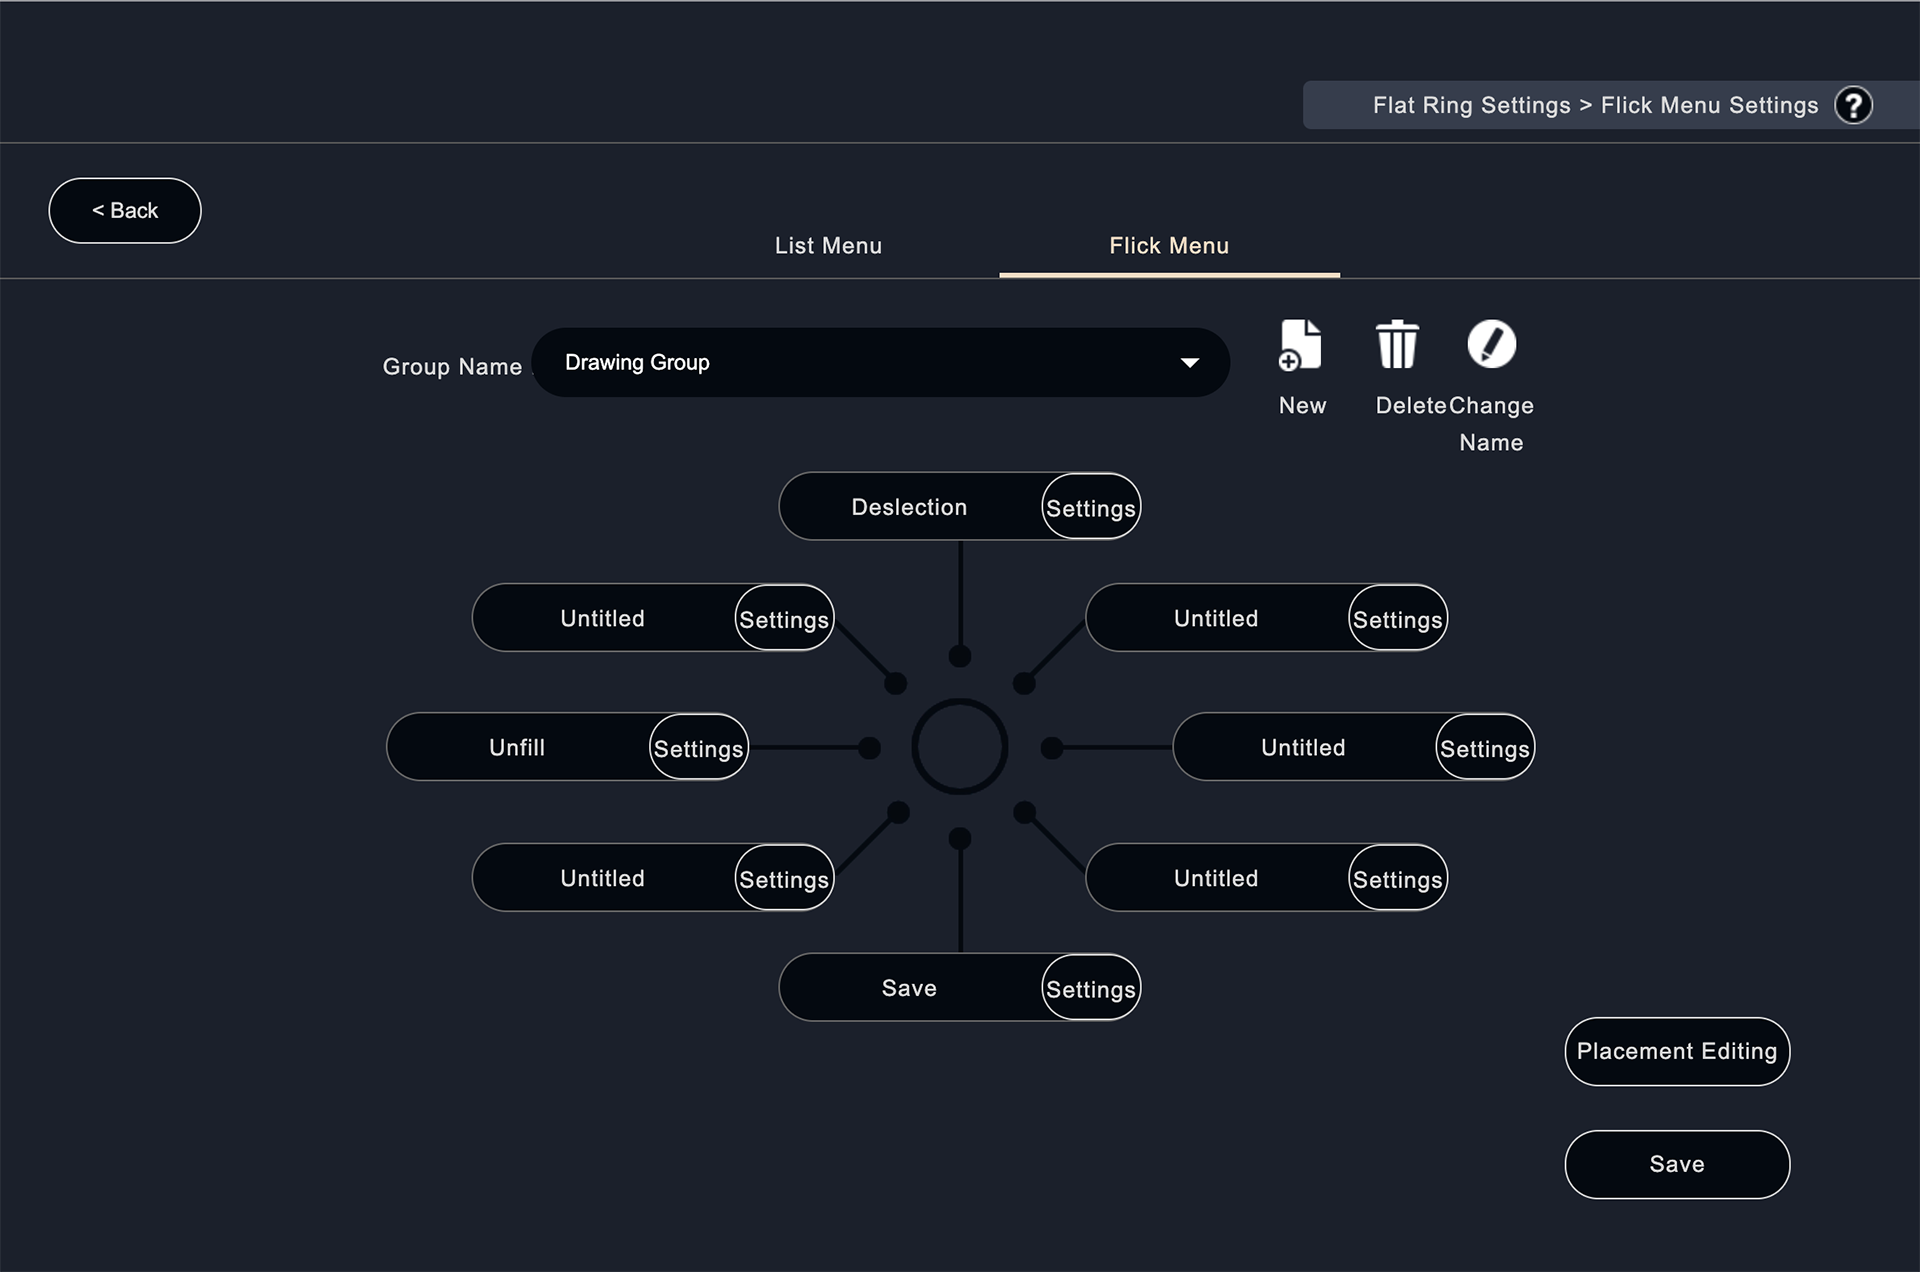
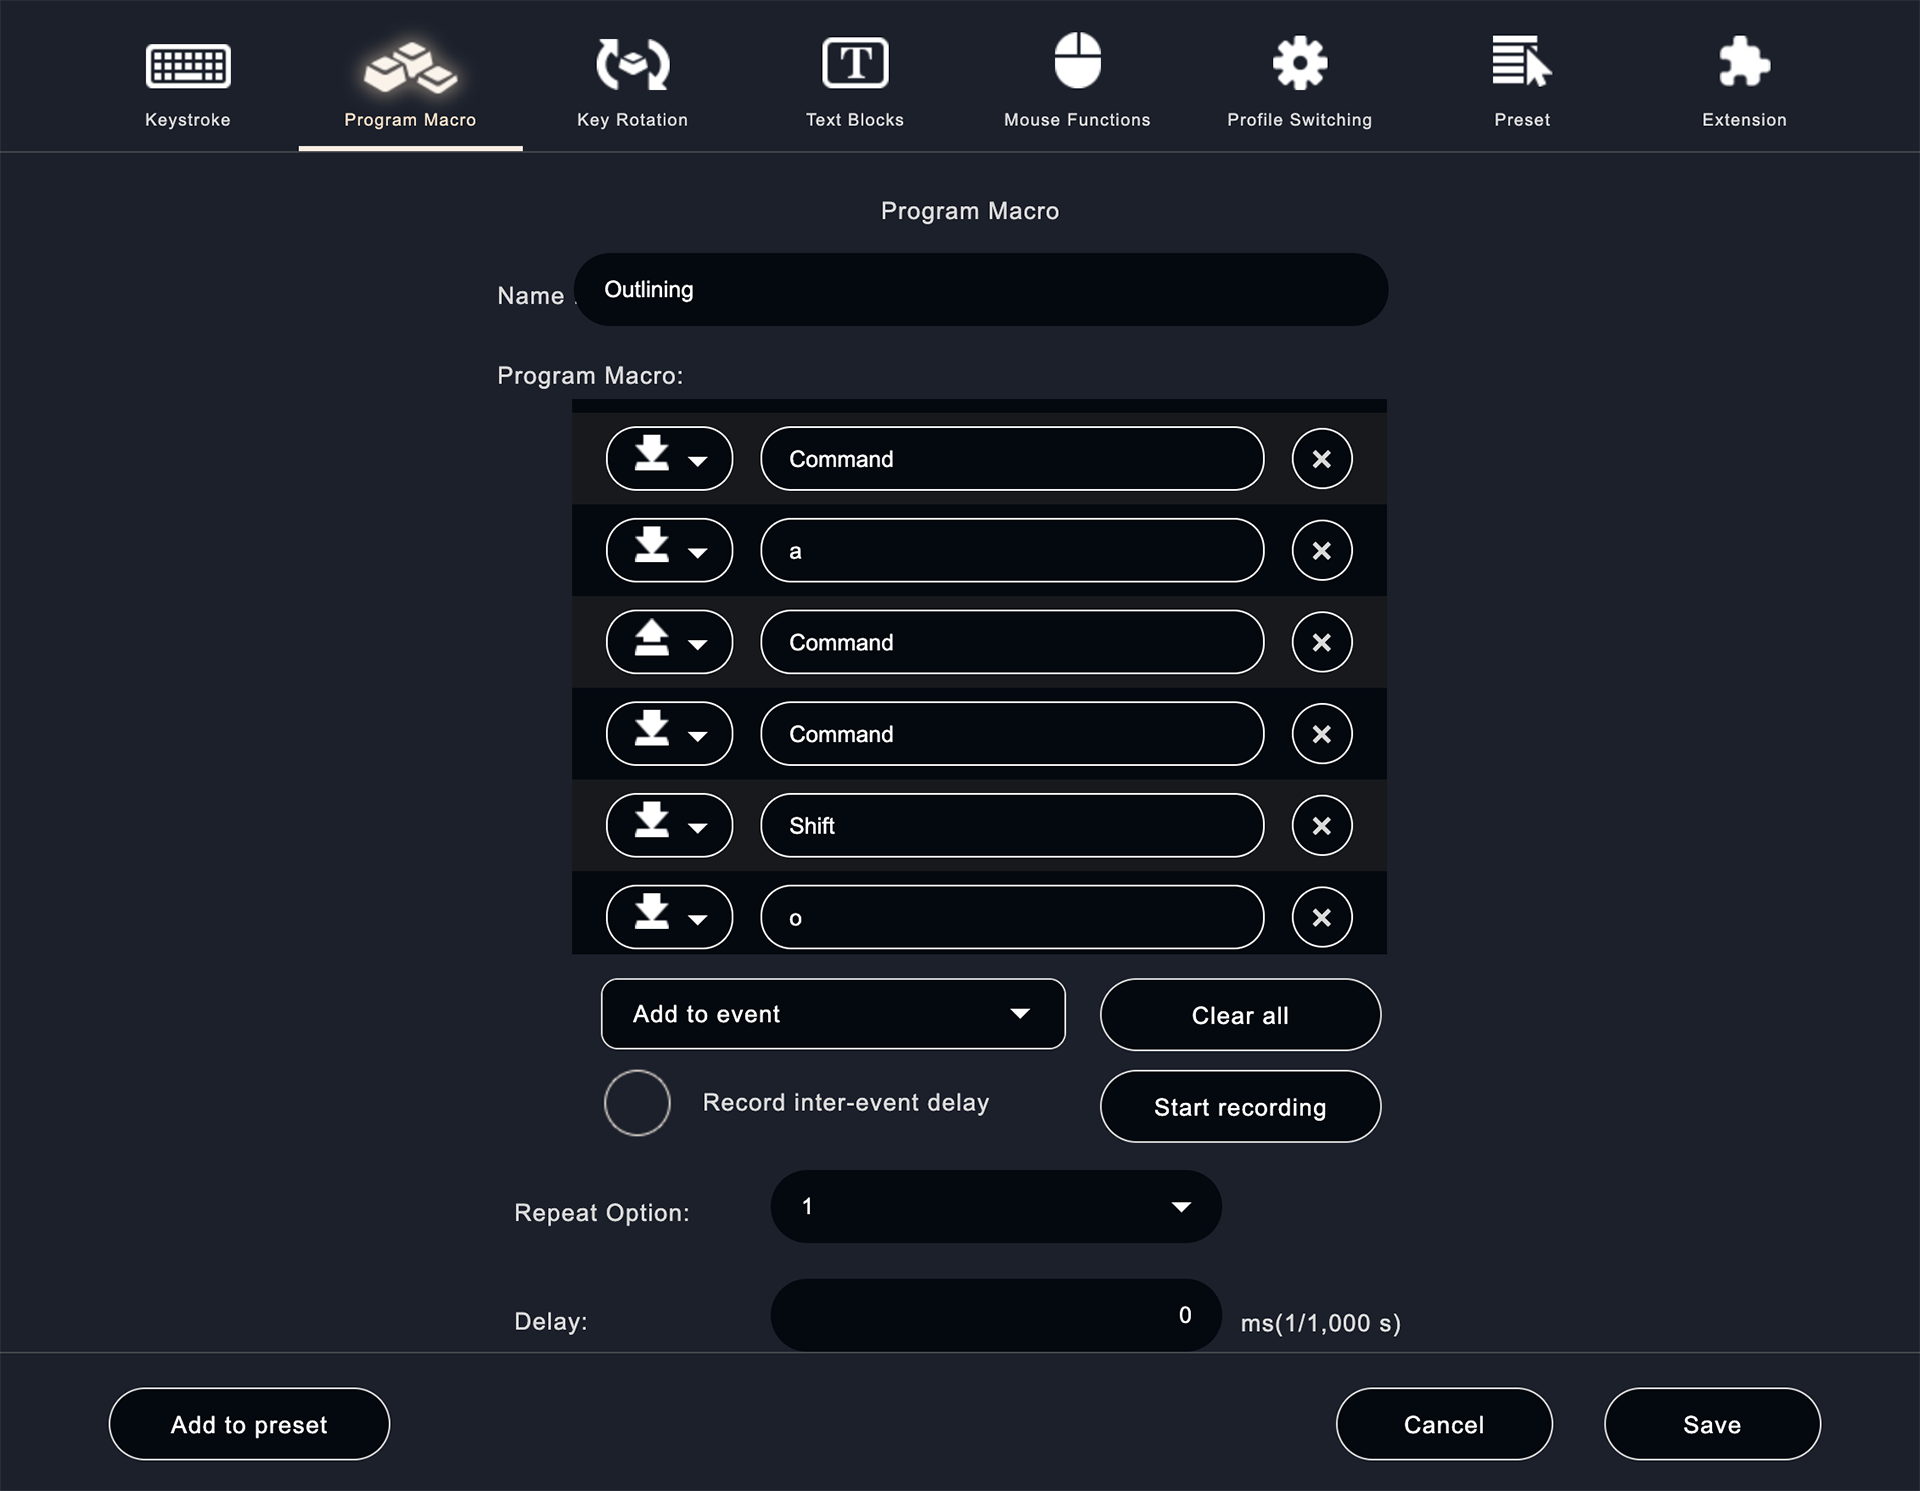
Assign the name of the function you want to assign to the "Name" field and the shortcut key to the "Input keystrokes" field. Make sure that the cursor is in focus when filling in the fields. After completing the settings, click "Save". You can now set up a keystroke profile for the flat ring.

・Fill
・Select
・Deselect
・Color correction
You can improve the efficiency of your work by putting two-step operations, such as fill selection, deselect selection, and color correction (Ctrl+U), into the flick menu.
It is also recommended to use the "Program Macro" function, which allows you to perform a series of operations such as select, fill, and deselect in a single action.
・Brush
・Pencil
・Real G Pen
・Color mixing
・Eraser
By registering brushes that you use frequently, you can quickly switch to a different texture by simply moving the pen on the screen when you want to use a different brush.

・Opacity
・Rotation
・Scale
・Position
By setting the above, especially the ones you use frequently, you can call them up quickly. Another advantage is that you don't have to remember the shortcut keys.
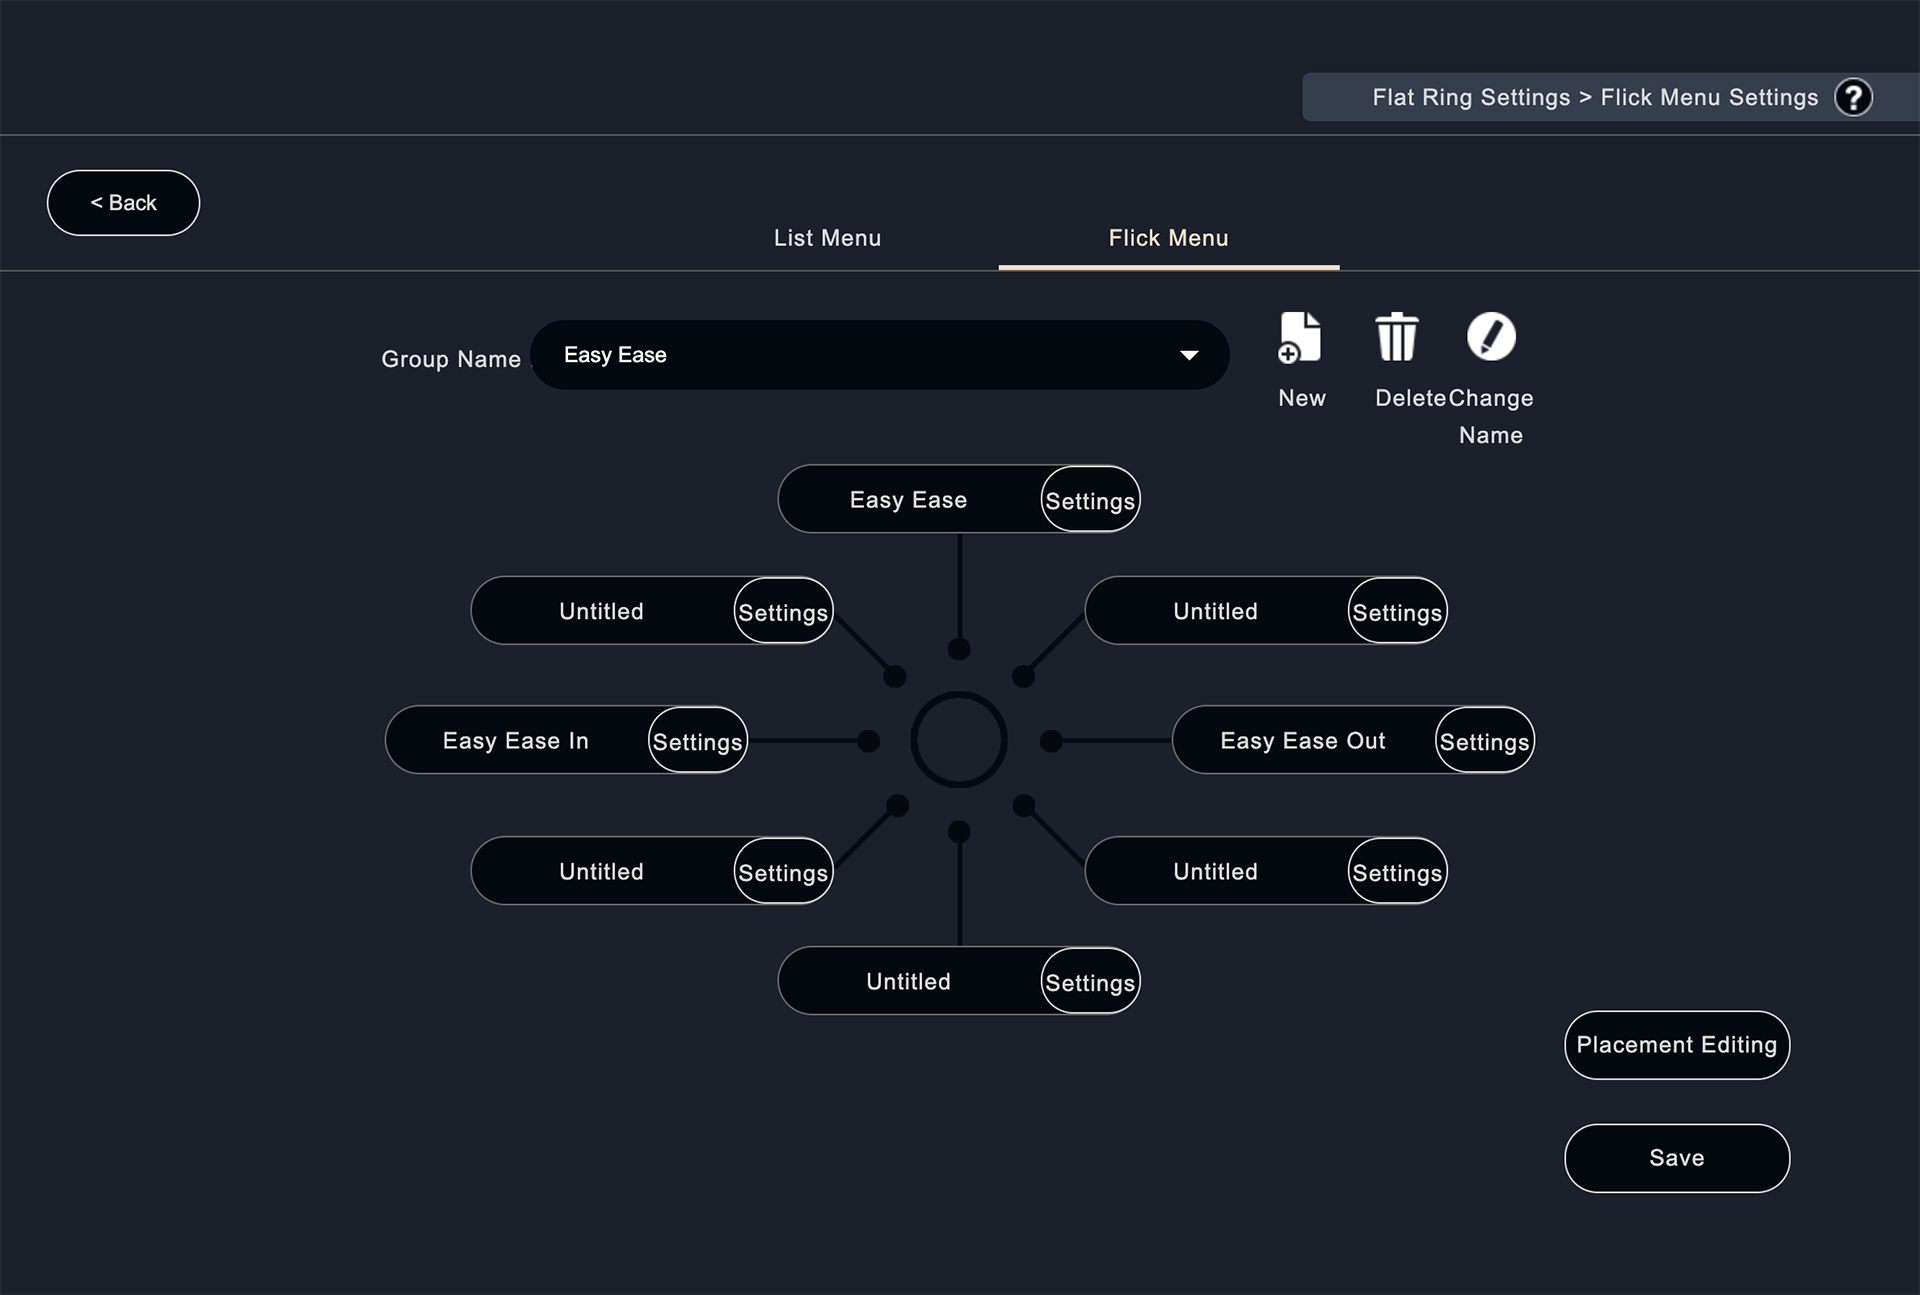
・Easy Ease In
・Easy Ease Out
By setting up other shortcut keys as above, you can, for example, hit two opacity keyframes, select a keyframe, and immediately attach it by flicking the cursor in the direction of the "Ease In" or "Ease Out" you want to execute.
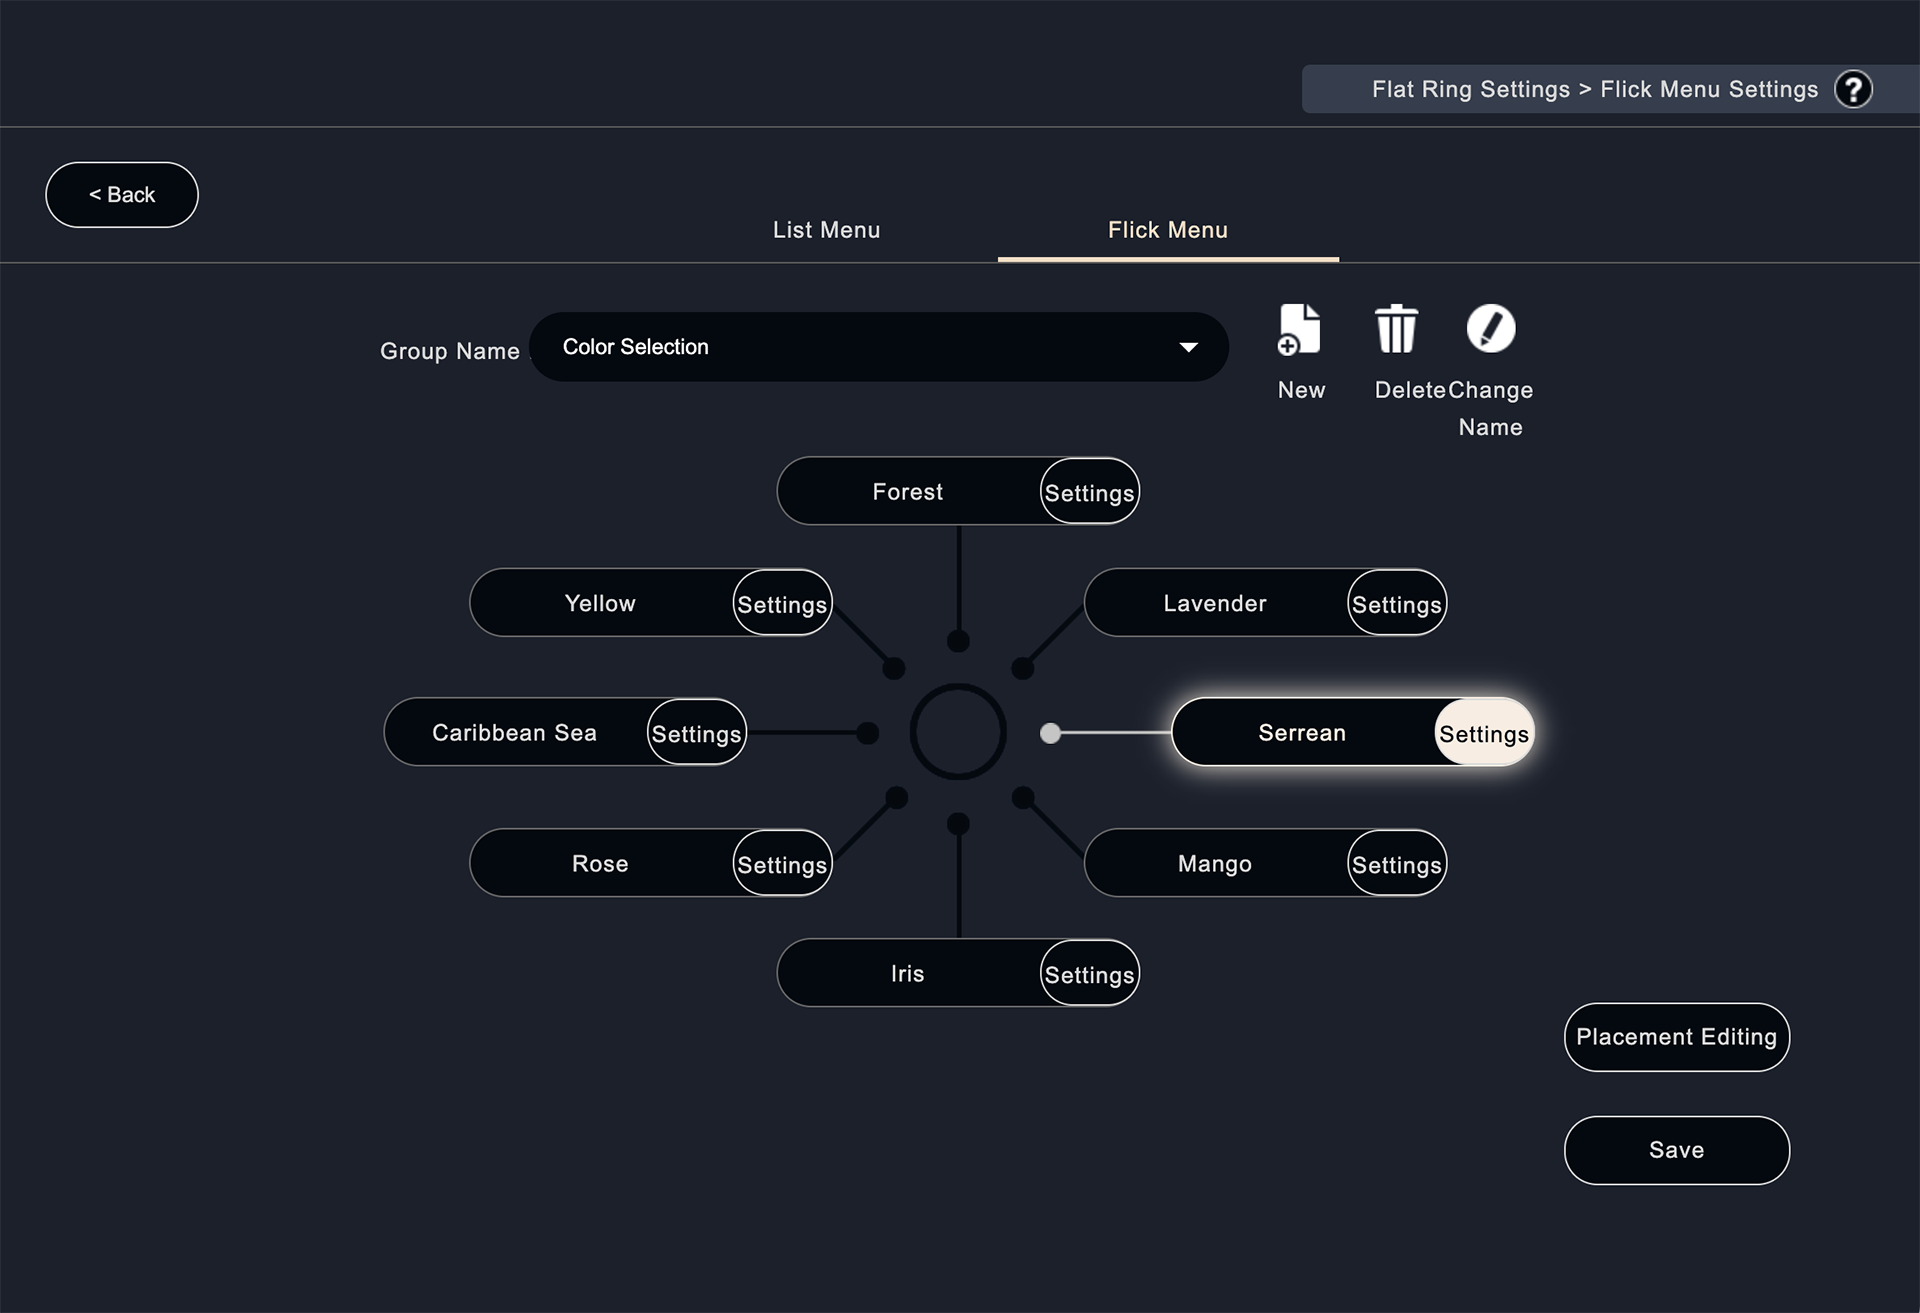
・Color Selection (Set various colors)
When the cut is getting longer or there are more scenes, this function is used to indicate which scene is which by color. For example, when you consider several clips from a particular clip as one scene, press the "Color Selection" switch to display the flick menu and make the clip colored.
・New text
You can easily create a message by setting it in the flick menu.
・Grouping
・Nesting
"Grouping" is used when you want to group multiple clips together, and "Nesting" is used when you want to combine multiple clips, text, sound, etc. into one clip.