Orbital Engine Settings【Orbital Engine Mode】
Orbital Engine Mode is a mode that allows you to execute continuous changes such as "Back and Forward" and "Zoom In and Out" in a stress-free and intuitive manner by tilting the joystick in eight directions and turning it left and right.
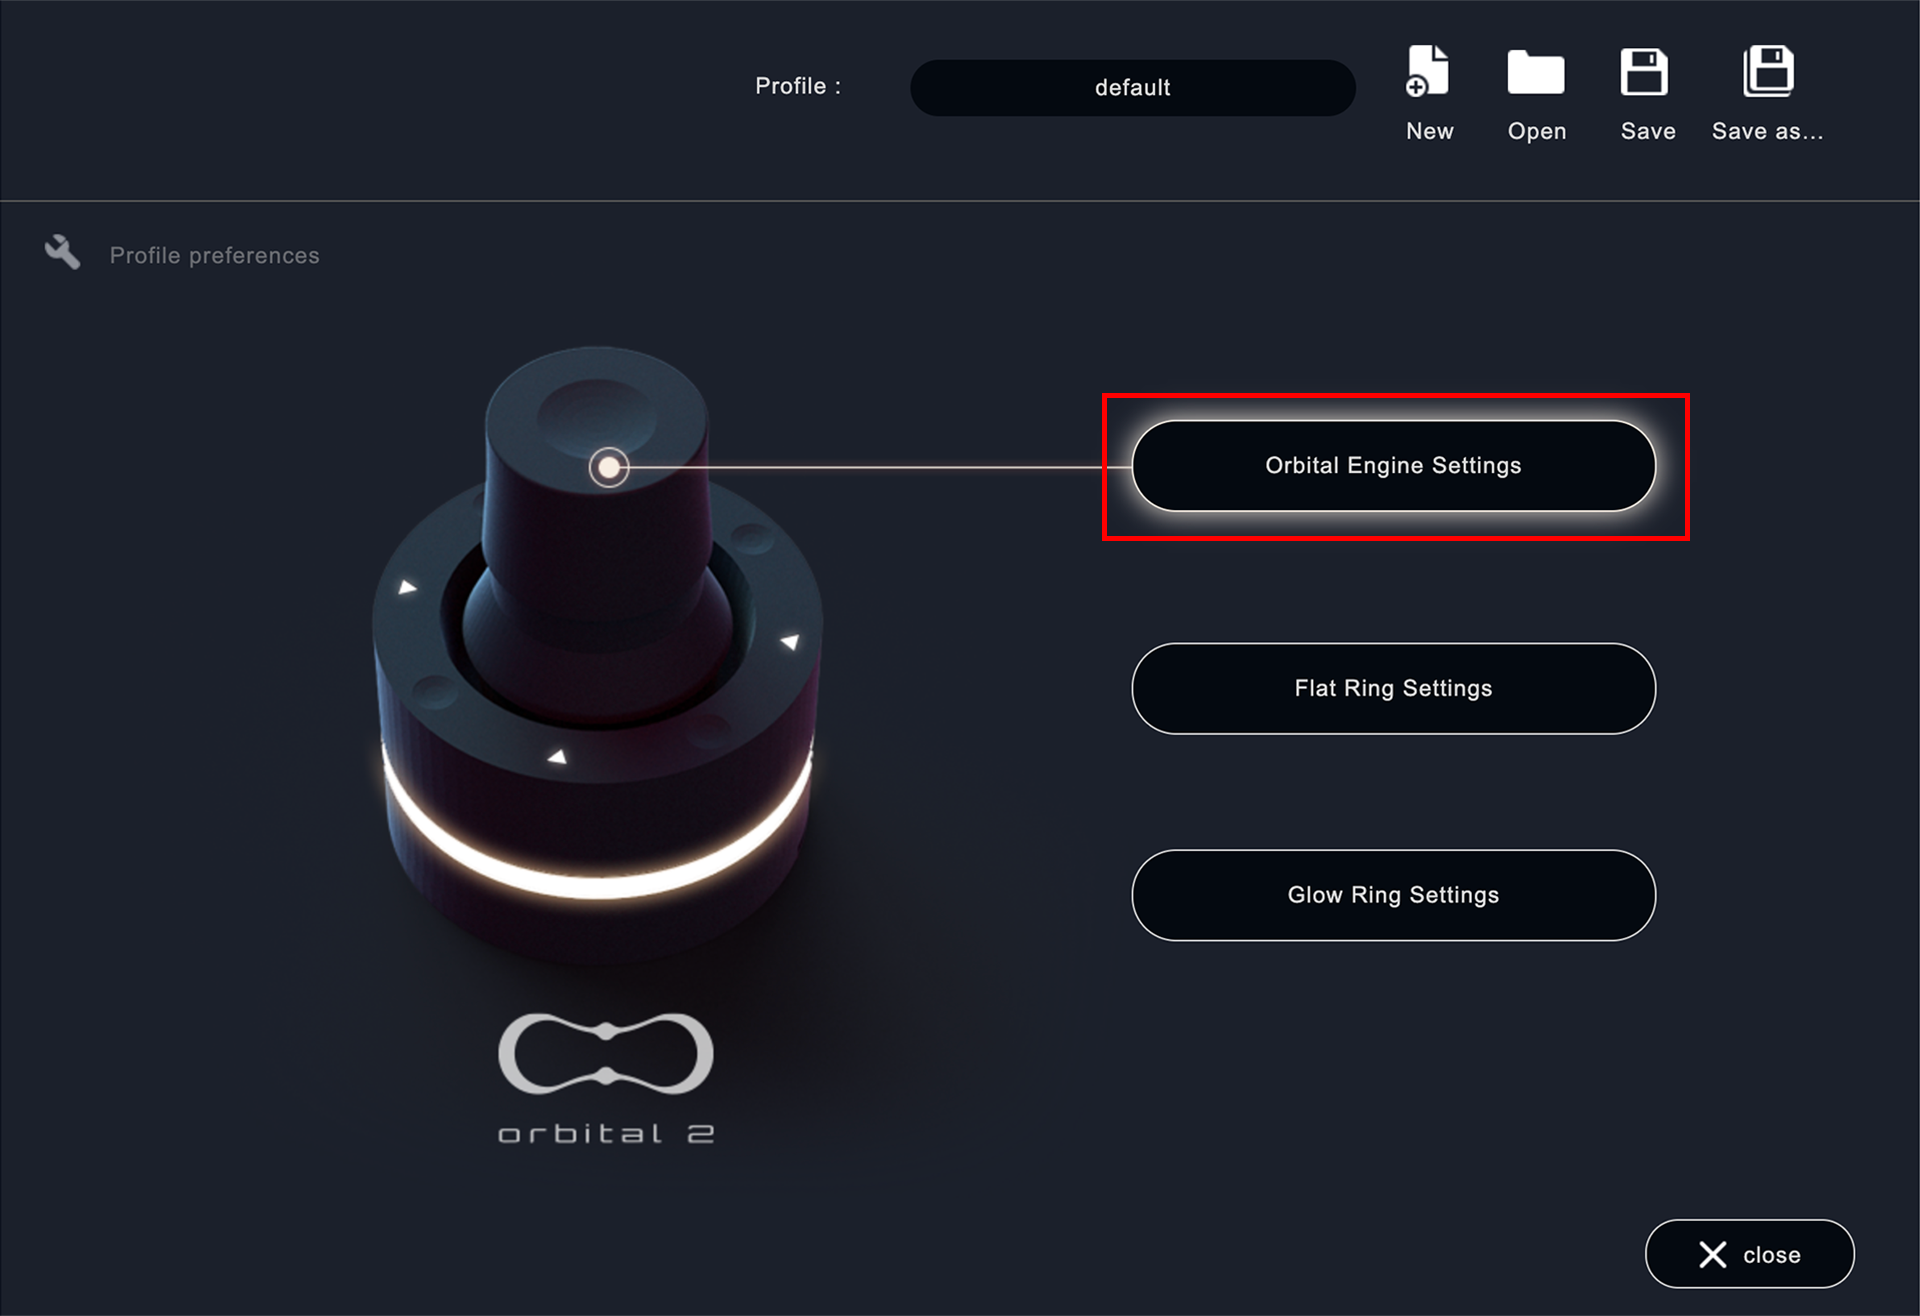
It can be set from "Orbital Engine Settings > Orbital Engine Mode Settings" in Orbital2 Core.
Vibrations can also be set when the joystick is tilted, providing a more intuitive operating experience.
click "Orbital Engine Settings".
You will move to the following screen.
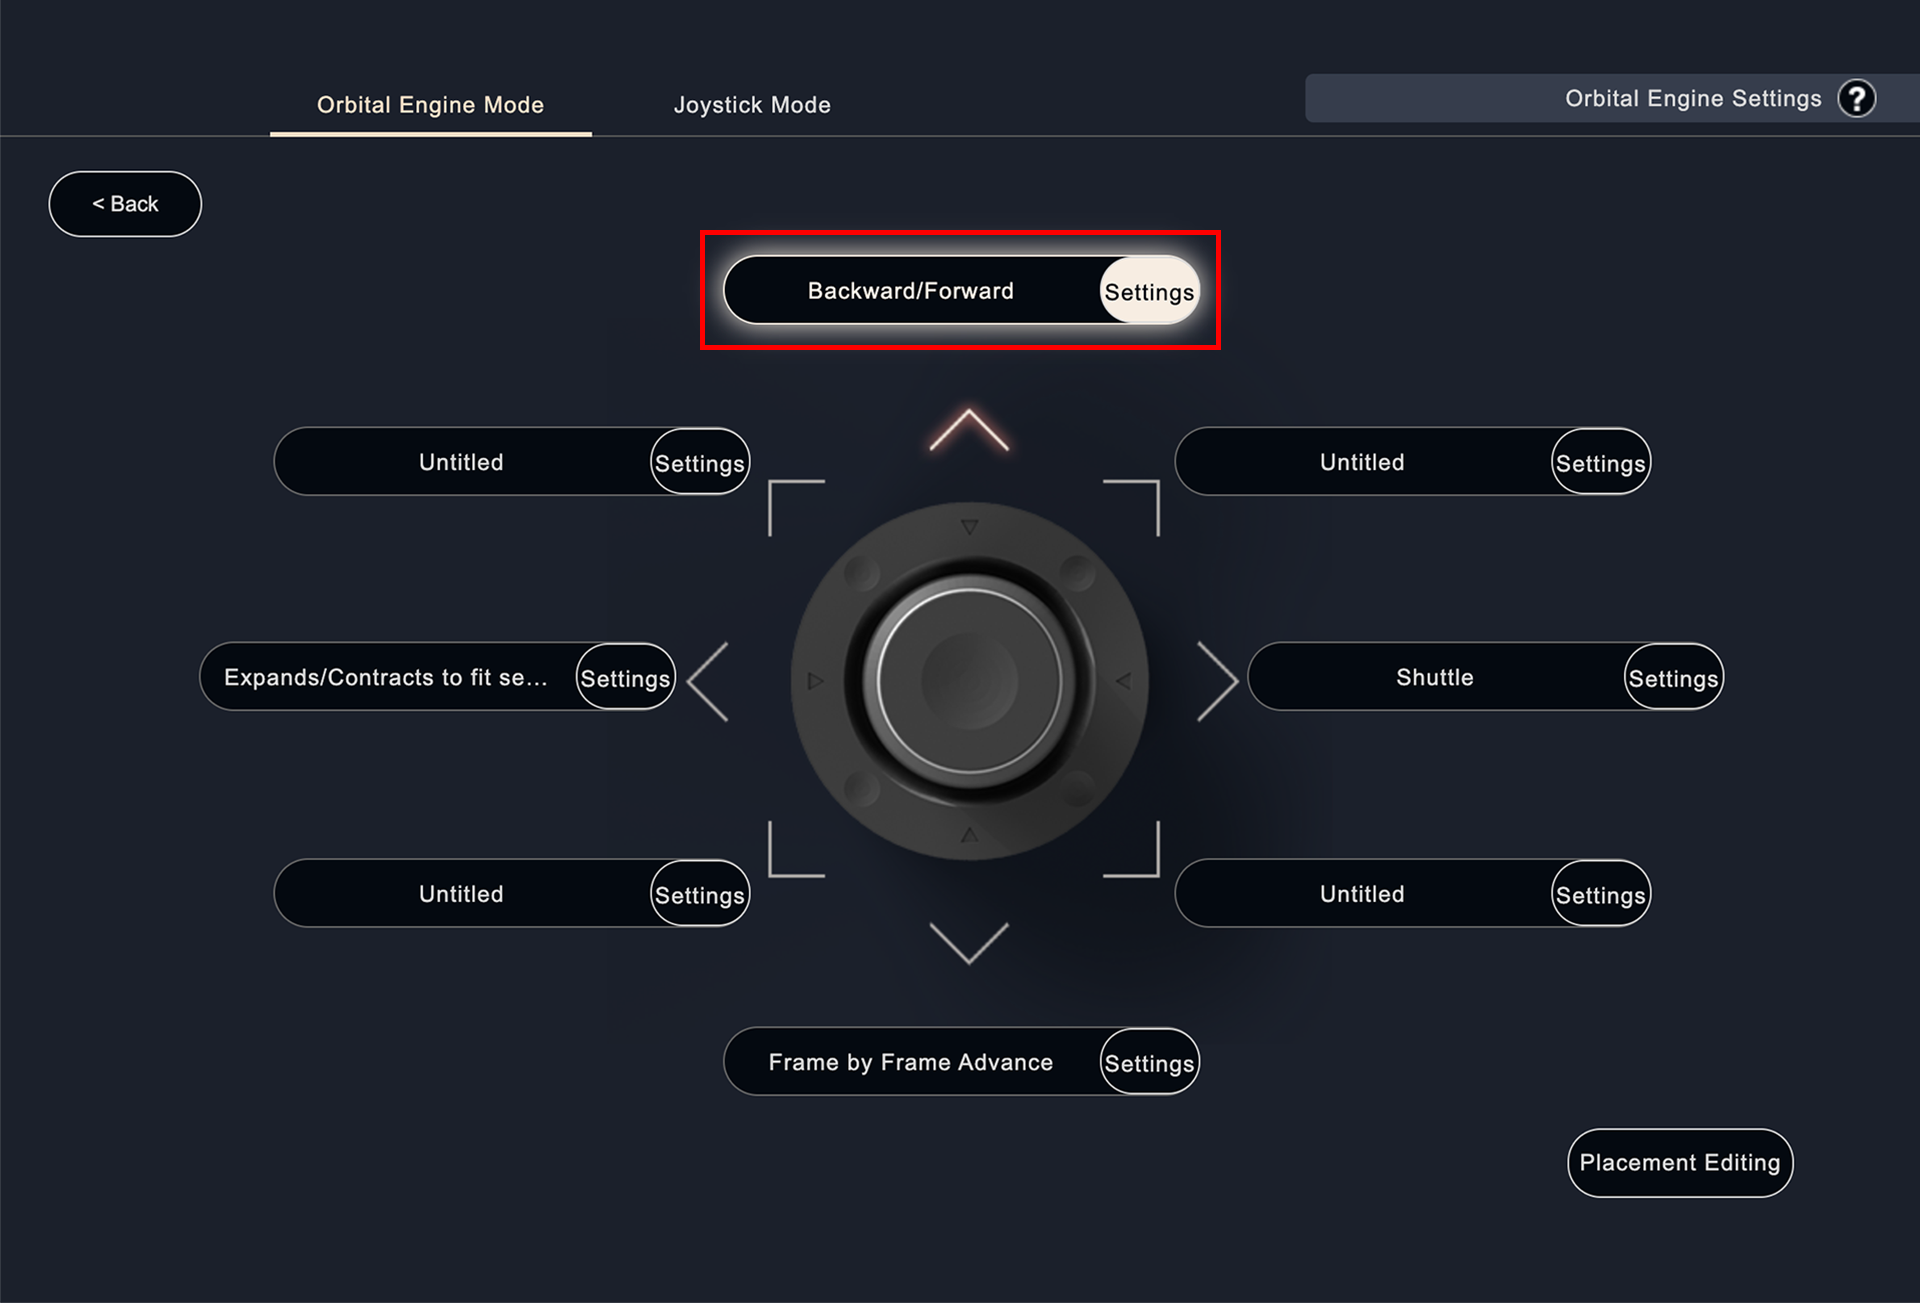
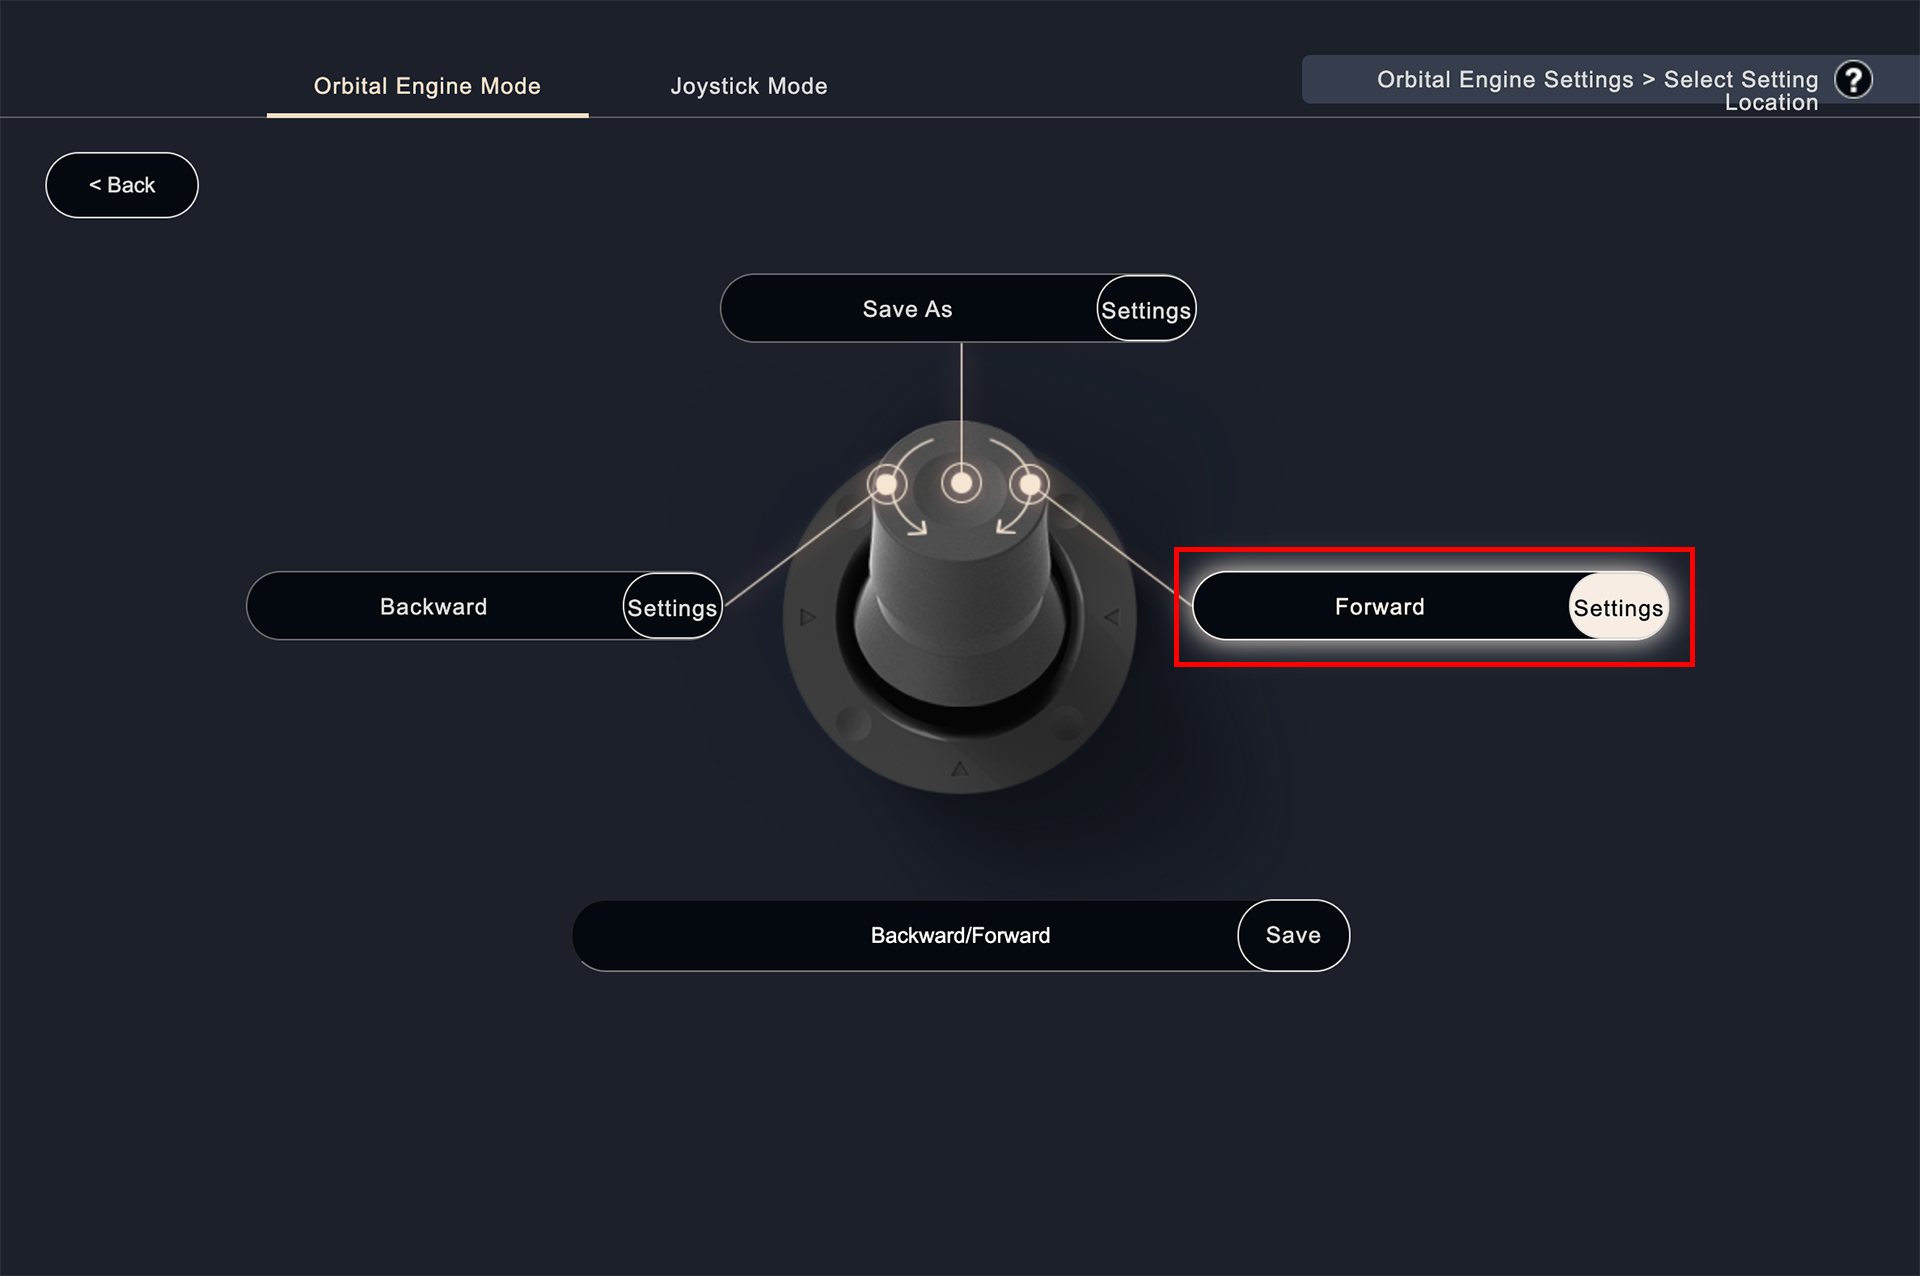
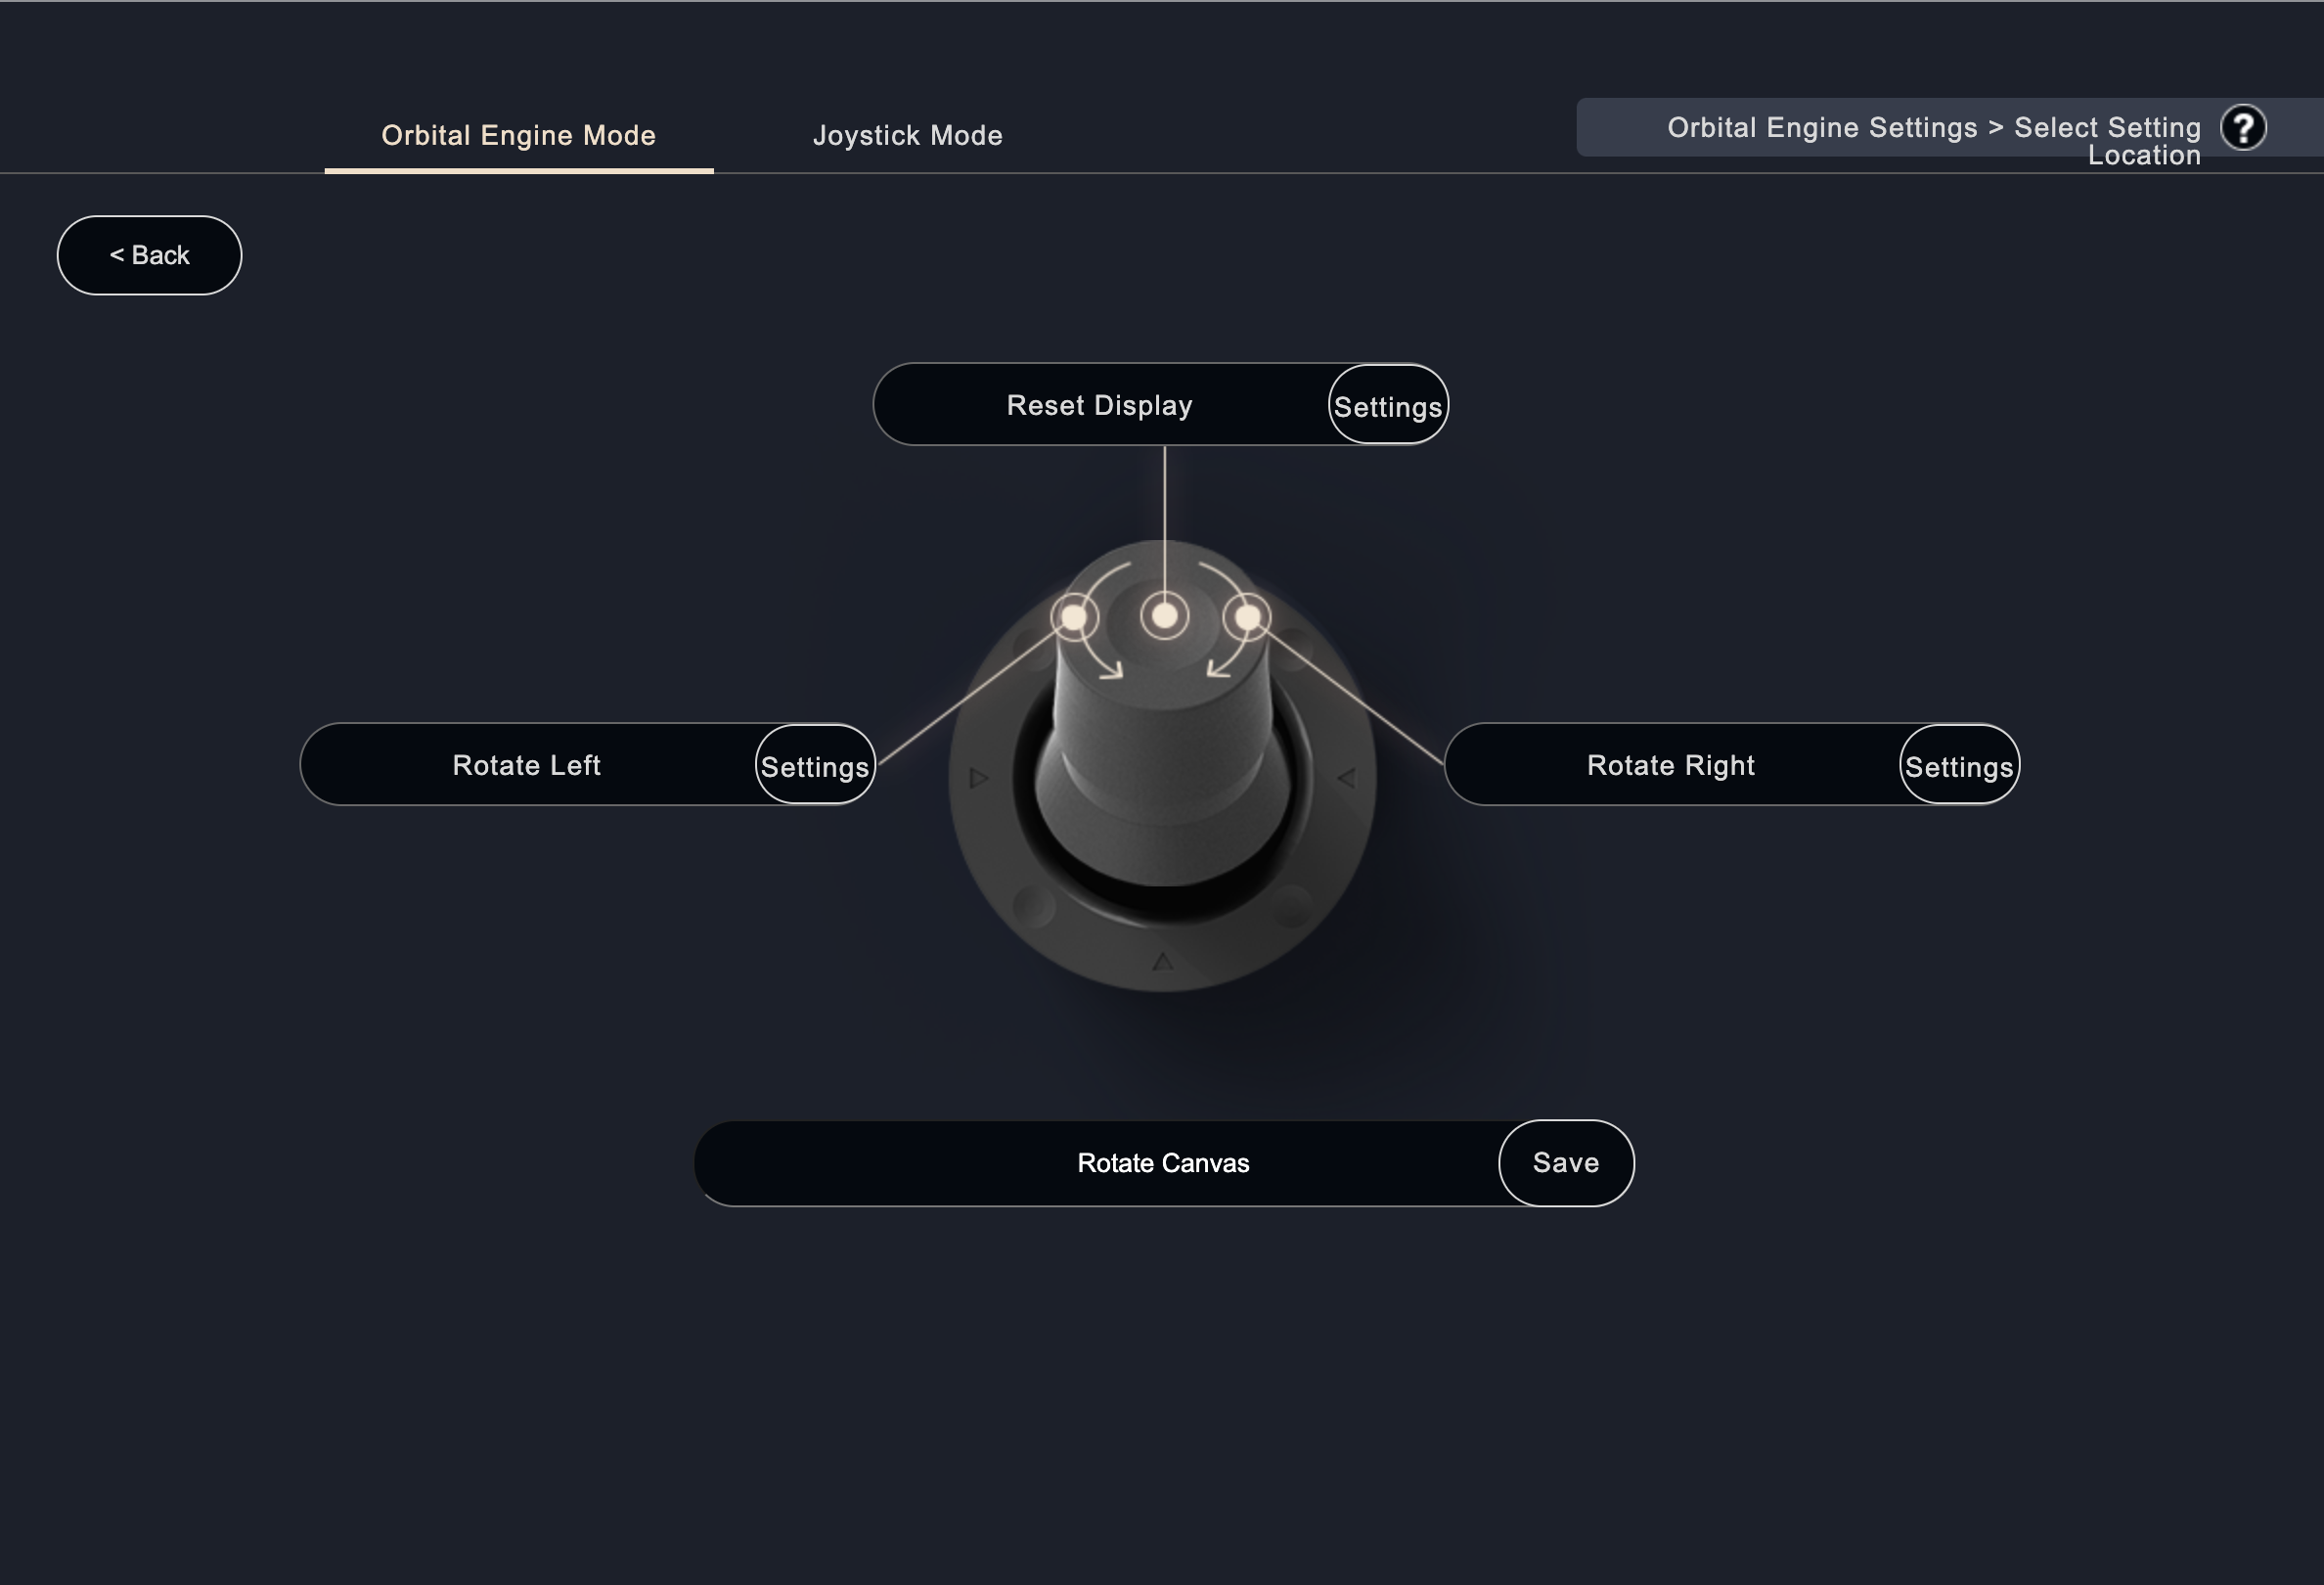
Select "Orbital Engine Setting" at the top of the screen and set the action to be taken when the joystick is tilted upward.
Initially, it is set to "Back / Forward". Click "Back/Forward".
Click "Back/Forward" to go to the following screen.
By pressing down the joystick (dial-click), "Save As (Control+Shift+S)" is set.
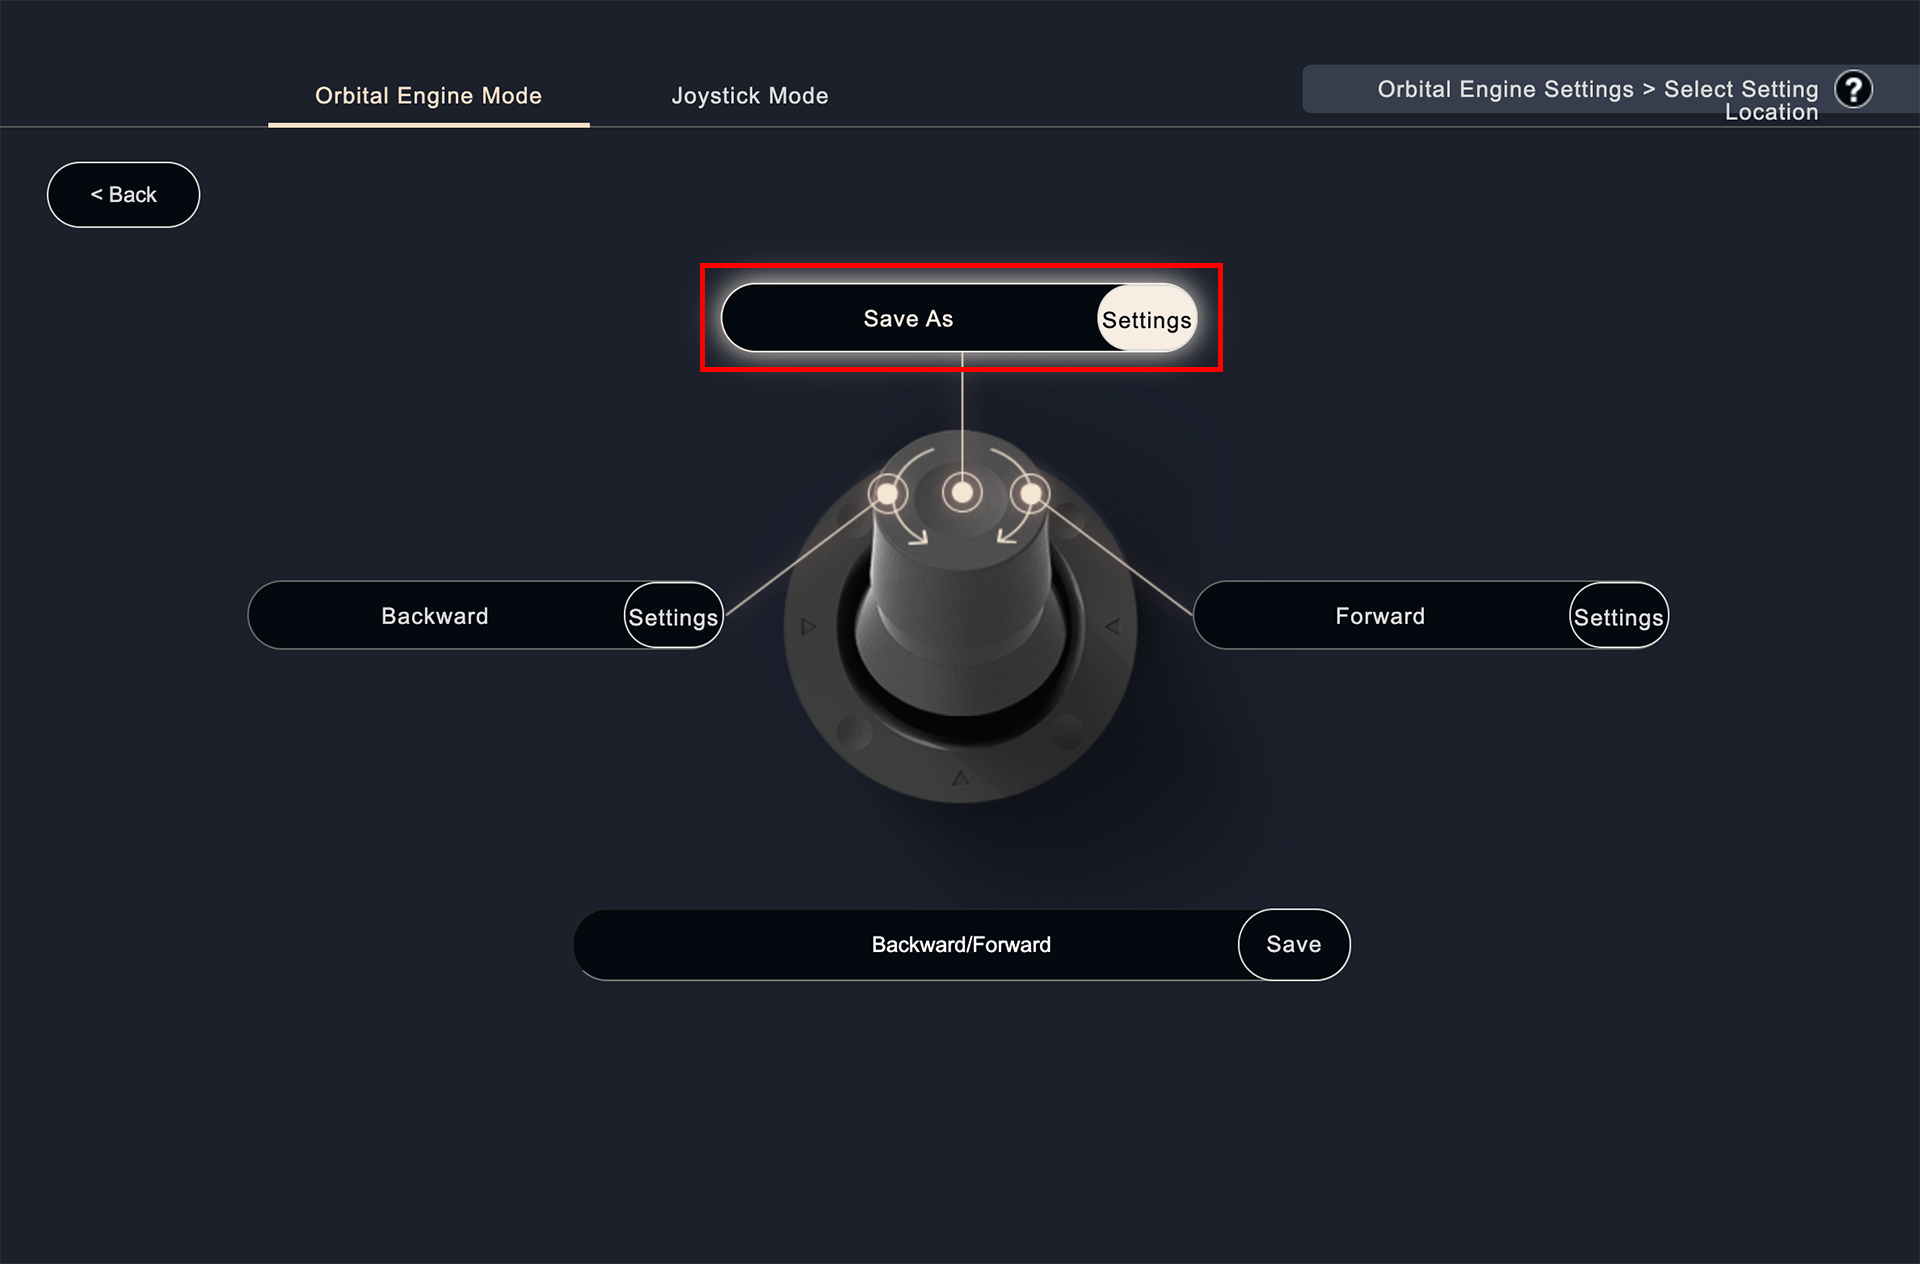
Rotating the joystick (dial) to the right sets "Forward".
Rotating the joystick (dial) to the left will set "Back".
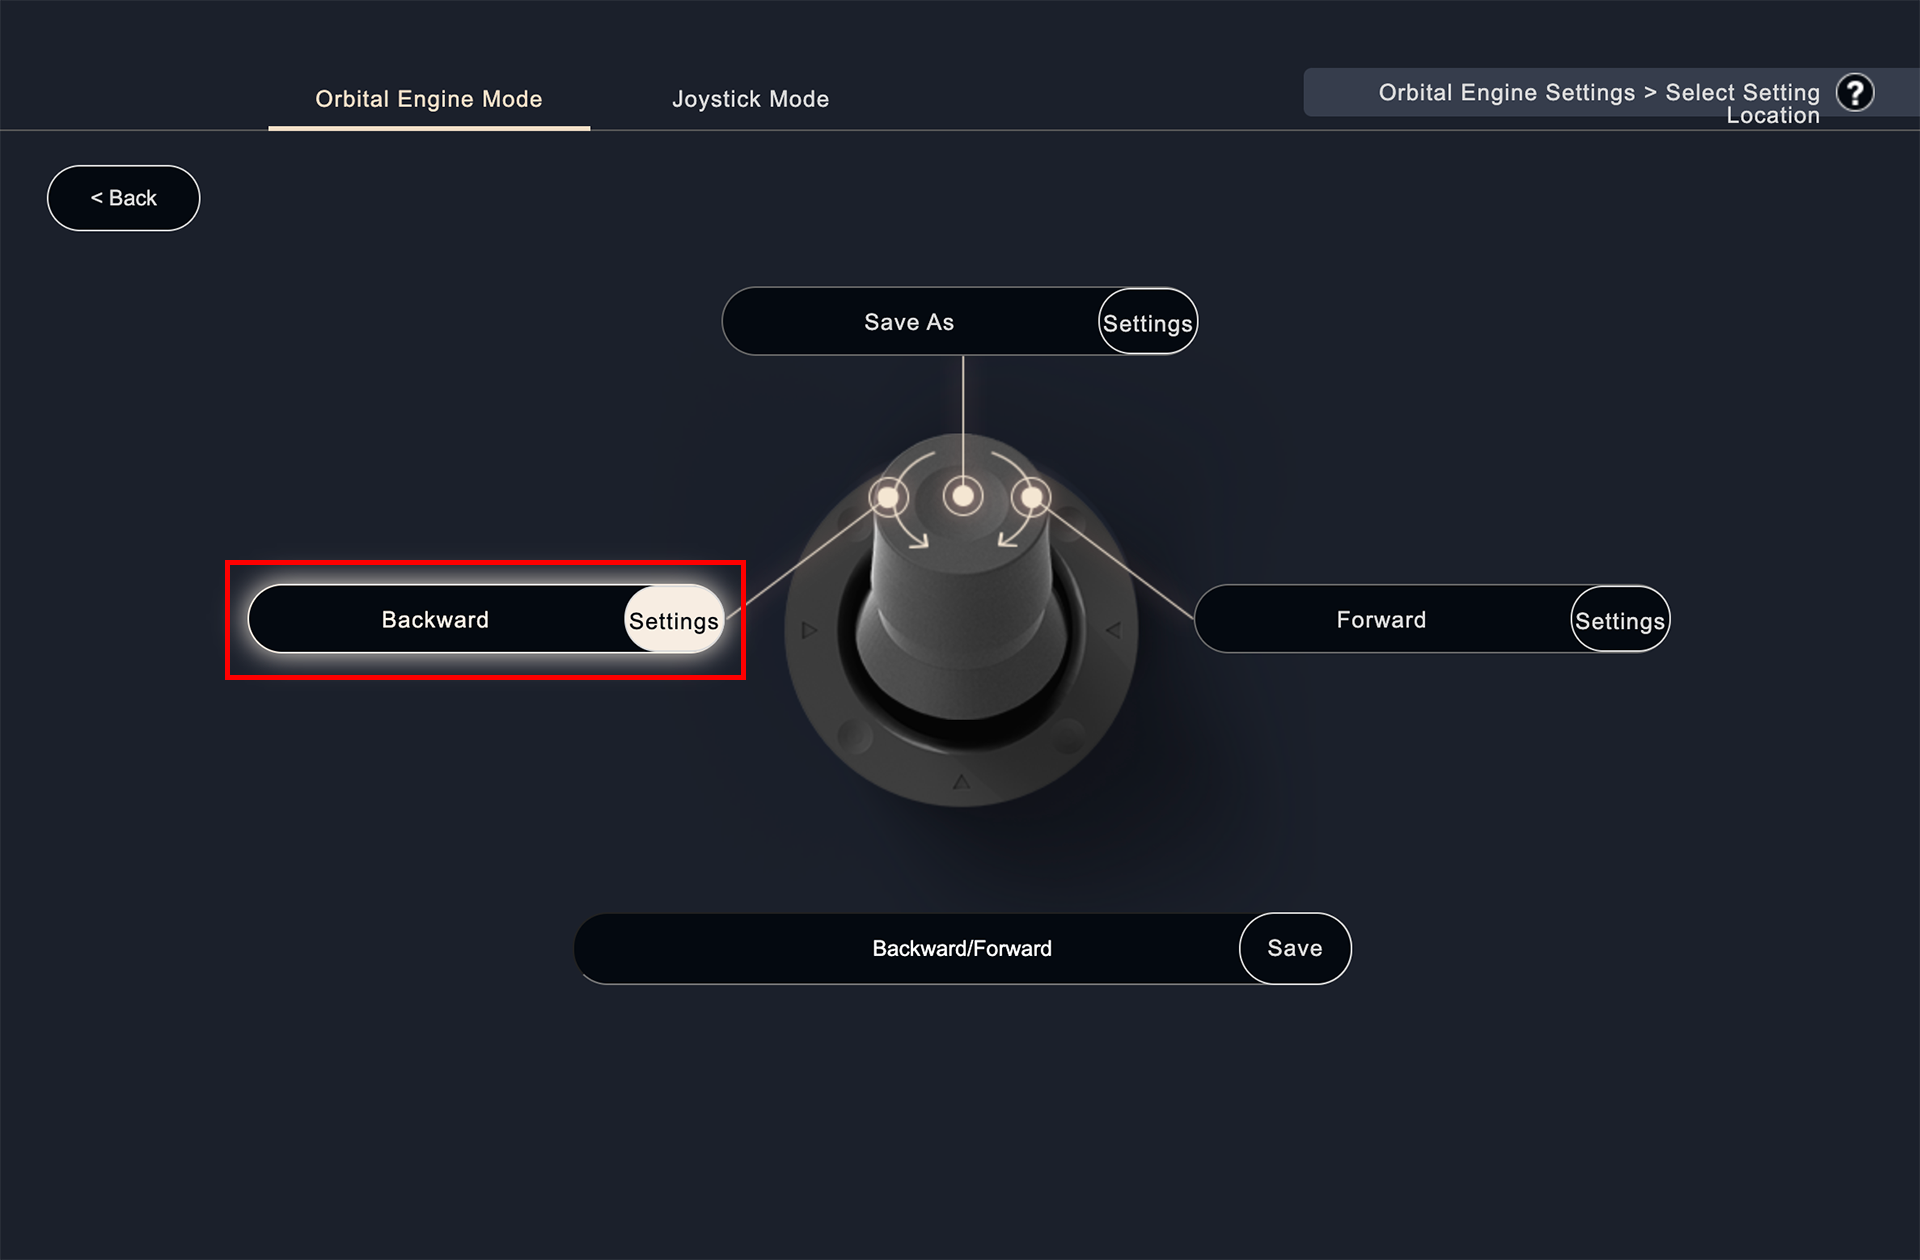
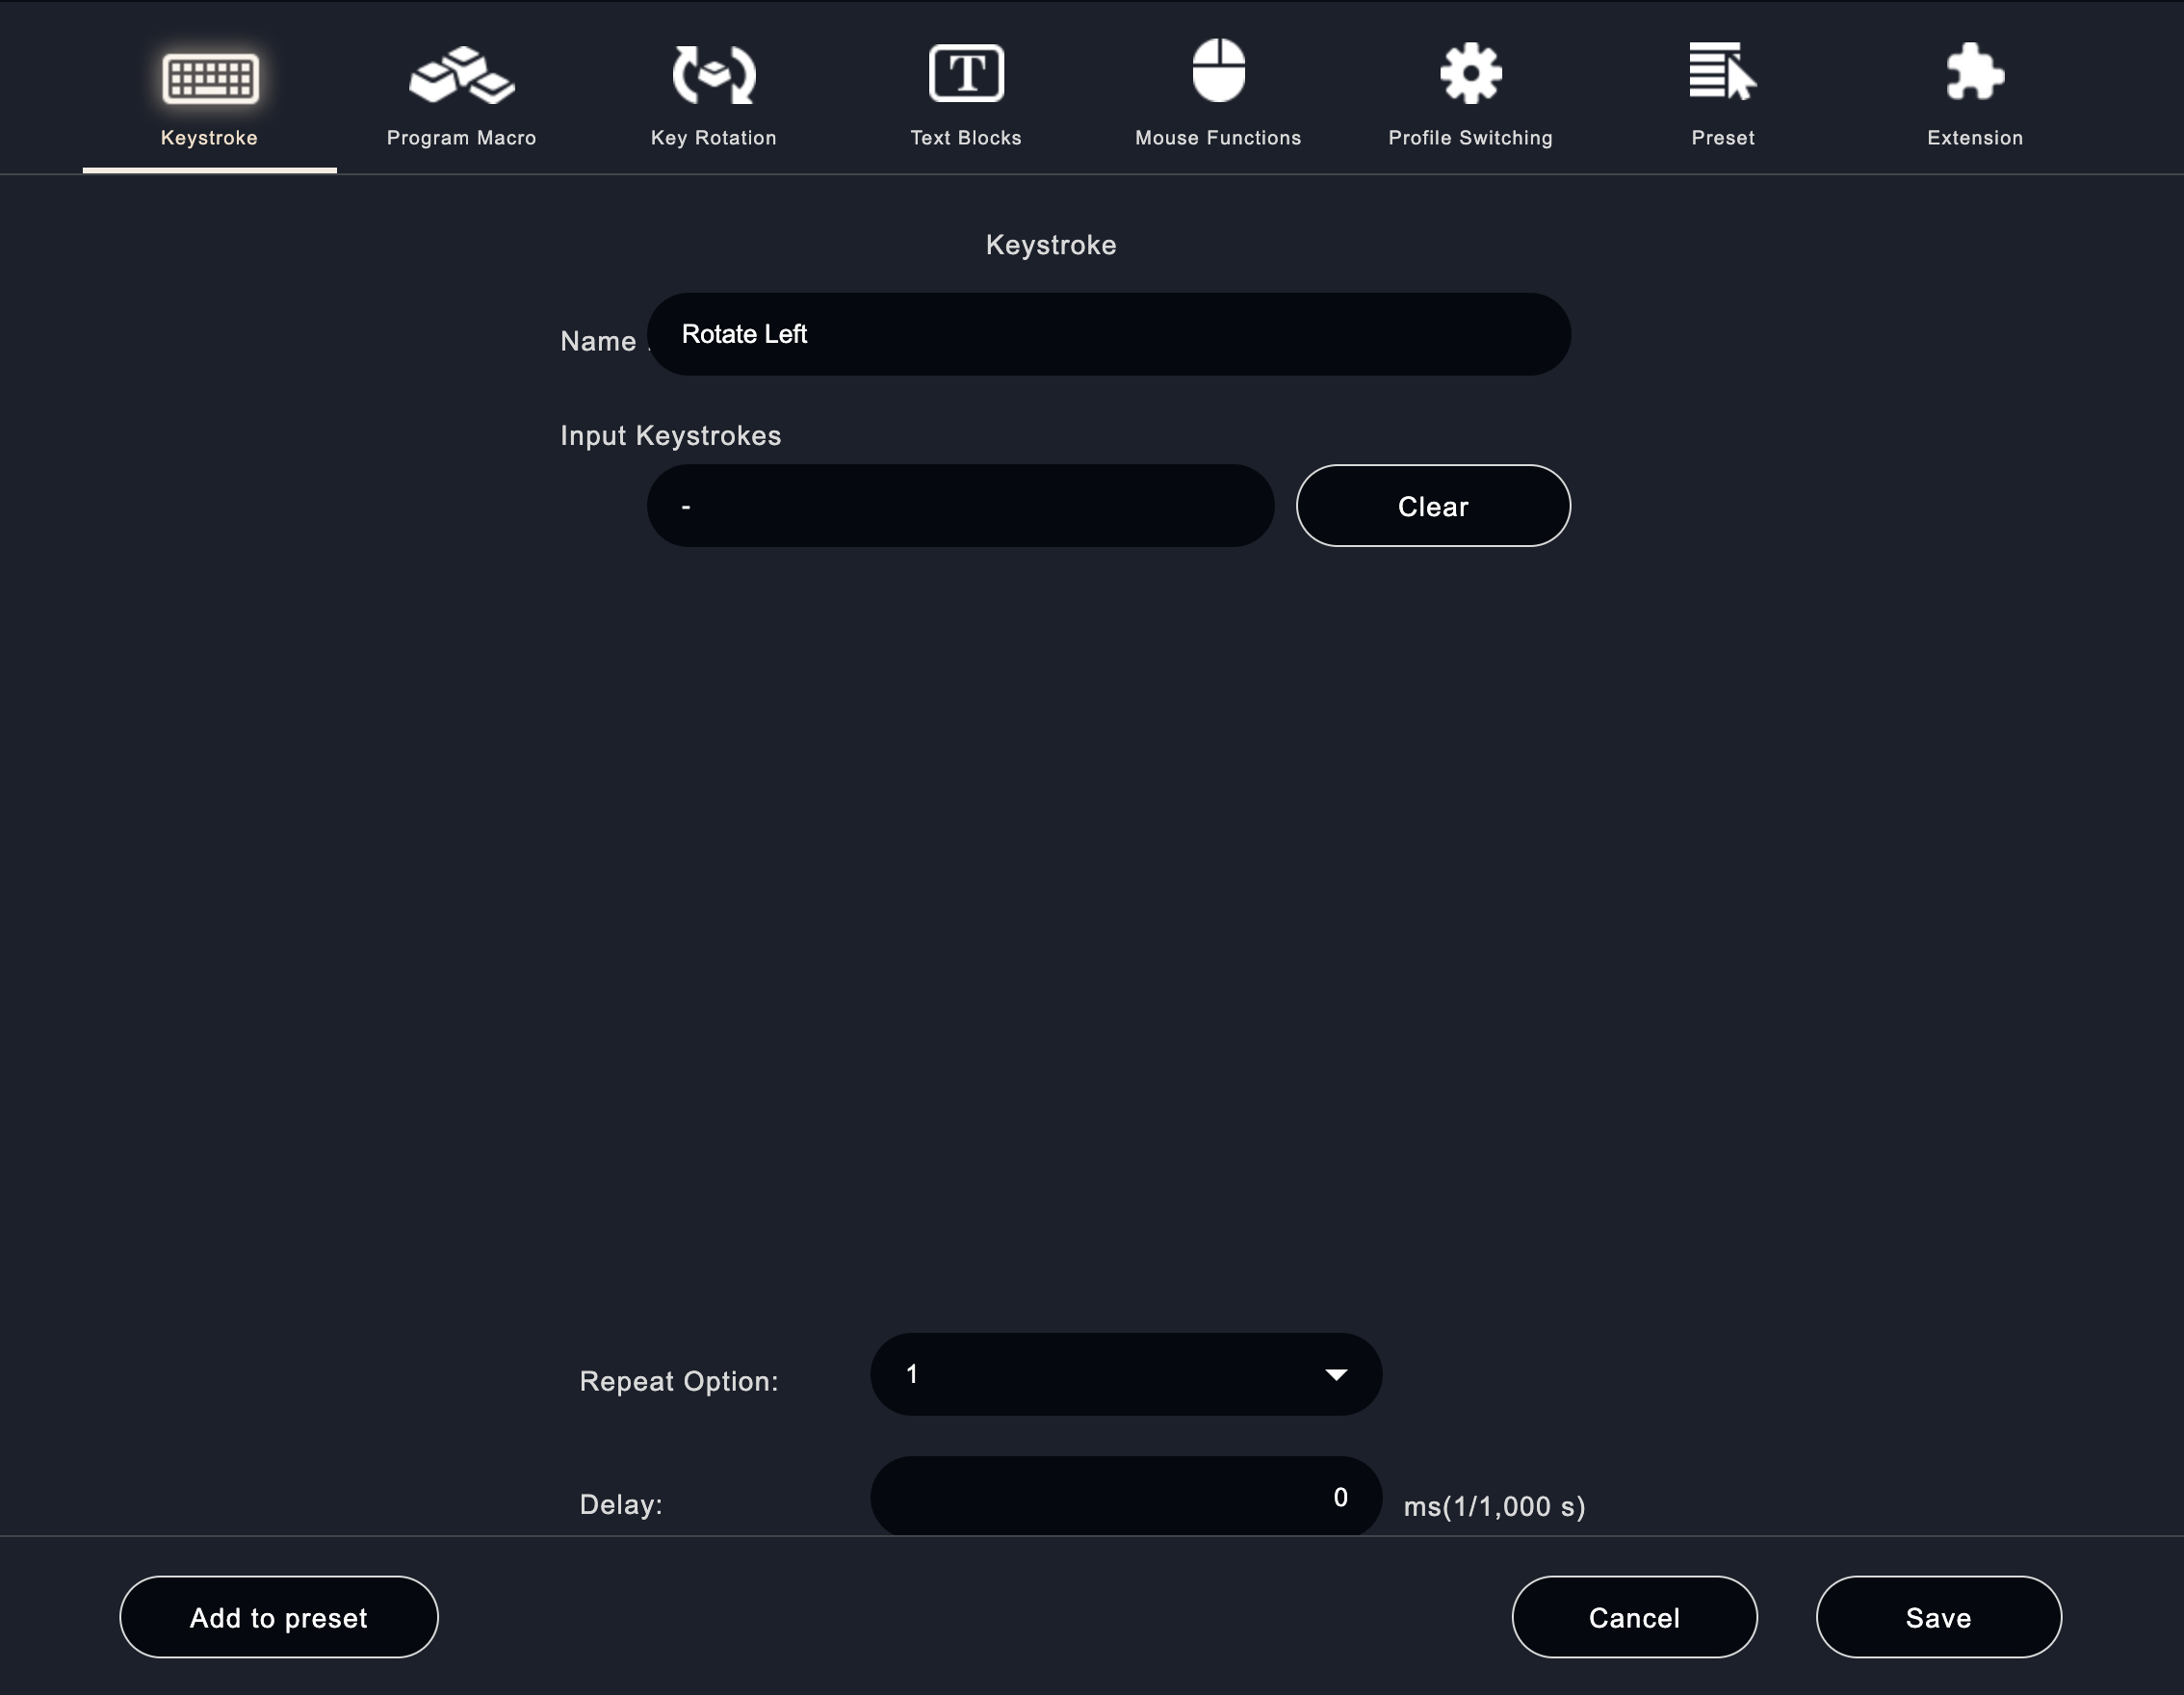
By clicking "Settings" in the area where you want to set the function, you will be redirected to the following screen.
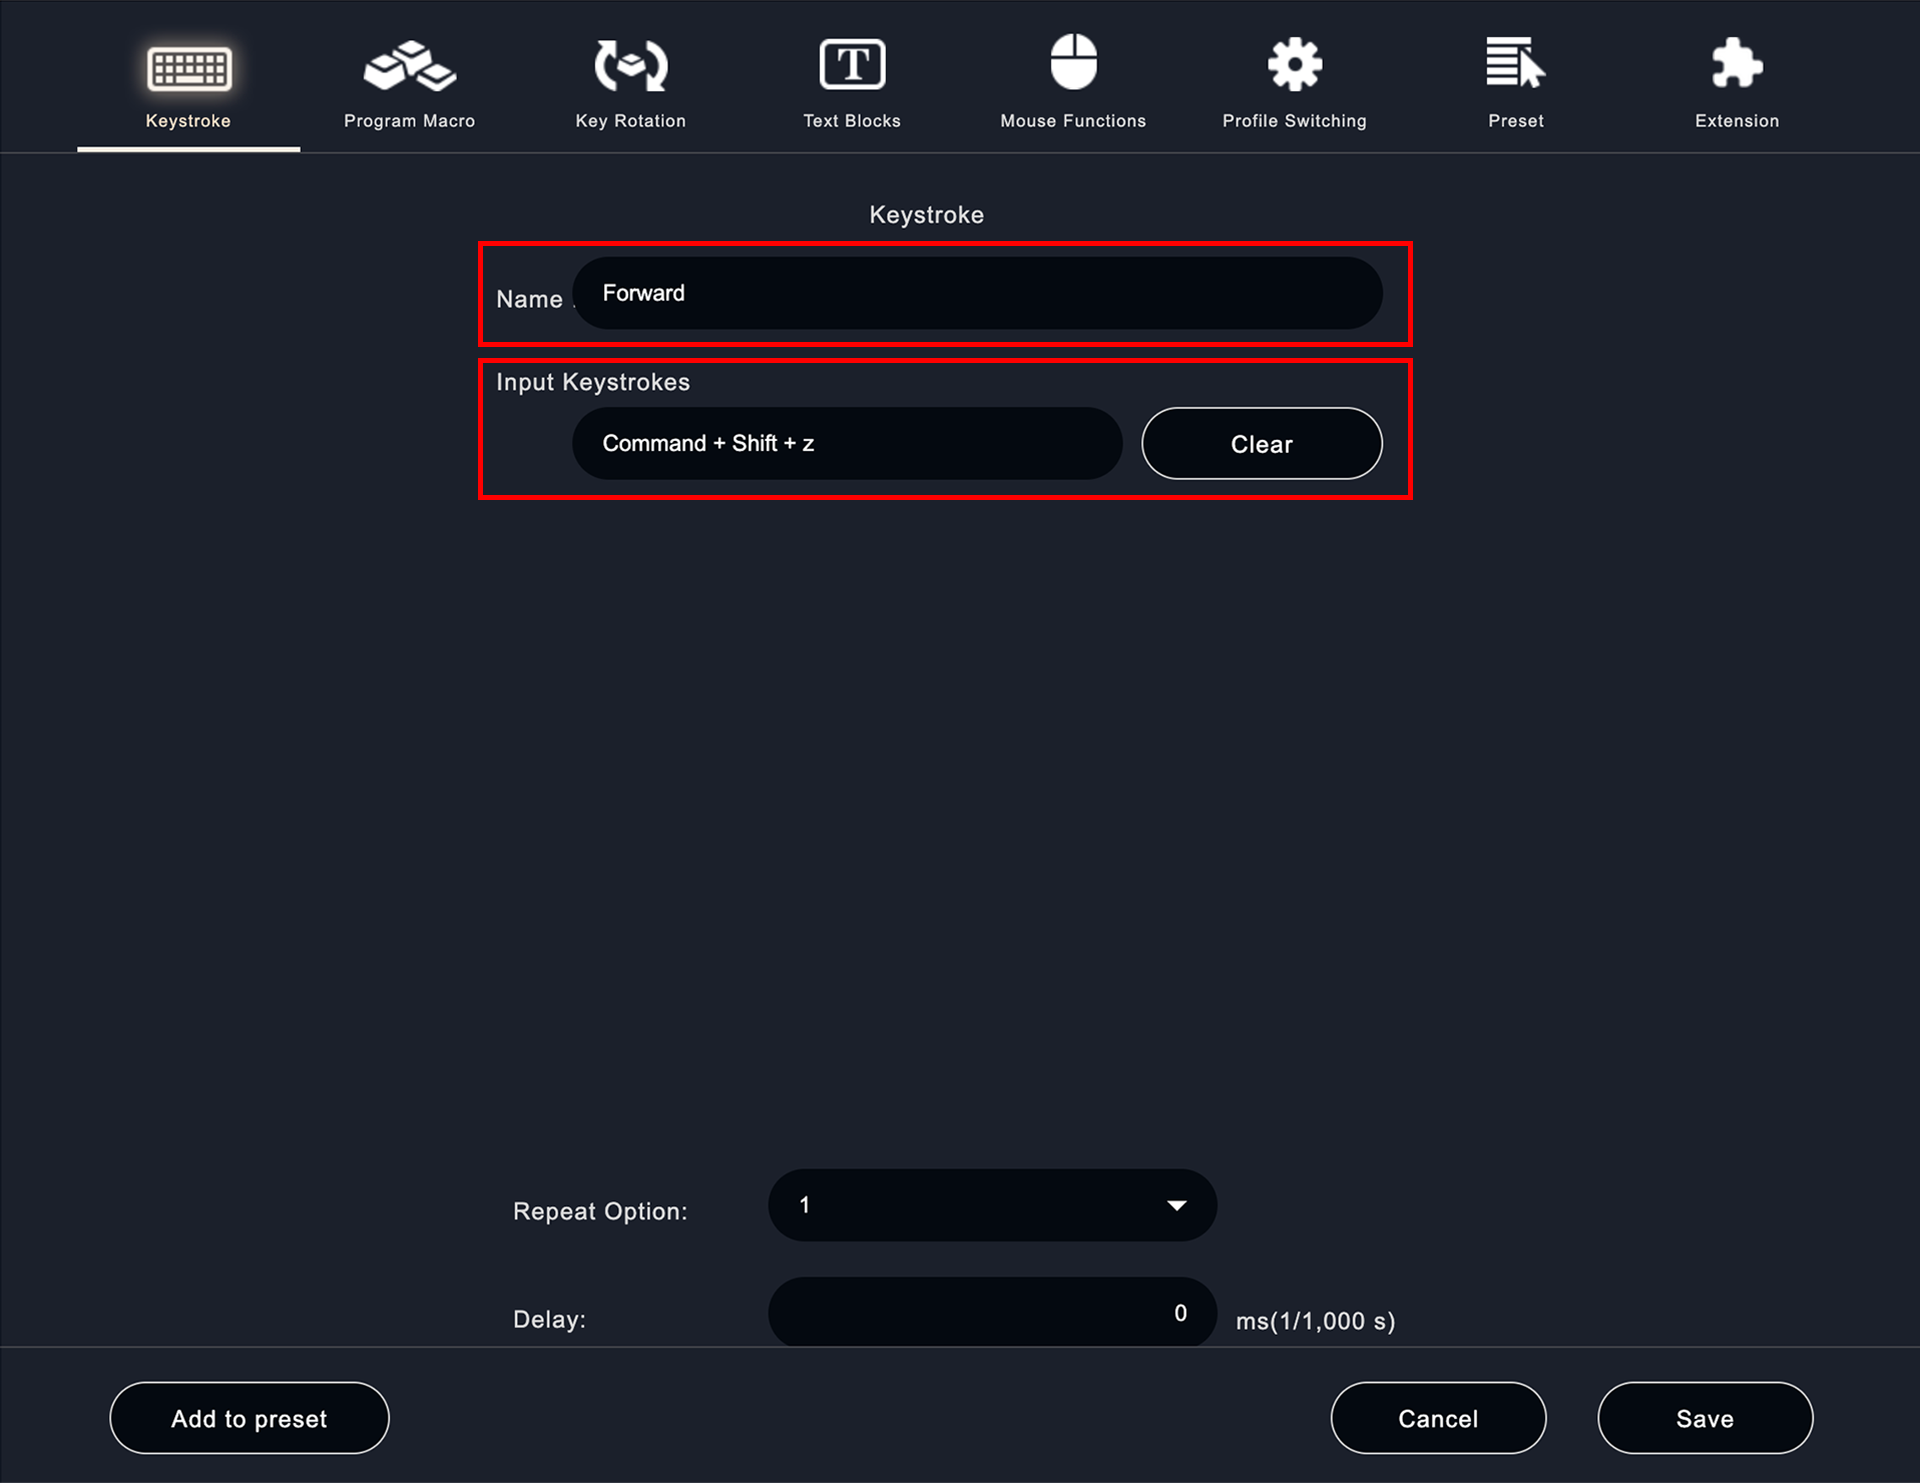
Assign the name of the function in the "Name" field and the shortcut key in the "Input keystrokes" field. Make sure the cursor is focused on both fields before entering the keystroke.
If you want to change the settings in the "keystrokes" field, click the "Clear" button to the right of the box.
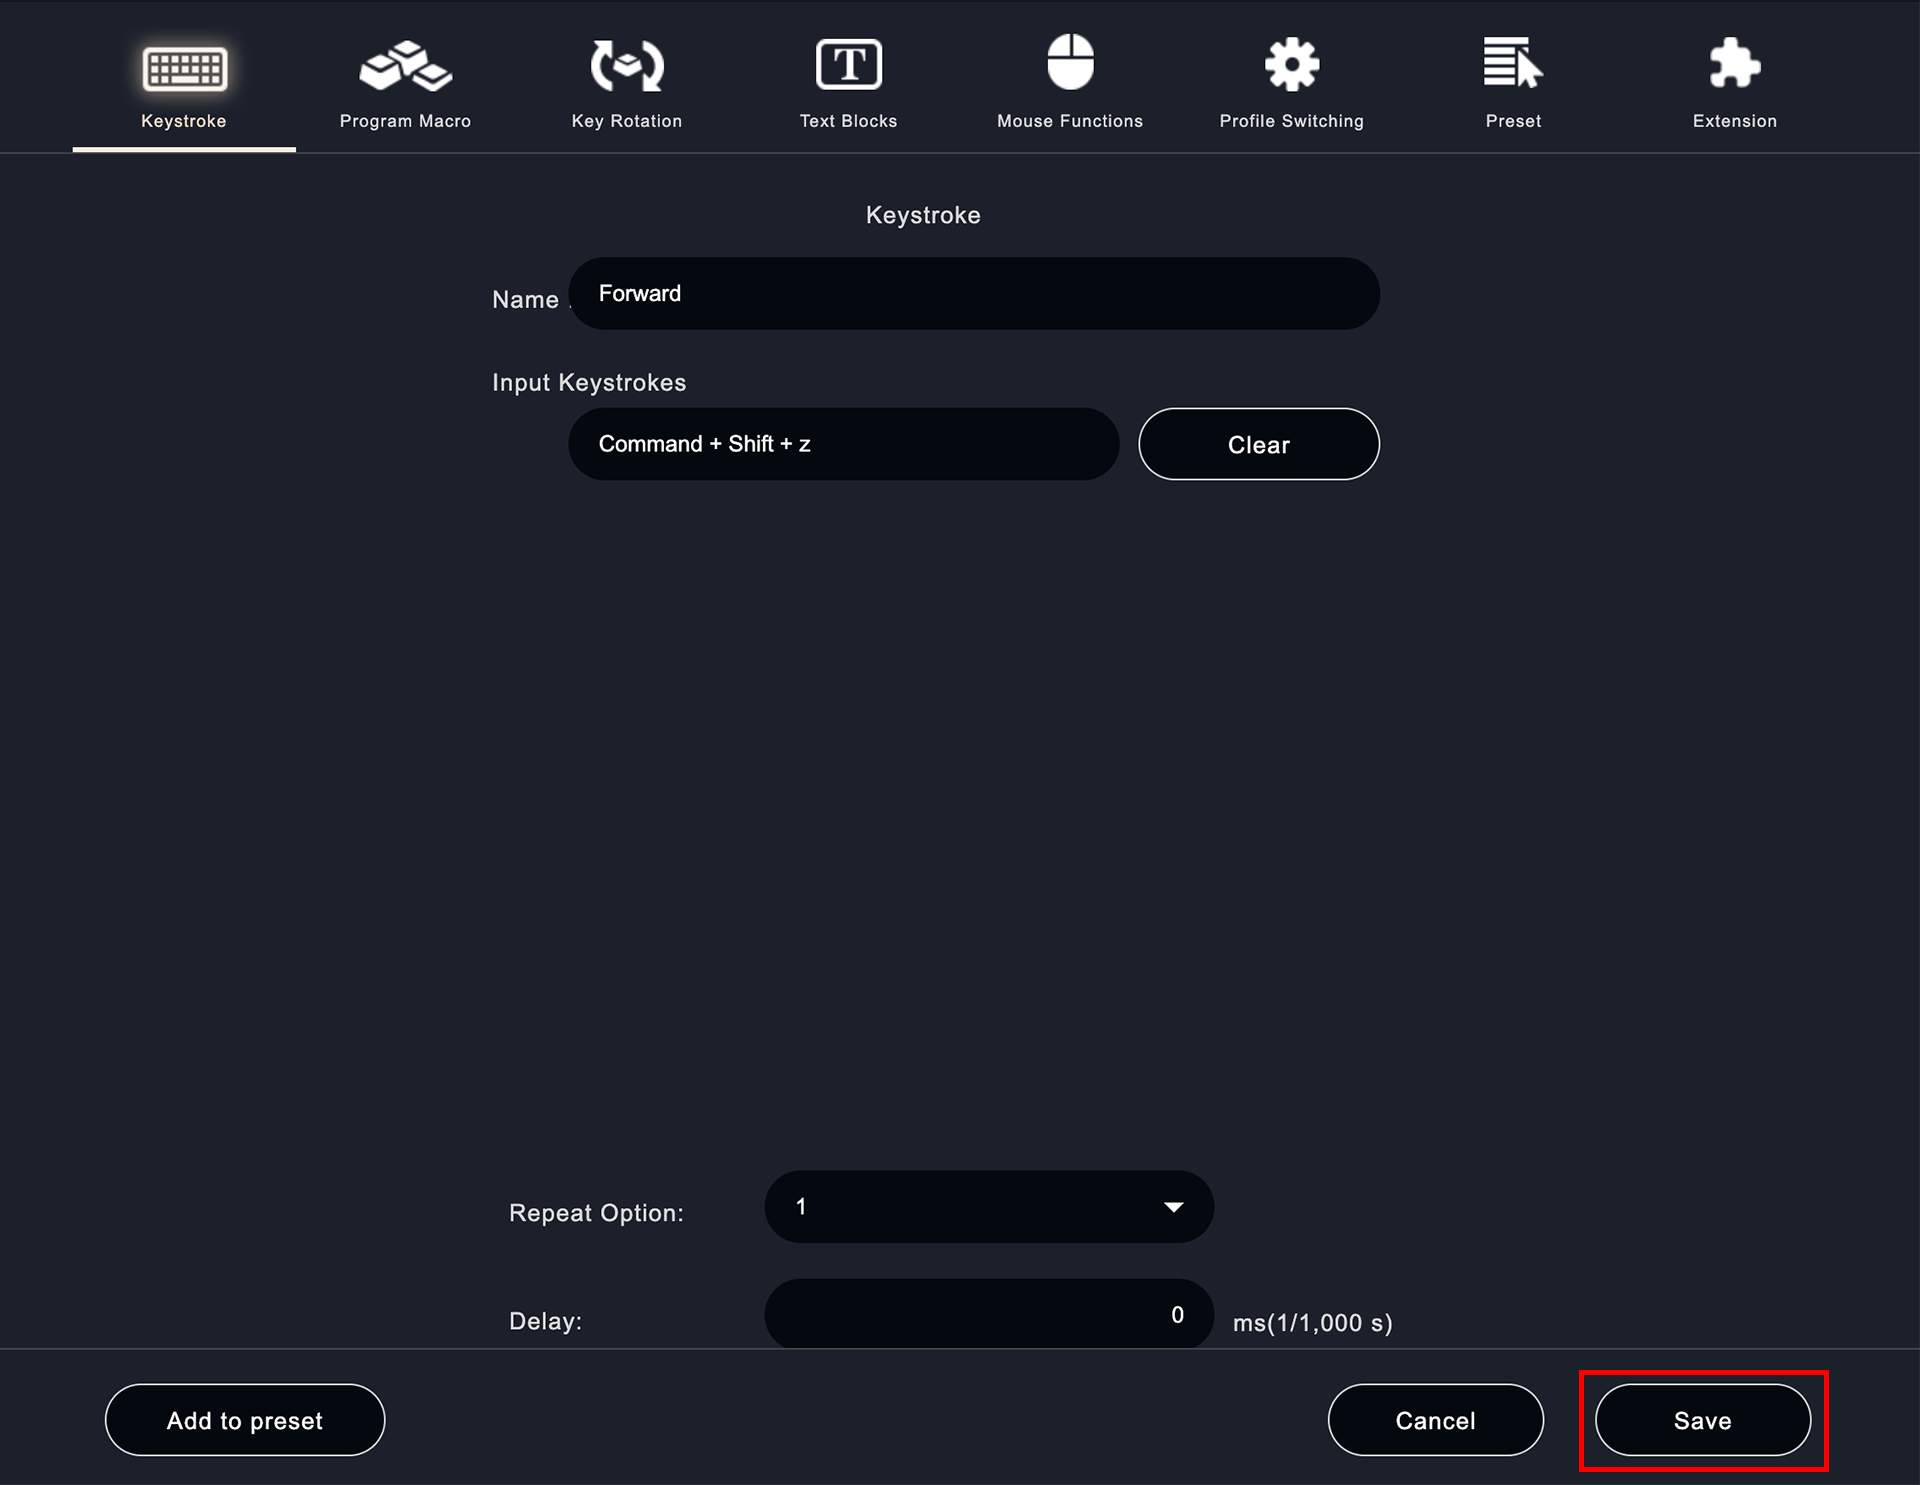
After completing the settings, click the "Save" button.
You are now ready to set up a keystroke profile for the Orbital Engine. If you want to go back to the previous screen without saving, click the "Cancel" button, which will not save your changes and return you to one previous screen.
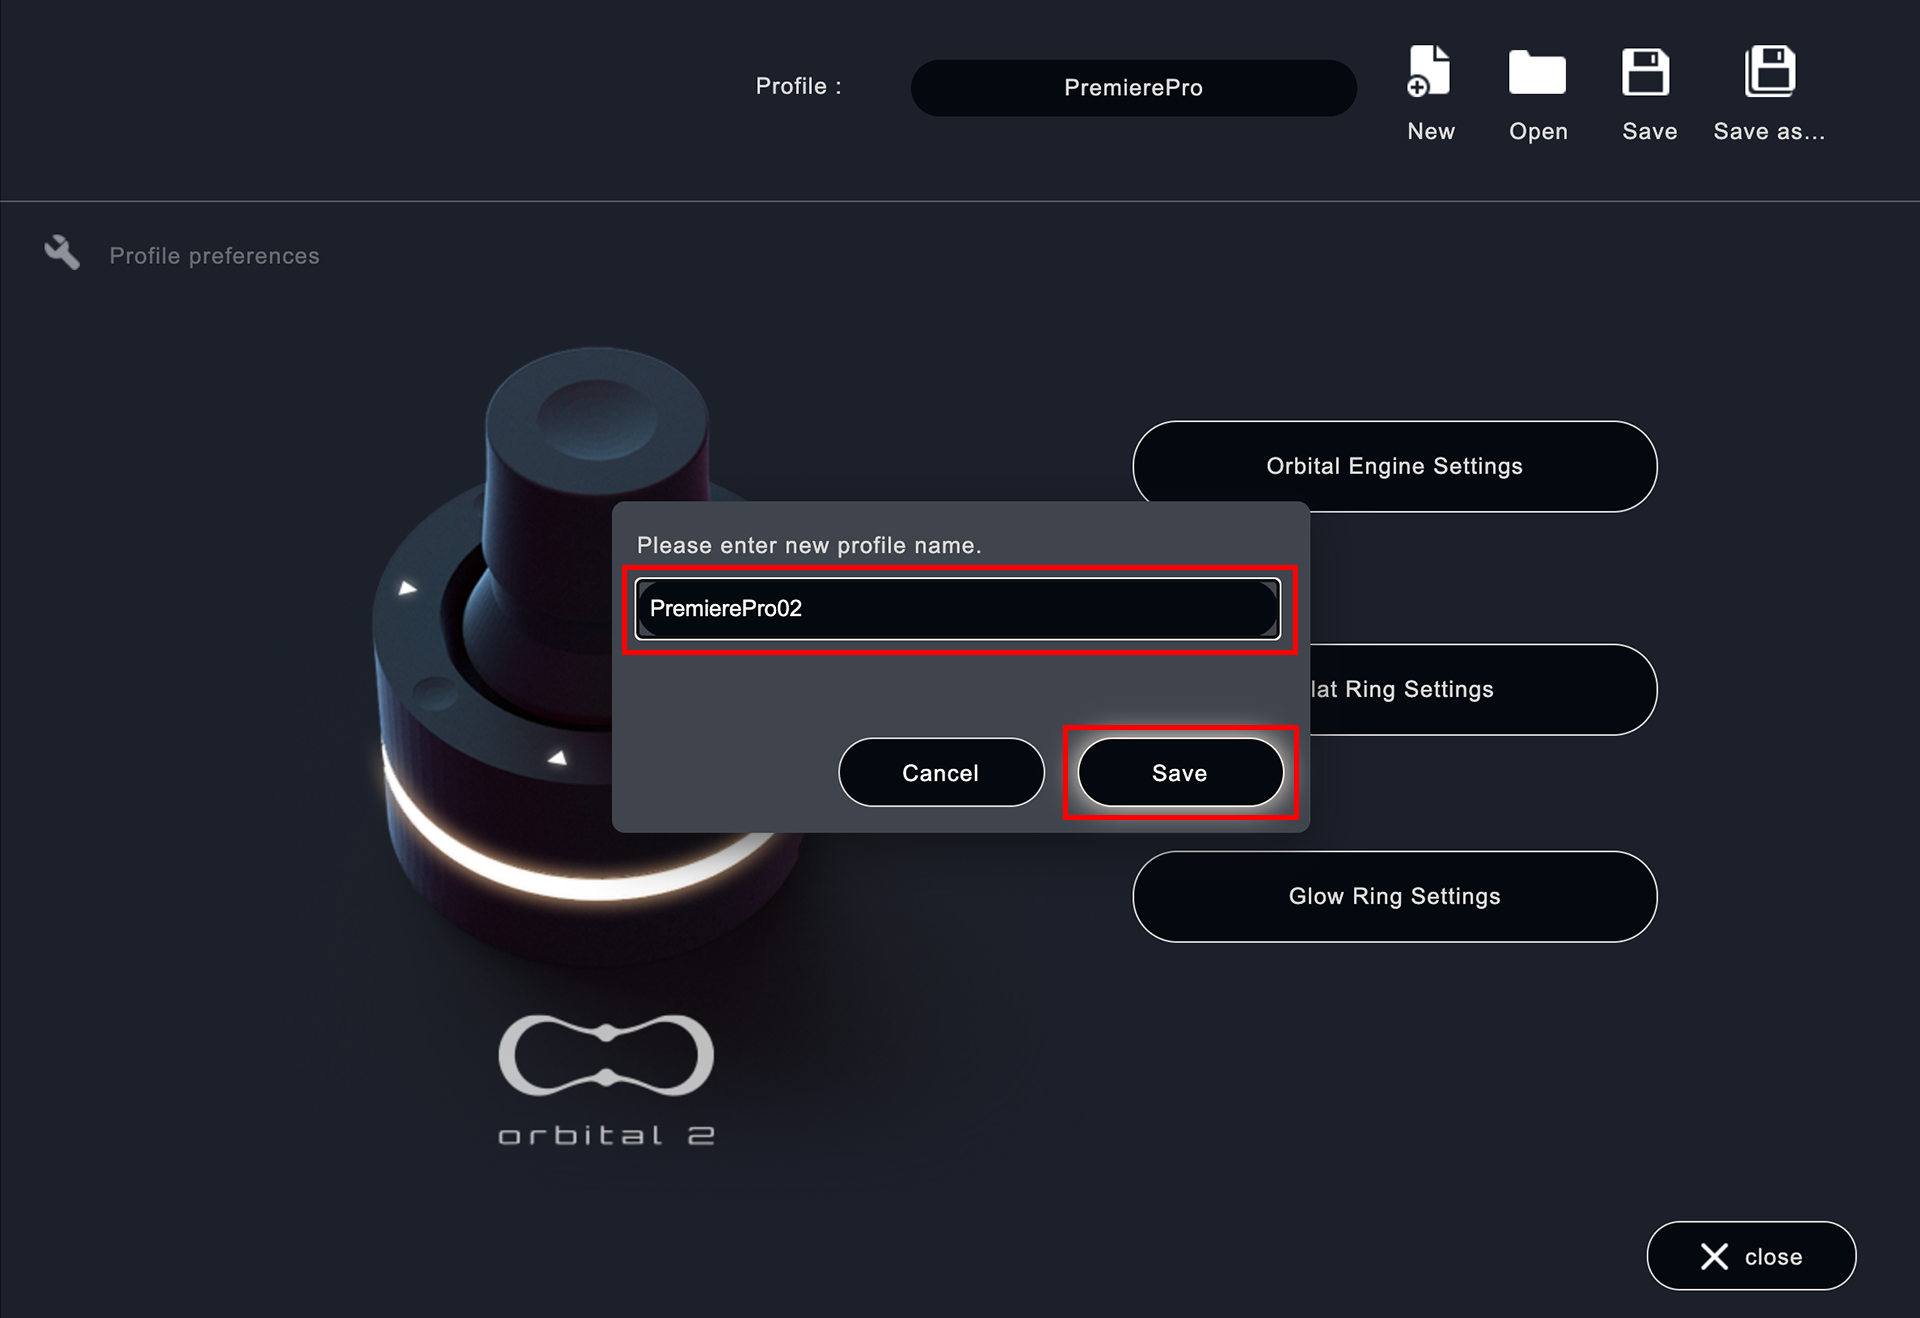
If you want to create a new profile with a different name from Premiere Pro's default profile click "Save As" in the upper right corner of the following window.
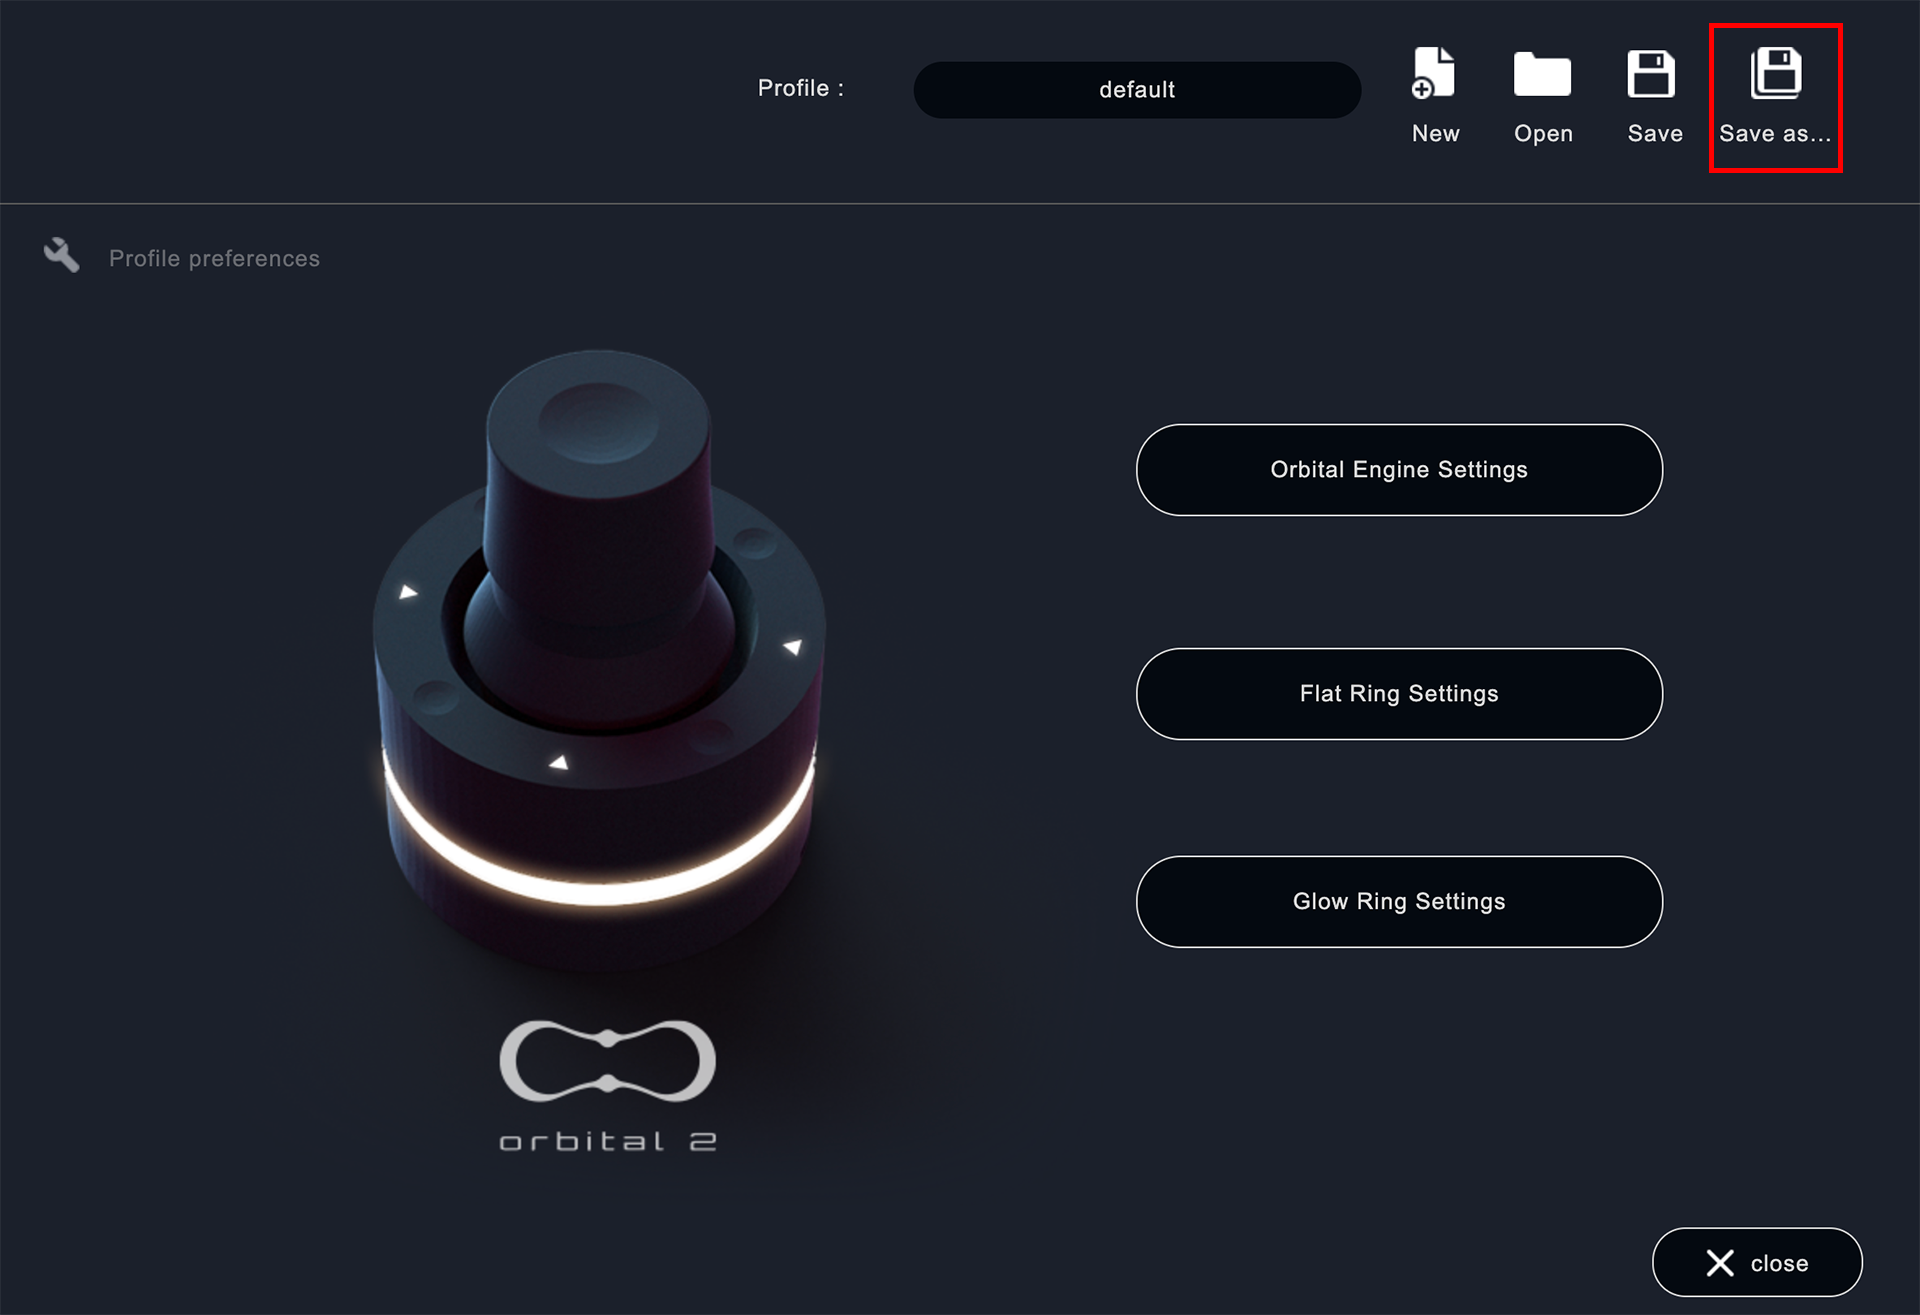
In the following window, enter the name you want to change and save it.
※ In the following screen, the profile is renamed to "PremierePro02" and saved.
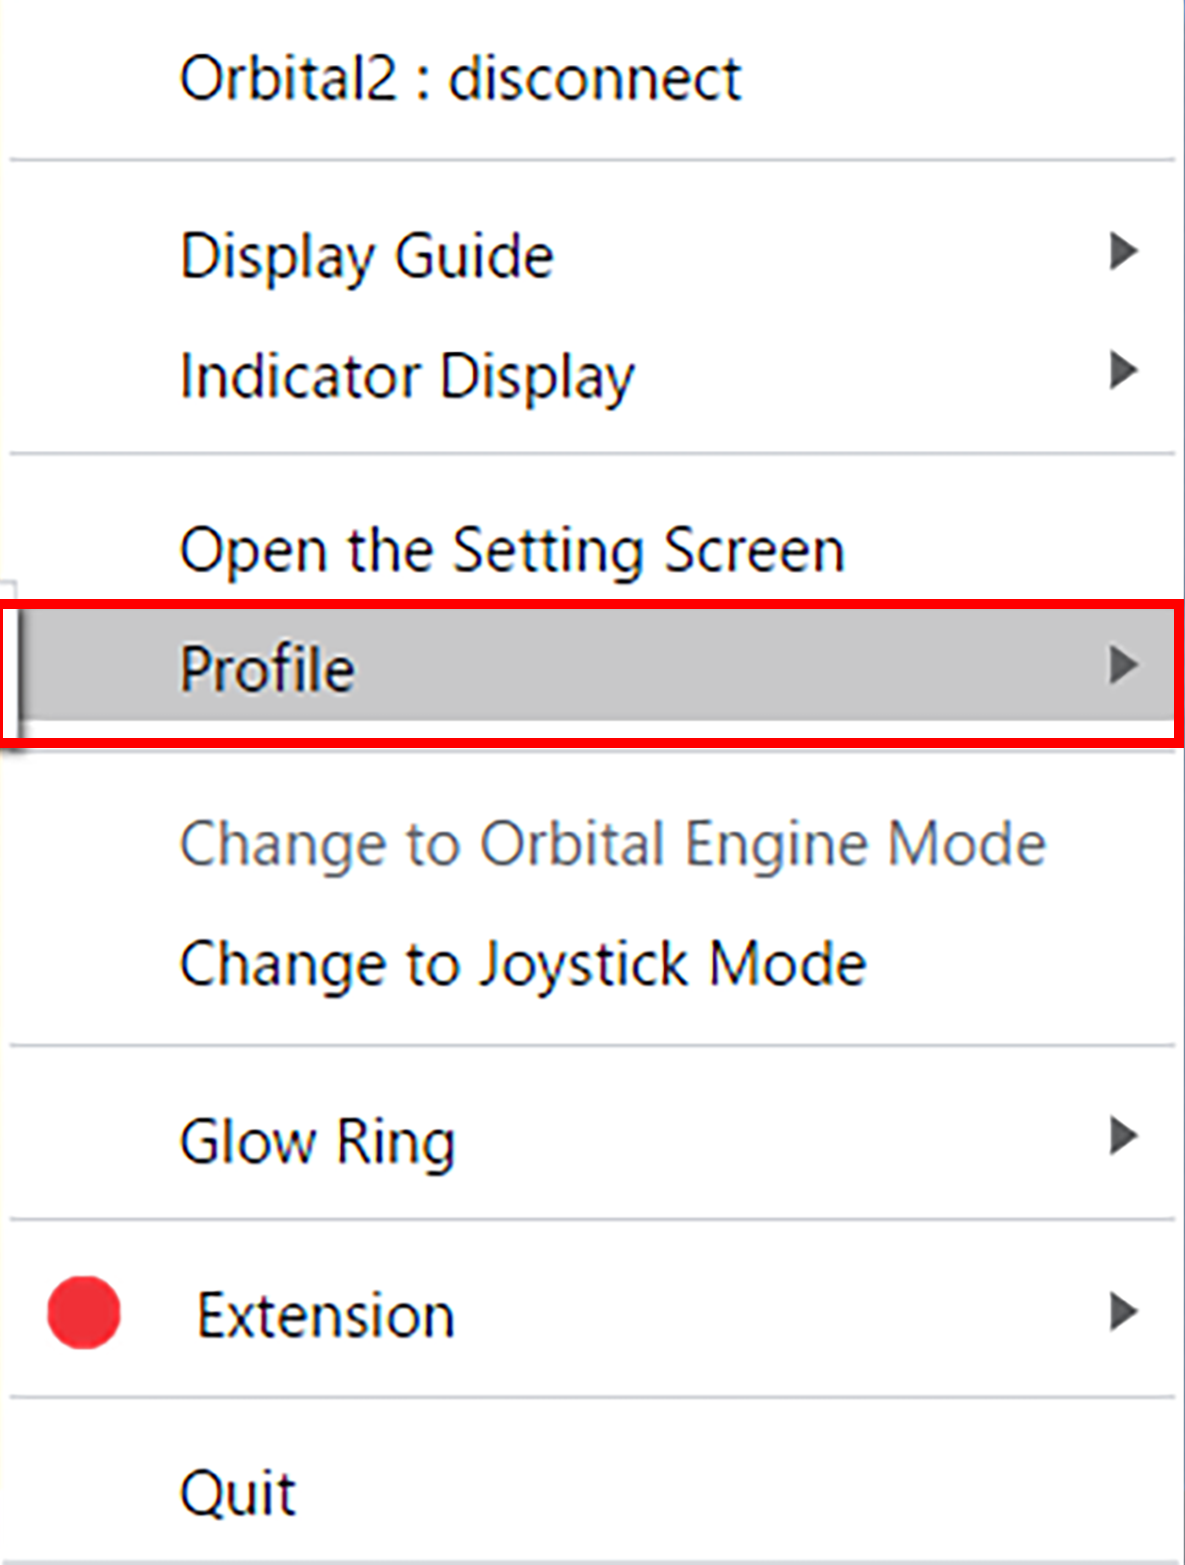
If you click the application icon in the upper right corner of the screen and move the cursor over "Profile", you will see the profile you are currently using is checked.
For illustrators, the following settings are recommended.
・Rotate the canvas (rotate left, rotate right, reset display)
・Brush density (decrease/increase opacity)
・Brush size (increase or decrease the size)
If you want to change the brush size by feeling rather than by exact numerical value, it is also comfortable to set it to Orbital Engine.
・Zoom in and out (zoom in, zoom out, reset display)
▼ Ex: "Canvas Rotation" setting in CLIP STUDIO
Set up a shortcut key in "Keystroke" to rotate the canvas to the left when the dial is turned to the left.
The following settings are recommended for video editors.
・Back/forward (back/forward)
・Stretching and shrinking of the sequence (expansion and contraction)
・Shuttle (leftward shuttle, rightward shuttle, stop shuttle)
・Frame advance (move to previous frame, move to next frame)
A variety of creative software is used for video editing. This section also introduces recommended settings for each creative software.
・Timeline expansion/reduction (expansion/reduction)
By assigning Orbital2 to the bar at the bottom left of the timeline, you can zoom in and out in an instant.
・Work area selection (in point [b], out point [n])
This function allows you to add in and out points, which is very useful for rendering and exporting.
・Volume Change (Increase/Decrease Volume)
By assigning the troublesome volume change to Orbital2, you can change the volume while playing.
・Move edit point (Move to previous point, Move to next point, Select nearest edit point as roll)
You can move the edit point for each cut of the clip.
For setting the part where the stick is pressed in, you can use "Key Rotation" and set it to select the closest edit point as the roll.
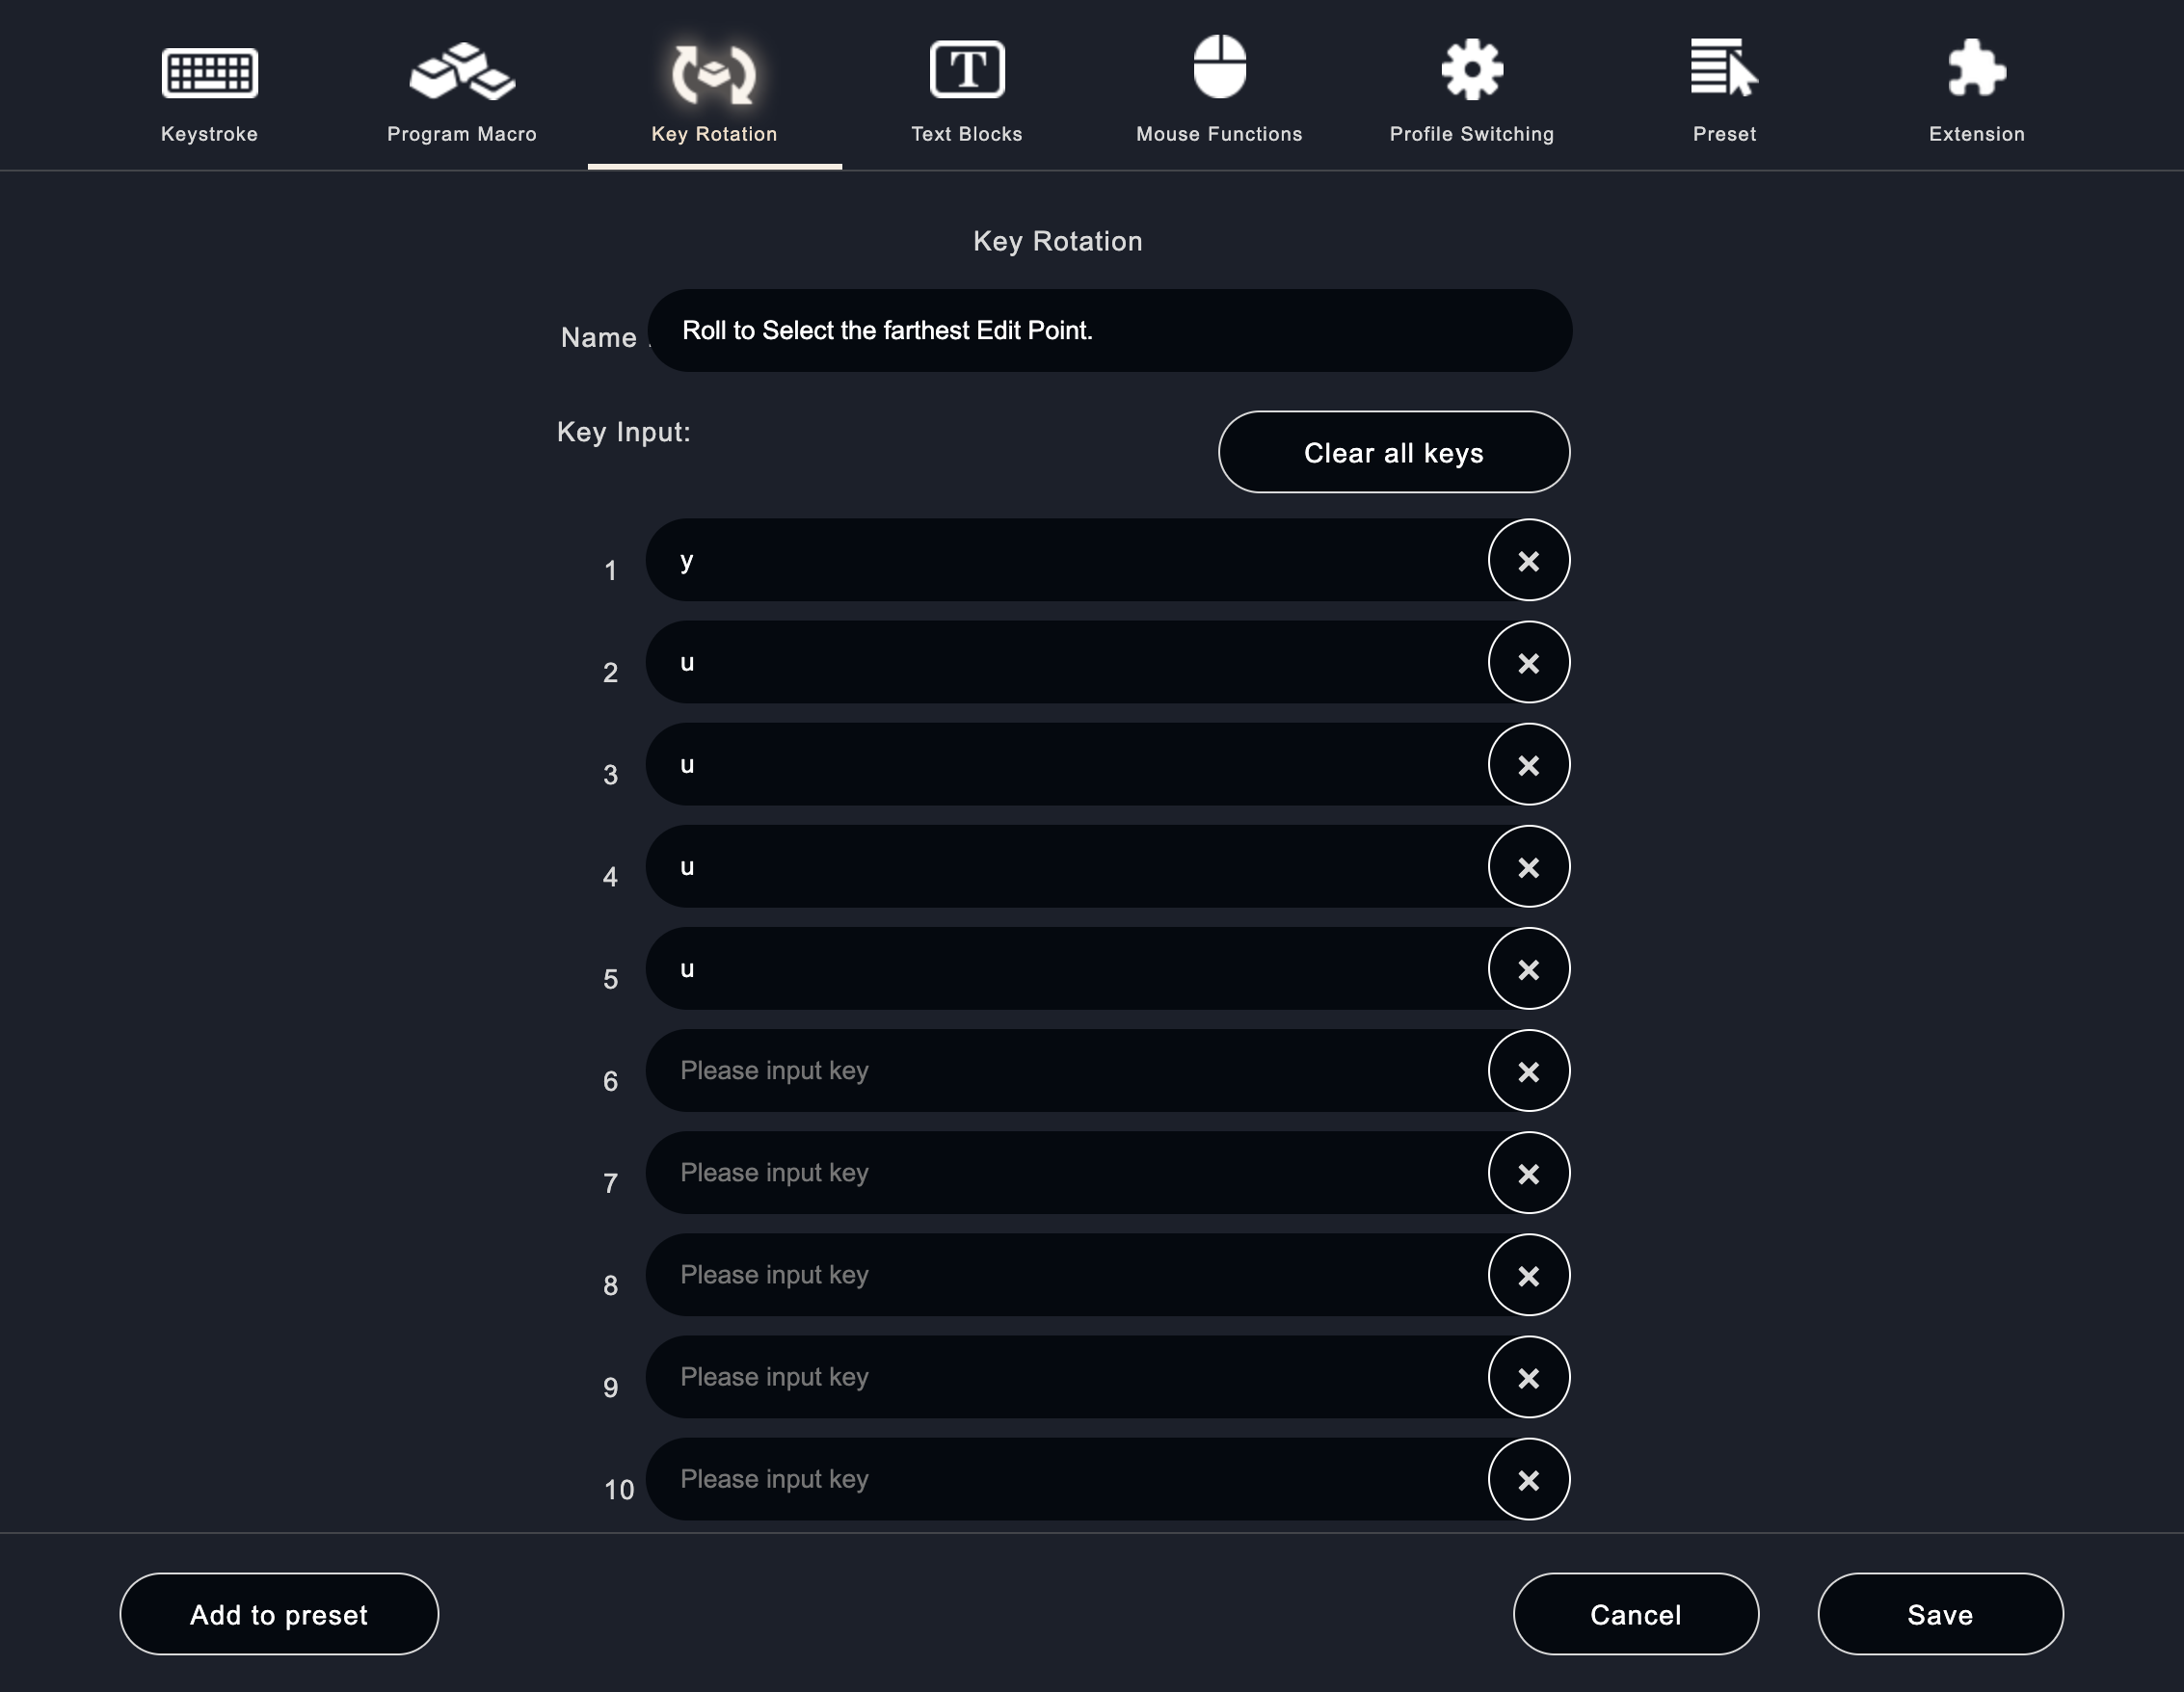
You can embed the keyboard rotation feature of Orbital2 so that the above command is repeated when you press the Move Edit Point button.
The first press is set to Y, and the second through fifth press are set to U.
Pressing the button six times will return you to the first Y.
Now by specifying the edit point and wheeling in the trim, you can adjust the in and out of the clip before and after with the wheel operation.
・Zooming (zooming in and out)
You can assign shortcut keys in "Keystrokes".
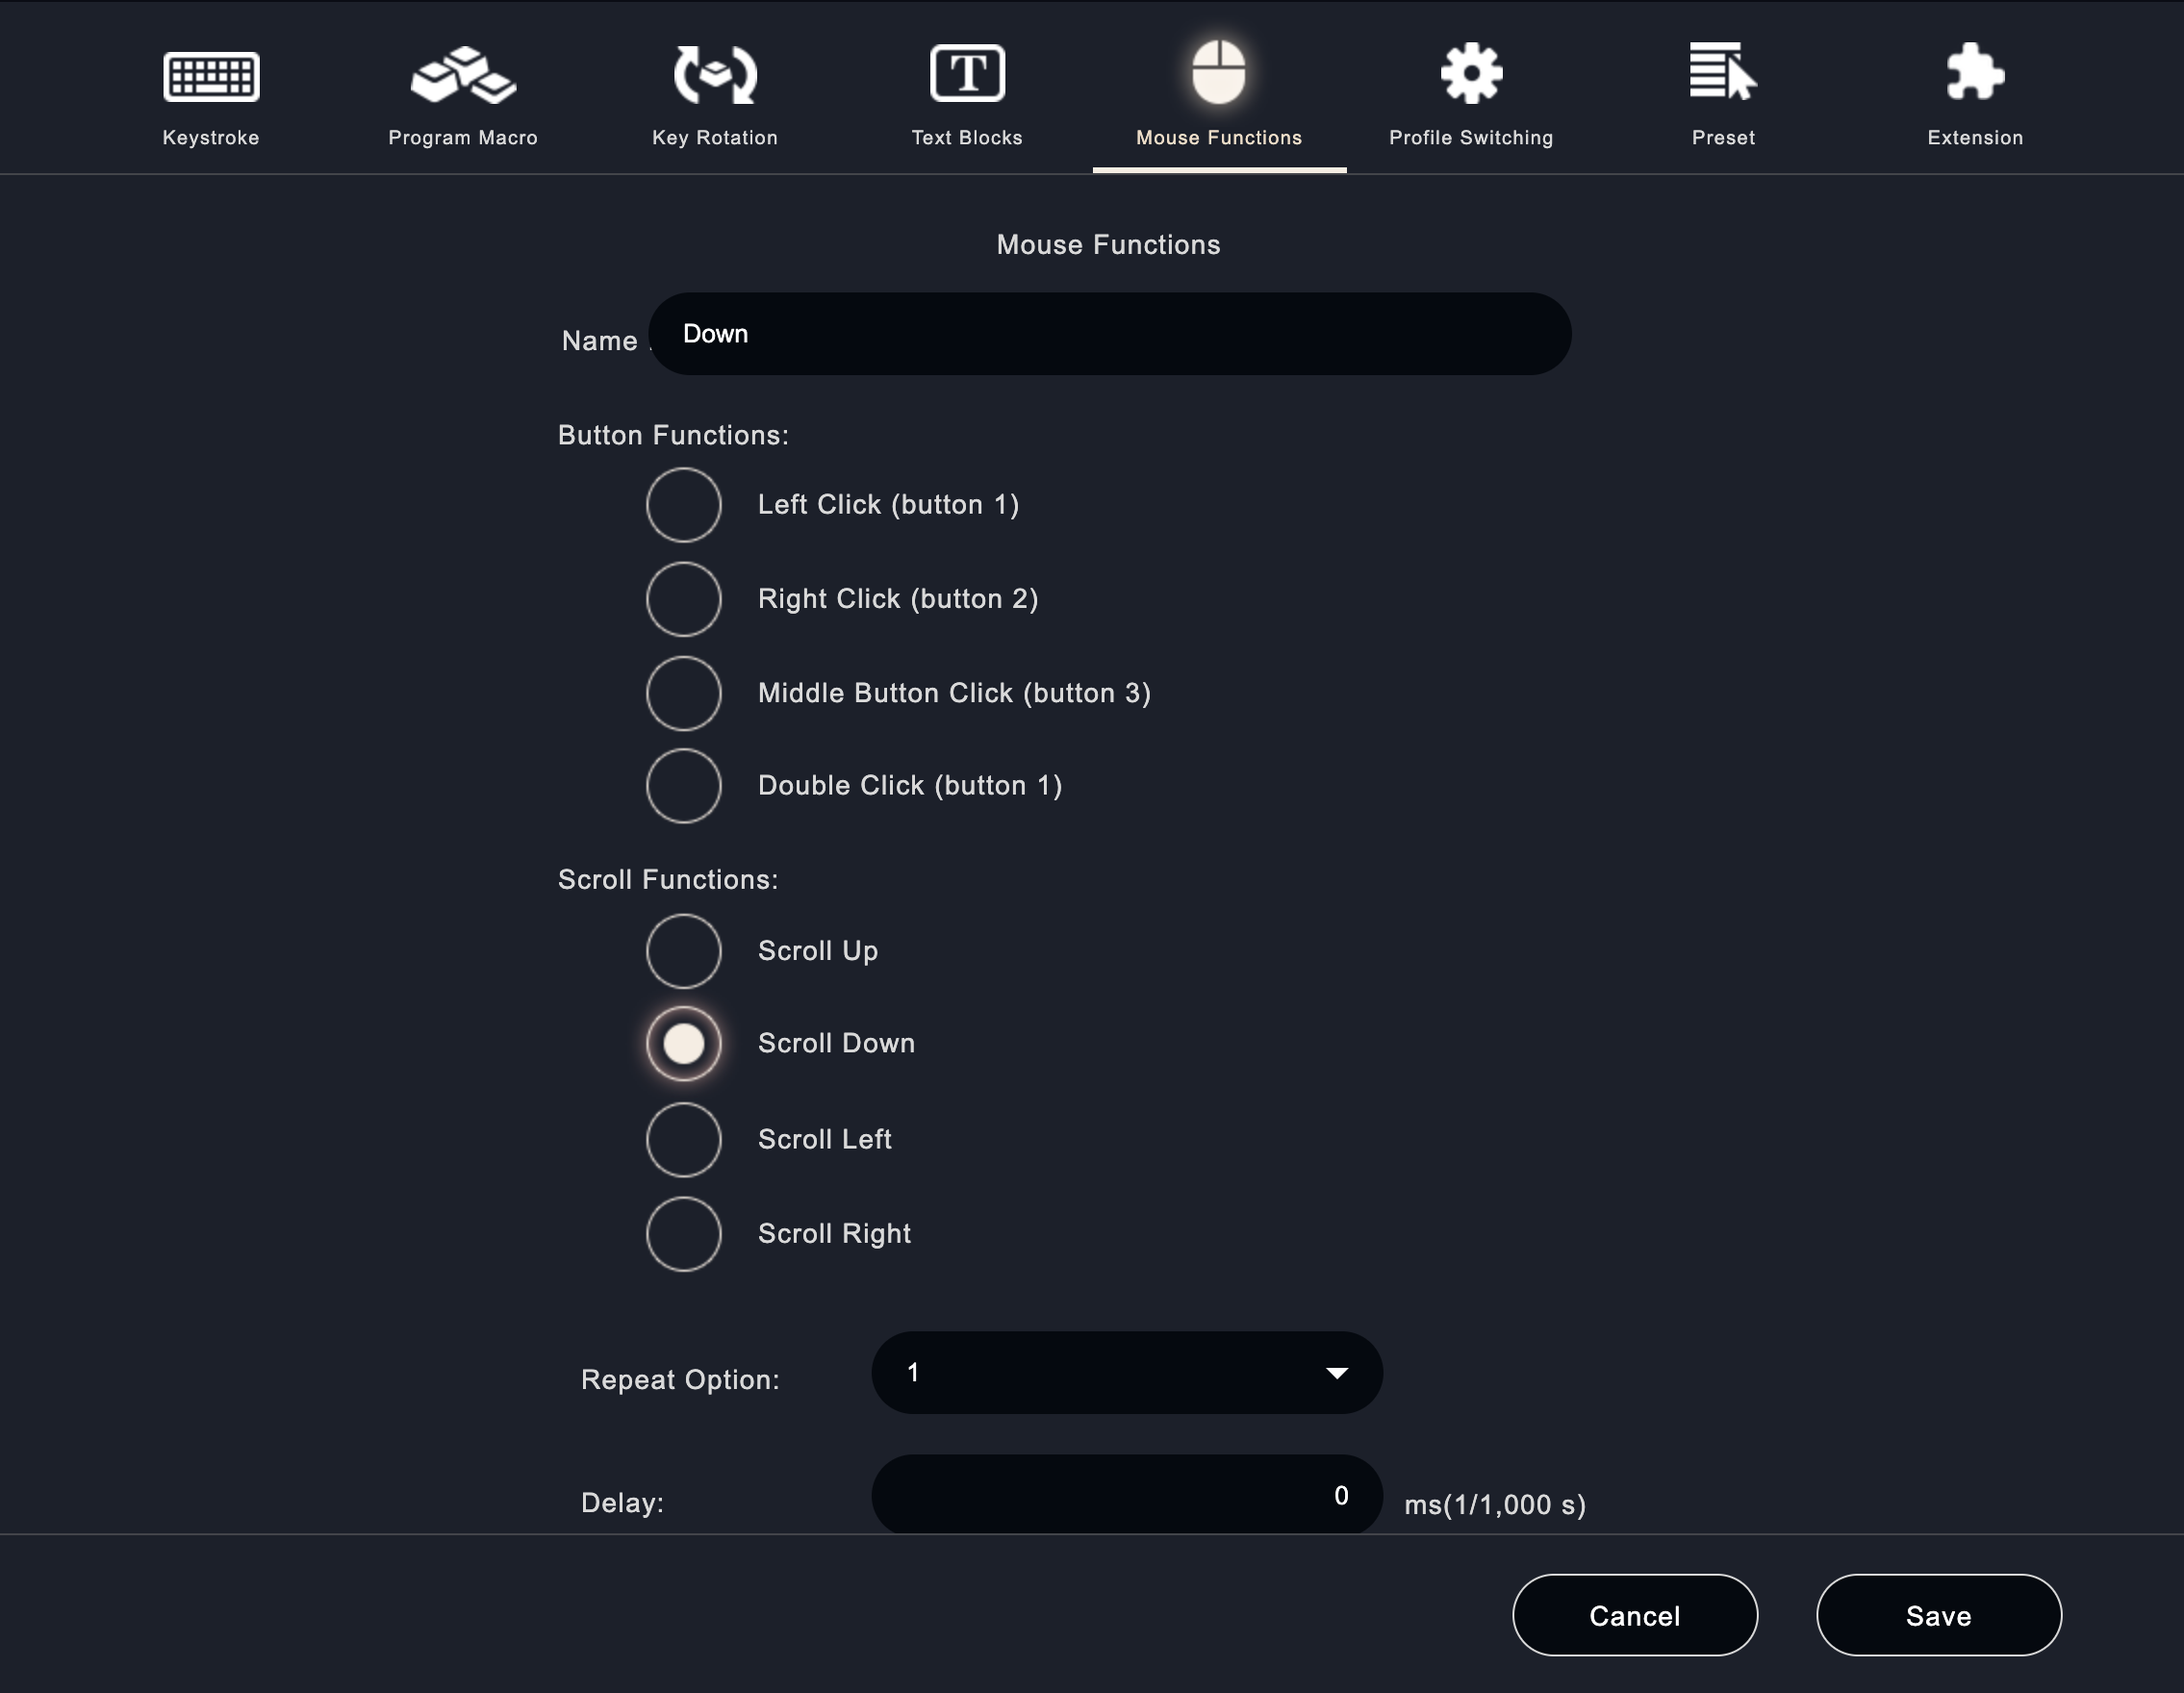
・Wheel (down/up)
You can assign the function using the scroll function in "Mouse Functions".
The wheel and zoom seem to be the same, but the zooming in and out rates are different.
Zoom has a high jump rate and changes the size all at once, while wheel changes the size little by little.
Also, the wheel is set up using the scroll function of the " Mouse Functions" so it can be used for numerical input, but not for zooming. You can use the wheel for numerical input, but not for zooming, based on these characteristics.
▼ Assign scroll up and down using the scroll function of the " Mouse Functions".